Introduction:
A “loading” window within your project can be useful for many reasons. It’s especially handy when paired with an HMI to remote device communication delay. Follow the steps below to configure an HMI to remote device communication delay and create a “loading” window that displays during the communication delay.
Software Version:
EasyBuilder Pro 6.04.02.349+
Instructions:
Configure the HMI to remote device communication delay:
-
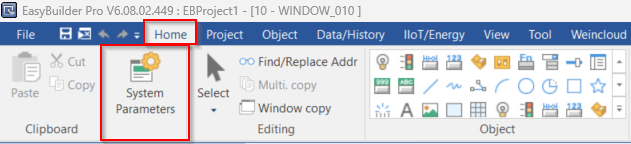
In EasyBuilder Pro, within the “Home” tab, Select “System Parameters”:
-
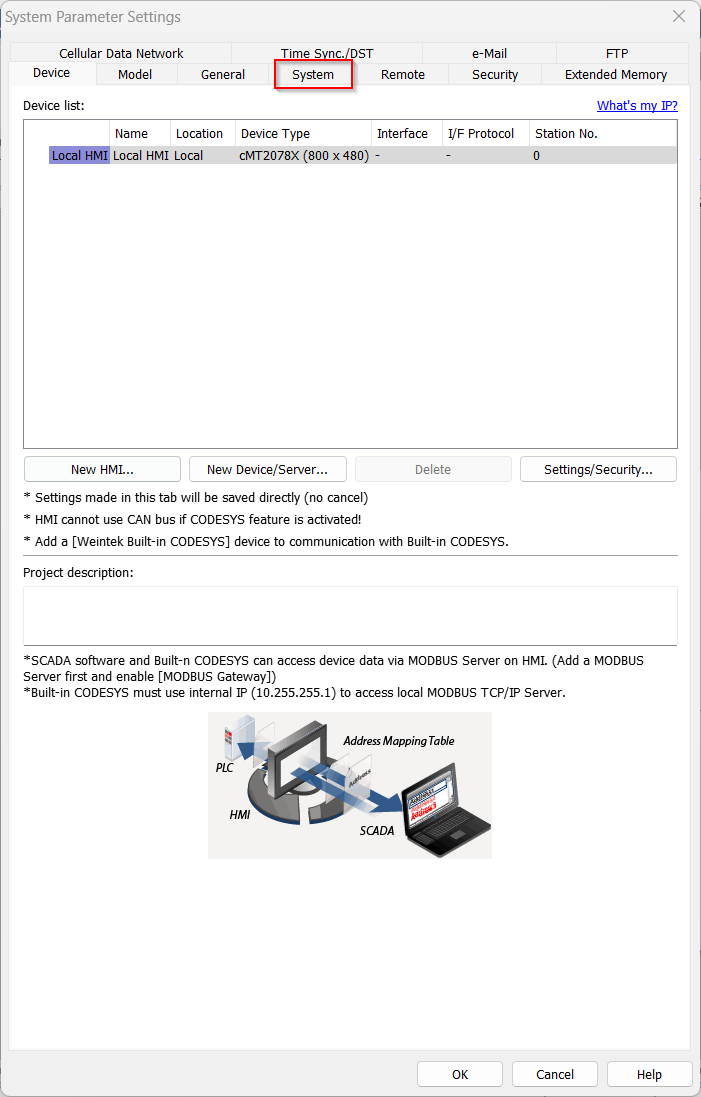
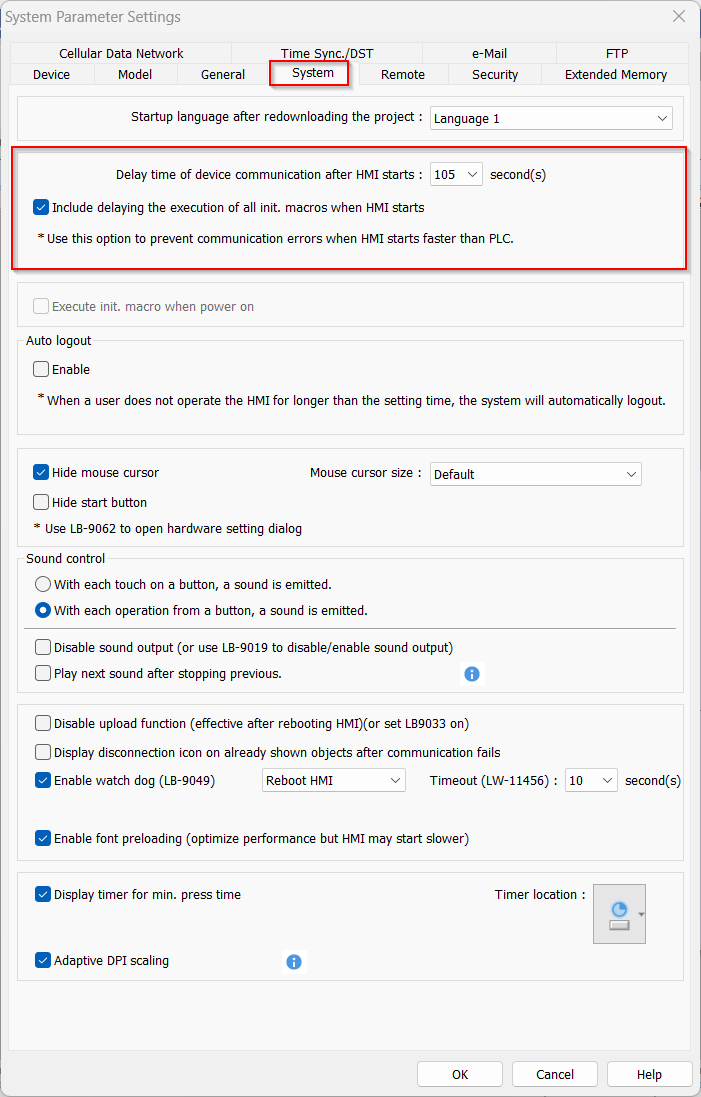
In the “System Parameter Settings” pop-up, select the “System” tab:
-
Within the “System” tab, configure the desired time in the “Delay time of device communication after HMI starts” drop-down list and enable the “Include delaying the execution of all init. Macros when HMI starts” option:
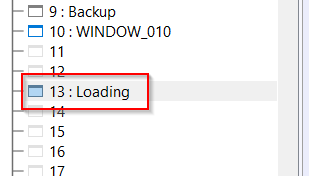
Create a “loading” window that displays during the communication delay:
-
Create a “loading” window to display while the boot sequence initiates:
-
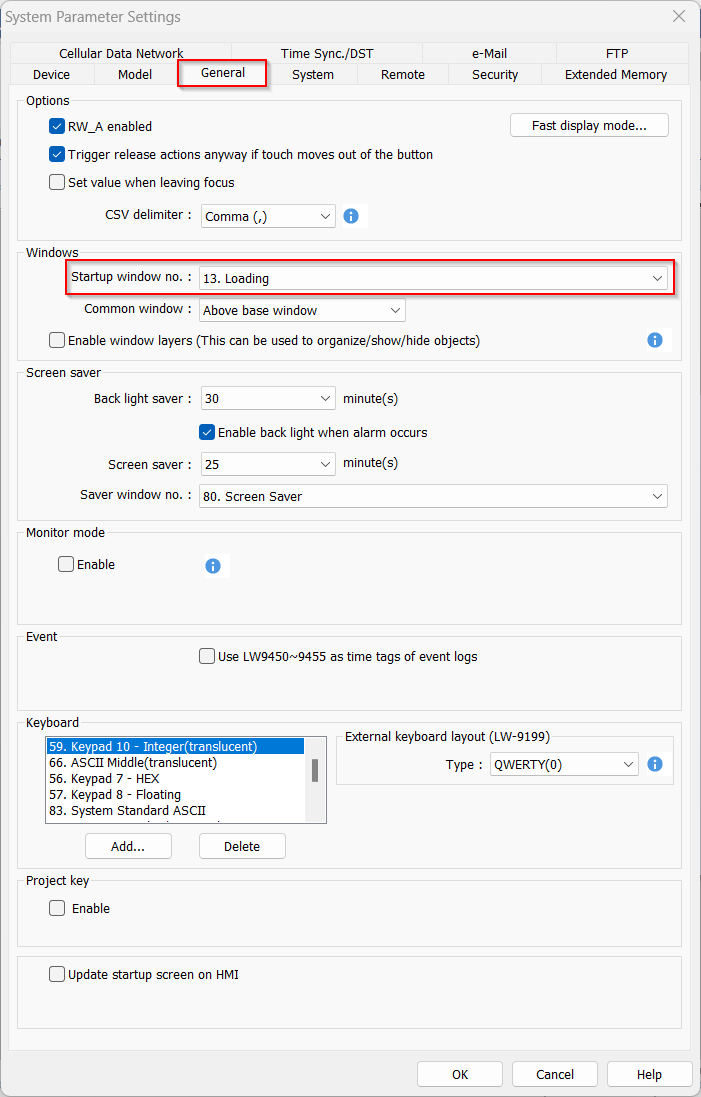
Within the “General” tab of the “System Parameters” ensure the “Startup window” is set to display the loading window:
-
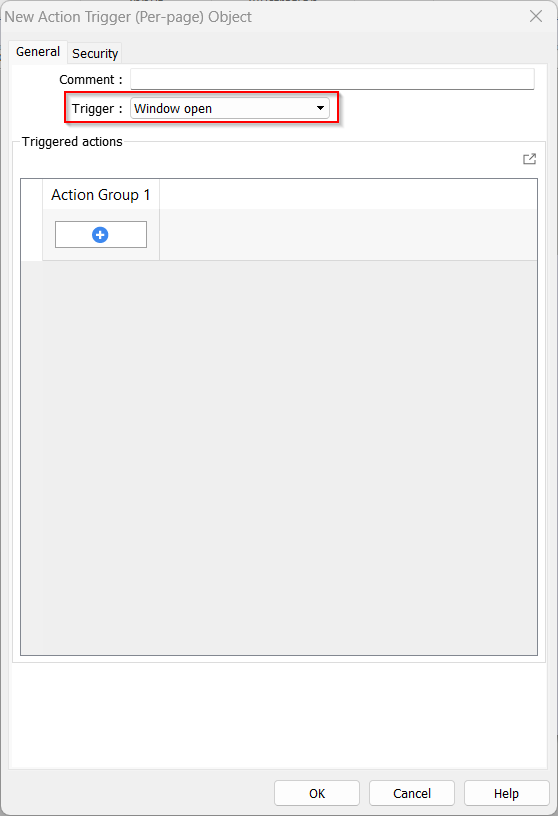
Navigate to the “Loading” window. Then, within the “Object” tab, select “Action Trigger (Per-page)" in the “Action-related” drop-down list:
-
Leave the “Trigger” type to “Window open”:
-
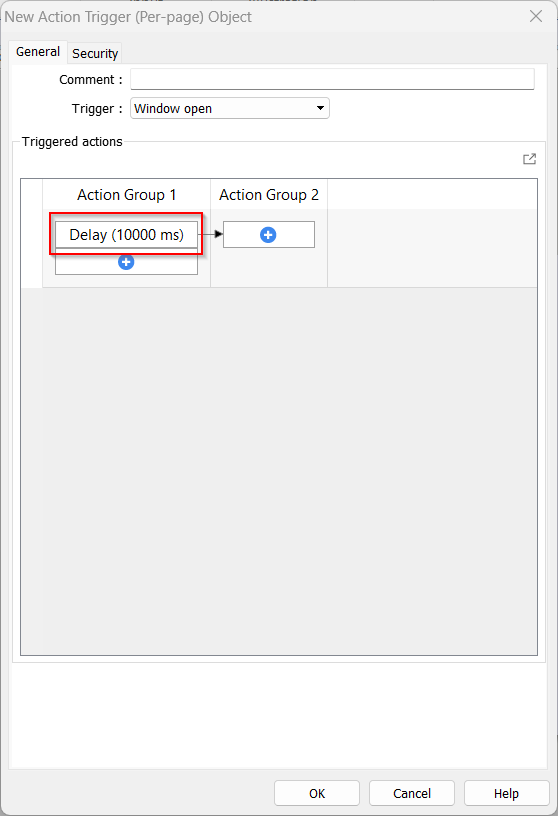
Add a delay (I’ve added a delay of 10,000 ms for this example) within “Action Group 1” and configure any additional delays within subsequent action groups:
-
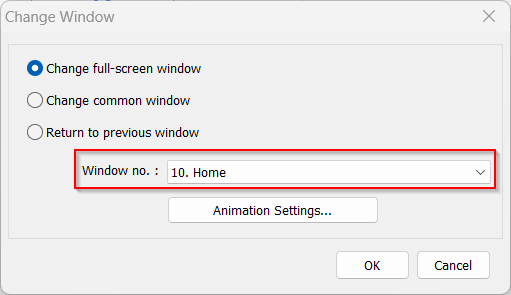
After implementing each “Delay”, add and configure a “Change Window” event that will redirect the user to the desired window:
Note: Ensure “Change full-screen window” is selected.
-
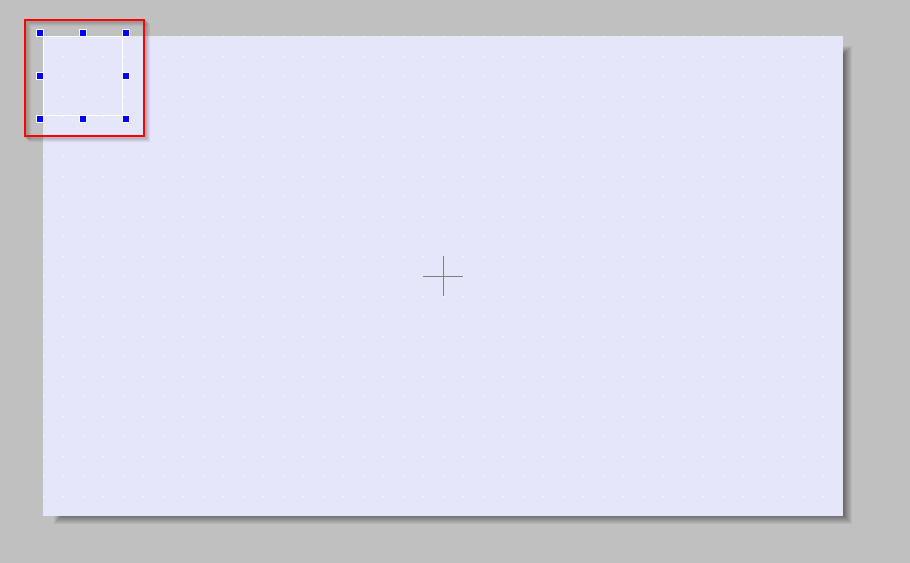
When finished, click “Ok” and place the “Action Trigger” object anywhere in the work area: