Introduction
EasySystemSetting is an easy way to create settings configurations for your HMIs that can be copied across numerous devices and save time with changing settings in your production environment.
How to navigate to EasySystemSetting:
Once you have your project open, navigate to the top navigation bar on the main screen. Hover over and select the “tool” section.

Now you will see a list of the available tools at your disposal, the one that we are looking for is titled “[System Setting] Editor”. Select this navigation option and wait for the additional window to open.

Now that the window is open, you’ll see multiple sections to look through, here are some of the important areas:
→ Model Dropdown: This section allows for users to select and fine-tune the model of HMI that they would like to edit the settings of. Before creating a settings template, make sure you have the right model selected.

→ Password and Selection Tab: The main focus and navigational area of EasySystemSetting are the password and checkbox selection area. Users can check or uncheck the areas that they want included in their settings configuration. Additionally, clicking on each tab will change focus of the right side of the window to allow users to fine-tune the values for each area. To change the IP
Note: Based on recent updates to the security in the HMI configuration, the system will request users to input a stronger password than the previous default of “111111”. Because of this it is crucial that the “Current Local Password” section matches the stronger password that is currently set/will be set. This can be changed afterwards, even back to the default password, but it is not recommended.

To change the IP settings of your configuration, select the “Network LAN 1” option from the navigation menu on the left side of the screen.

→ Saving the Config: Once you’ve configured the desired settings, save the configuration file locally to your PC, make sure this is accessible because you will need to find this file in the next step.

→ Downloading to HMI with Settings Applied: Navigate back to the project screen of EasyBuilder Pro and select “Download (PC → HMI)”. Once the pop-up window opens, you’ll see a checkbox located towards the bottom titled “Use system settings file”. This is where you will grab the EasySystemSetting file made in the previous step, and include that here.


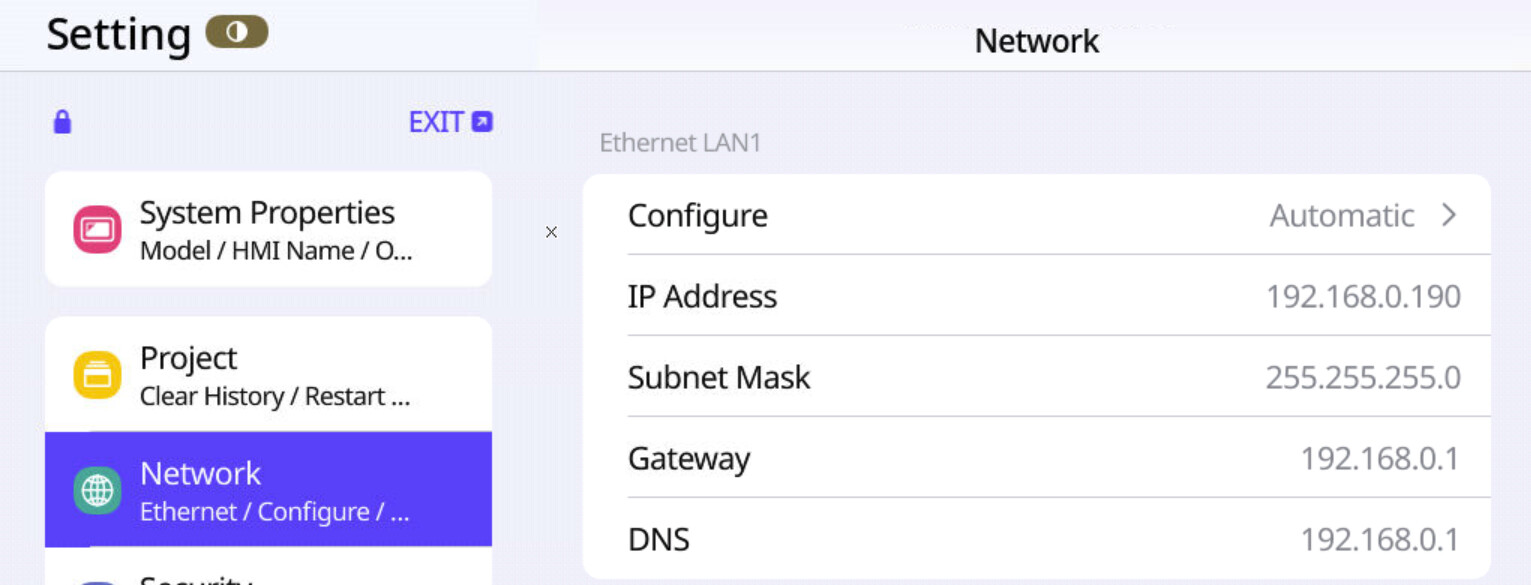
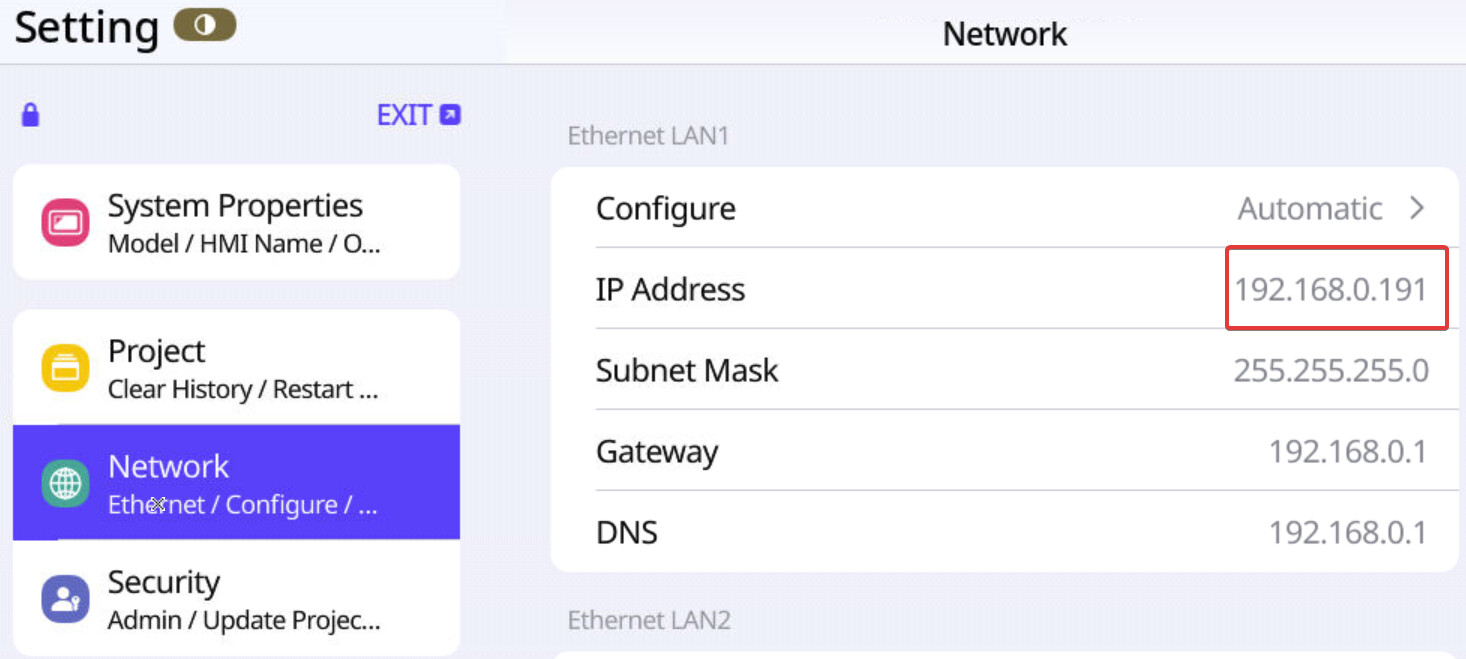
→ Verifying your Configuration: Assuming you’ve connected and downloaded your project to your HMI, navigate to the settings page on your HMI to validate that the configuration file you set has been successfully saved.
Before:

After:

With that step done, you now have successfully used EasySystemSetting to make edits to the settings of your HMI. Now if you need to load a large batch of HMIs with specific settings, you don’t even need to edit each one!