Introduction:
Within this post, we demonstrate how to export “tags” from the Codesys IDE and import them into EasyBuilder Pro. Since the HMI and Codesys are programmed using separate IDEs, you must generate and import a tag file to access Codesys variables within EasyBuilder Pro.
Software Version:
Codesys IDE 3.5.15.50
Codesys package
EasyBuilder Pro 6.03.02.463+
Instructions:
Codesys tag export:
-
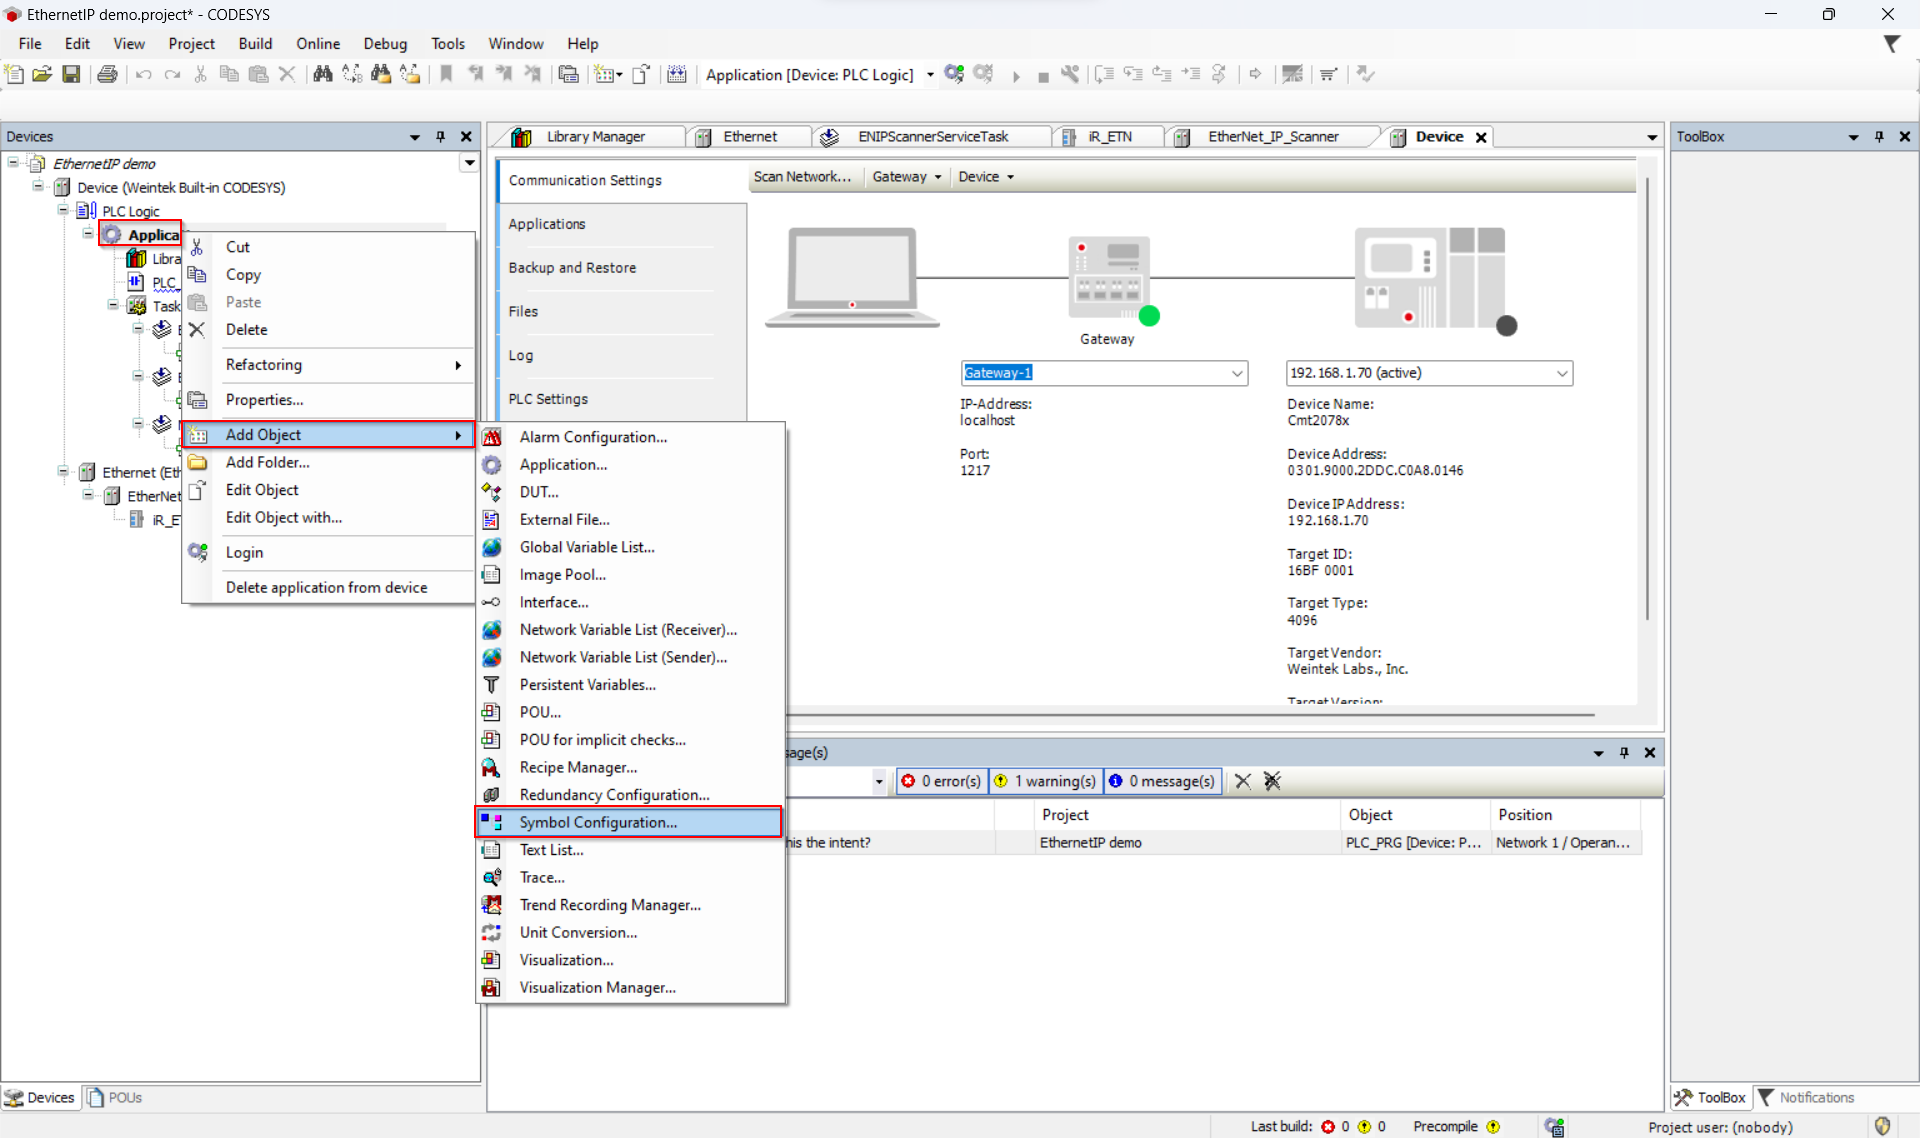
To generate a tag file, right-click on “Application” within your Codesys project and select “Symbol Configuration” in the “Add Object” drop-down list:
-
Select “Add” within the following pop-up:
-
When prompted, select “Build” to verify that the application is error-free:
-
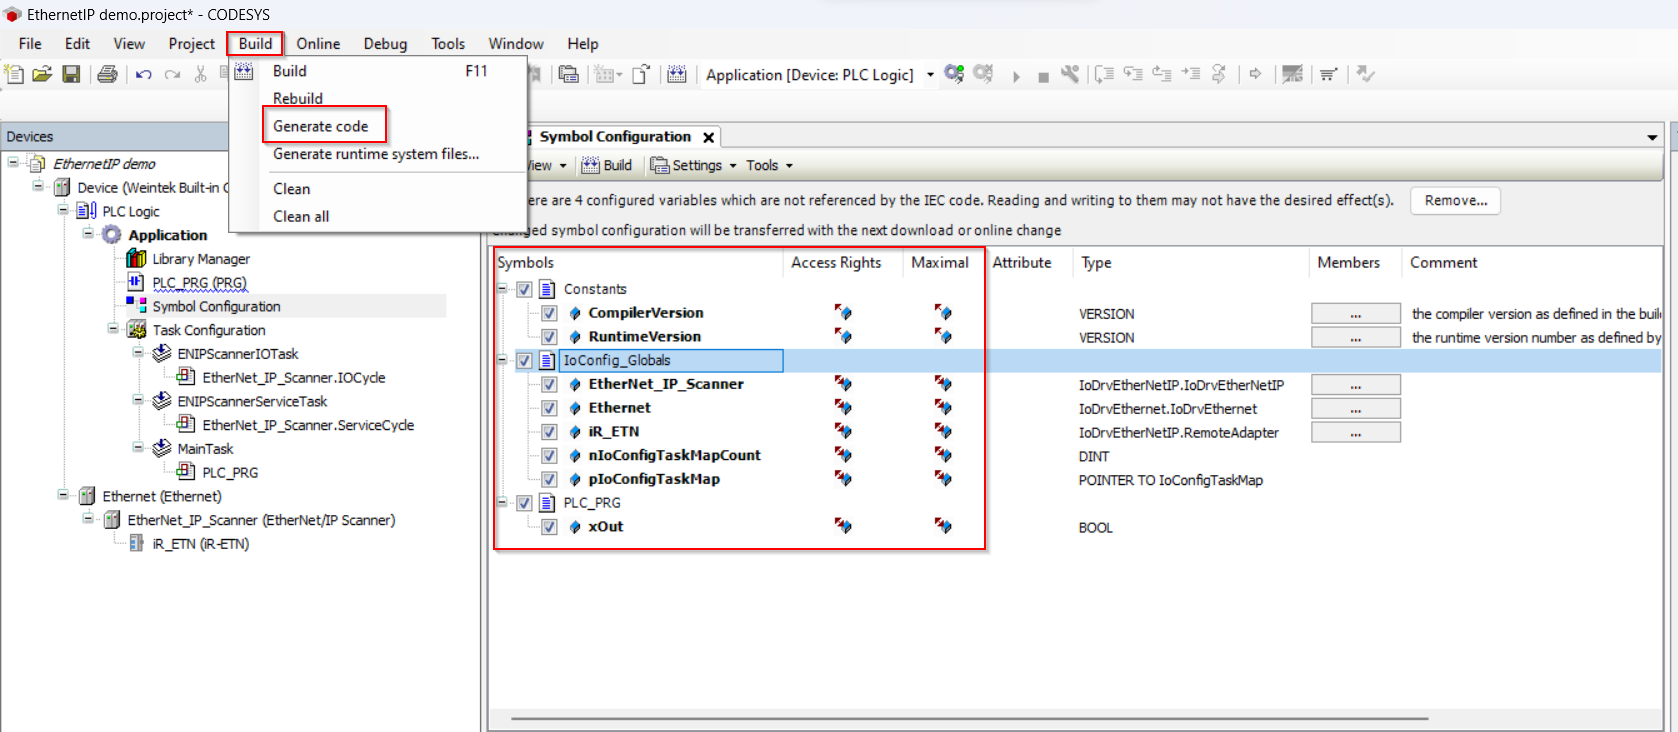
Within the “Symbol Configuration” tab, Select each “Symbol” you would like to export. When finished, select “Generate Code” within the “Build” menu of the IDE. This will generate an XML file in the same directory where your Codesys project is saved:
Note: To select a tag, ensure that the checkbox next to the variable name is checked.
-
Before you save and exit the application, please click the “Login” button to download this project to the HMI:
-
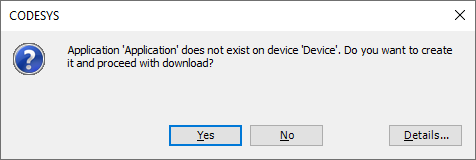
If prompted to “proceed with download” click “Yes”:
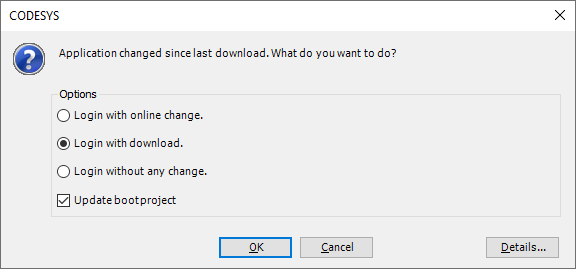
Note: Subsequent changes may display the following menu. If prompted, ensure that “Login with download” and “Update bootproject” are enabled.
-
Click the “Start” button to place the Codesys application in “RUN” mode:


EasyBuilder Pro tag import:
-
Within “System Parameter Settings,” select “New Device/Server”:
-
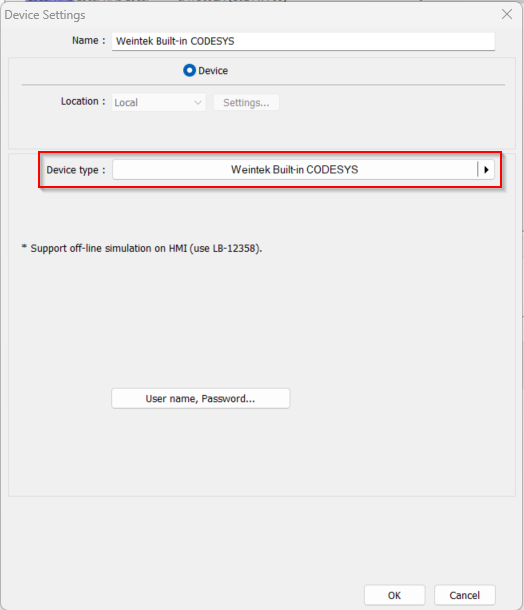
In the following window, select “Weintek Built-in CODESYS” from the “Device type” drop-down list:
-
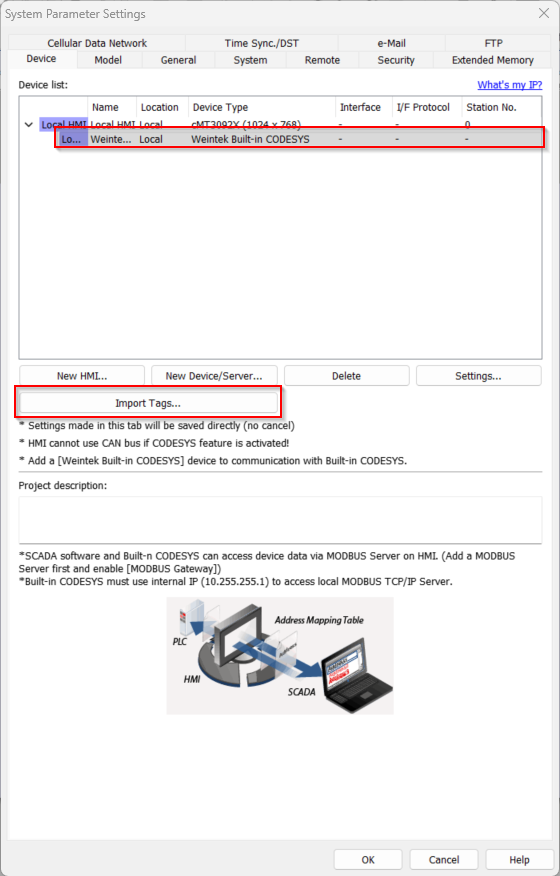
Select your newly added “Weintek Built-in CODESYS” device within “System Parameter Settings” and click the “Import Tags” button:
-
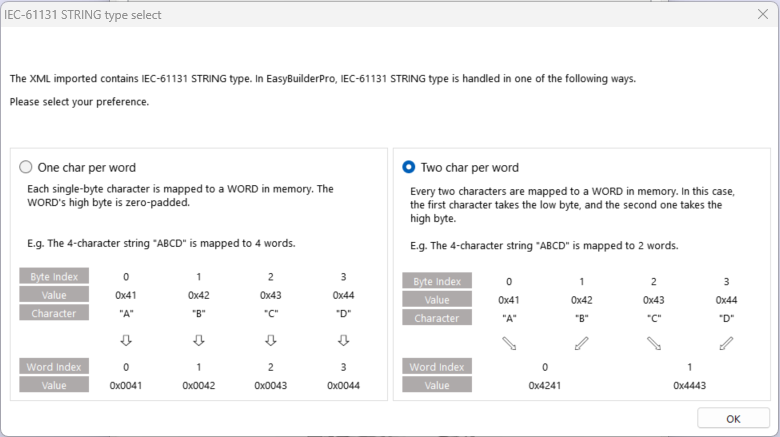
In the following pop-up, you must choose how you would like string data mapped to variables within your application. If you have not defined any string variables within your application, you may select either option to continue:
-
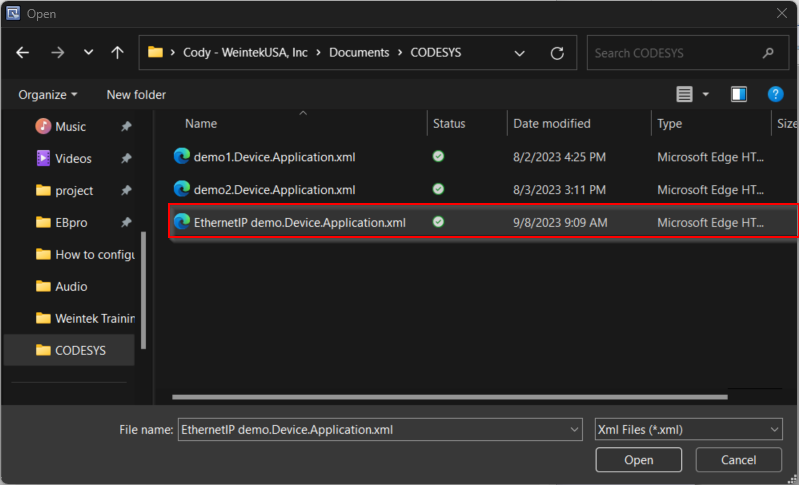
Navigate to the directory where your Codesys project is saved and select the XML tag file. This file will be named after your project, but will include “.Device.Application”:
-
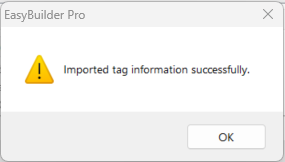
After selecting your Codesys tag file, you should see the alert “Imported tag information successfully”:
-
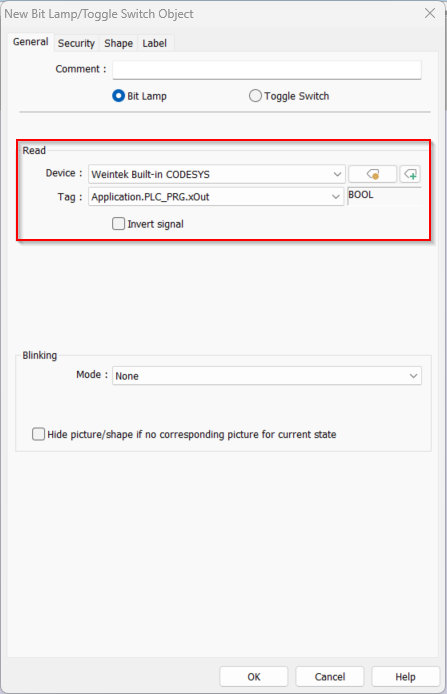
You will now be able to select your Codesys tags from the “Tag” drop-down list when configuring an object within EasyBuilder Pro:
Note: Your “Weintek Built-in Codesys” device must be selected from the “Device” drop-down list to select tags imported from Codesys.