Introduction:
This post will guide you through the steps of installing and configuring MySQL Server & Workbench on a local PC and establishing a database server connection with a Weintek HMI.
Software Version:
EasyBuilder Pro 6.03.02.393+
MySQL Server V8.0.x
Note: MySQL Server version 9.0 doesn’t have the option to use legacy authentication so it is not compatible with the EasyBuilder Pro runtime.
Related Tutorials:
How to search for or filter items within a recipe database
Video - SQL Sync, how to set up a Local SQL Database
Video - Sync Data to a central database with a SQL Query object
Video - SQL Query Object: Advanced Mode
Instructions:
Installing MySQL Workbench & Server
-
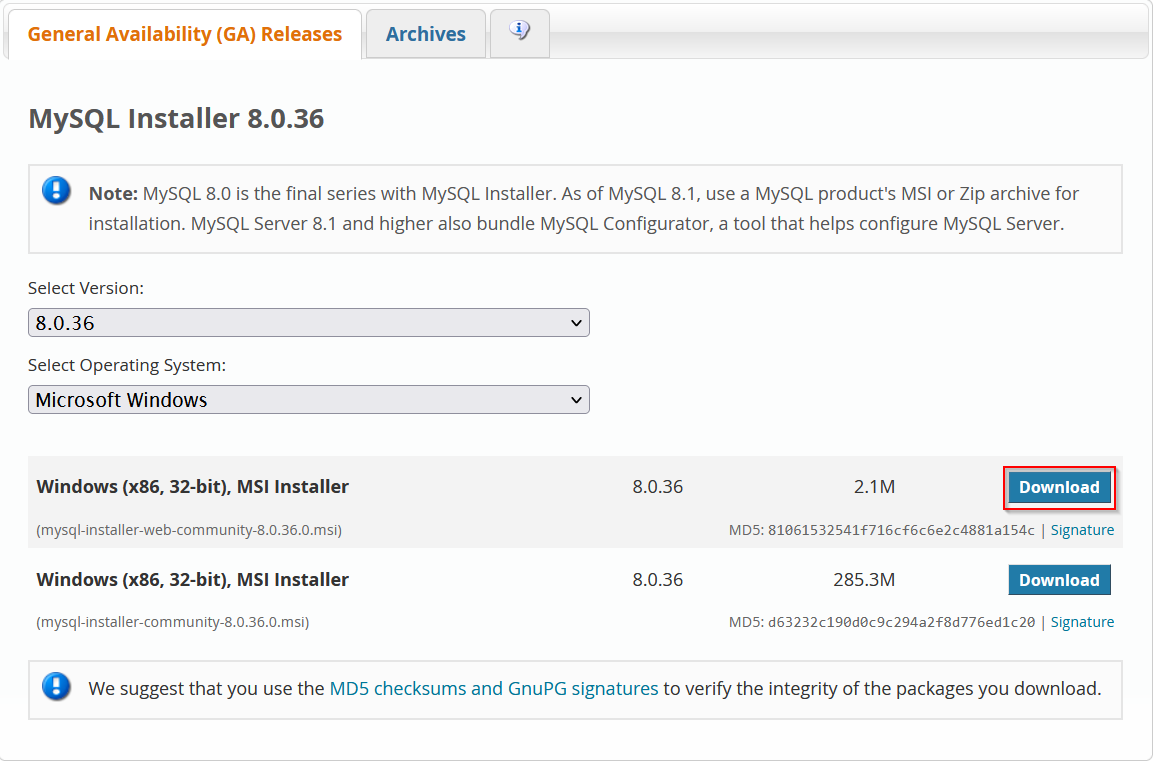
First, download the MySQL Installer here:
-
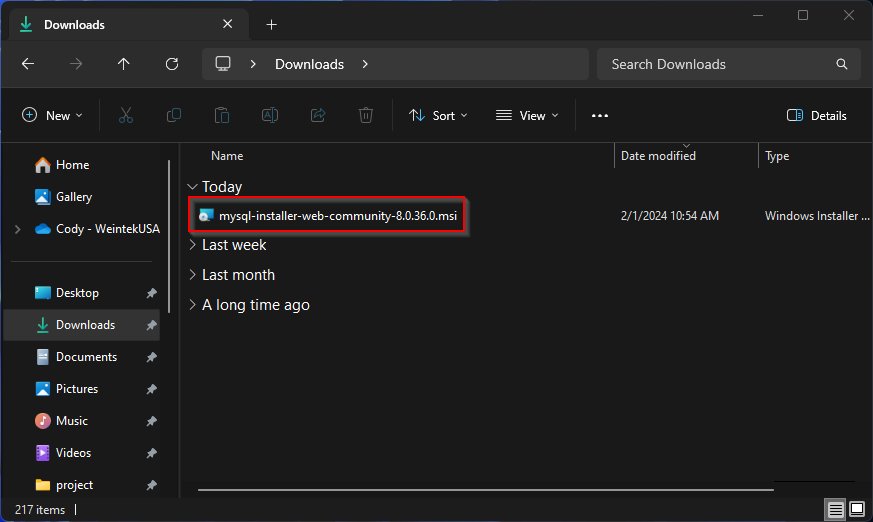
Navigate to the downloaded file and start the installation:
-
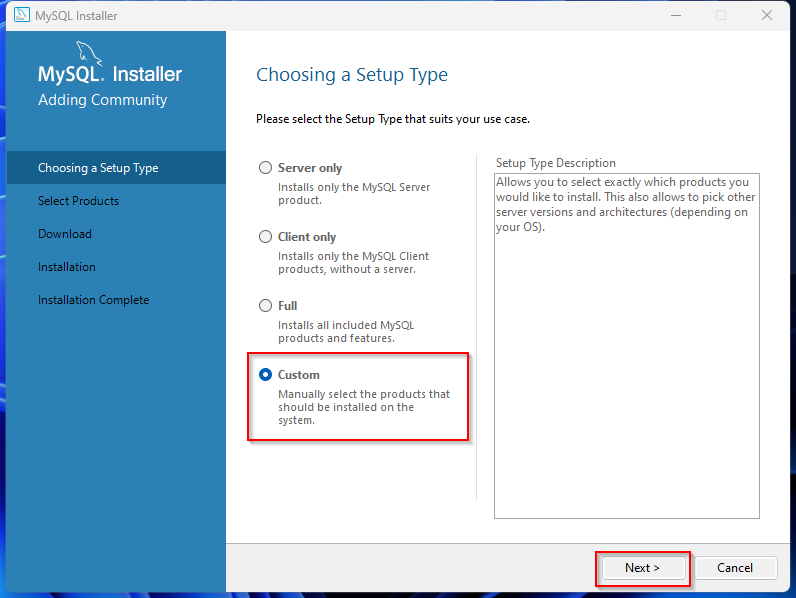
Choose the “Custom” setup type in the MySQL Installer and click “Next”':
-
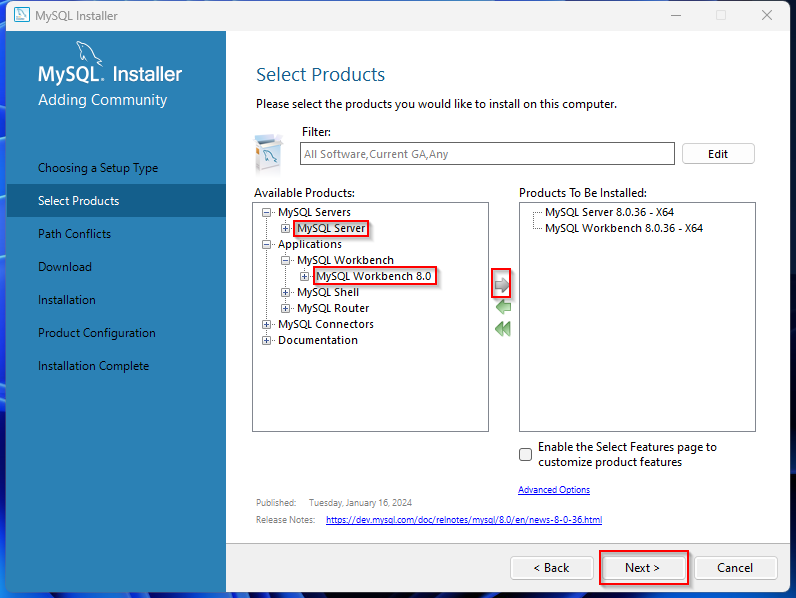
On the following window, select the latest versions of MySQL Server & MySQL Workbench and add them to the “Products To Be Installed” list. Select “Next” when finished:
-
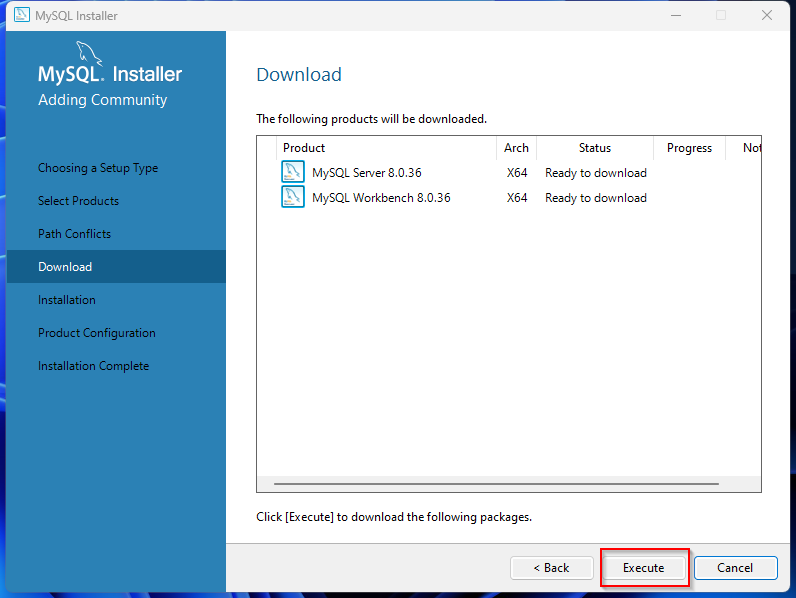
Select “Execute” to download MySQL Server and MySQL Workbench:
-
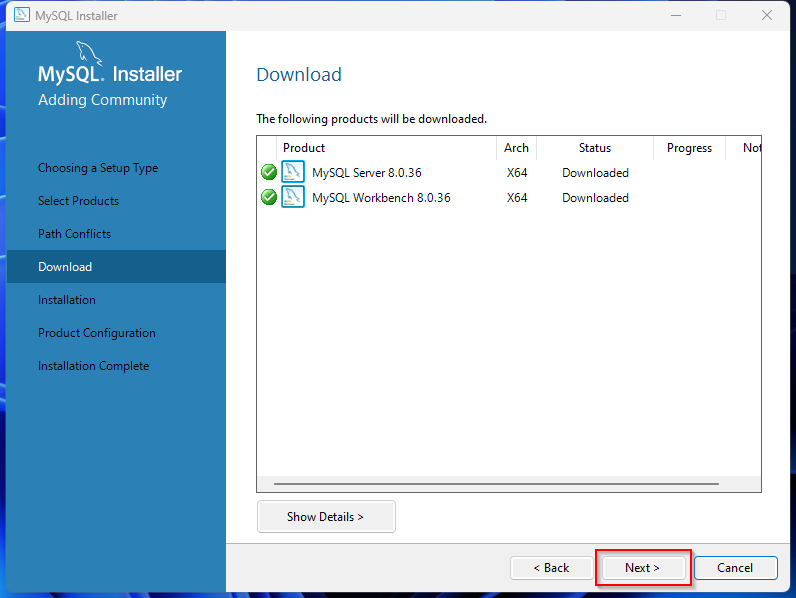
Select “Next” when the download is complete:
-
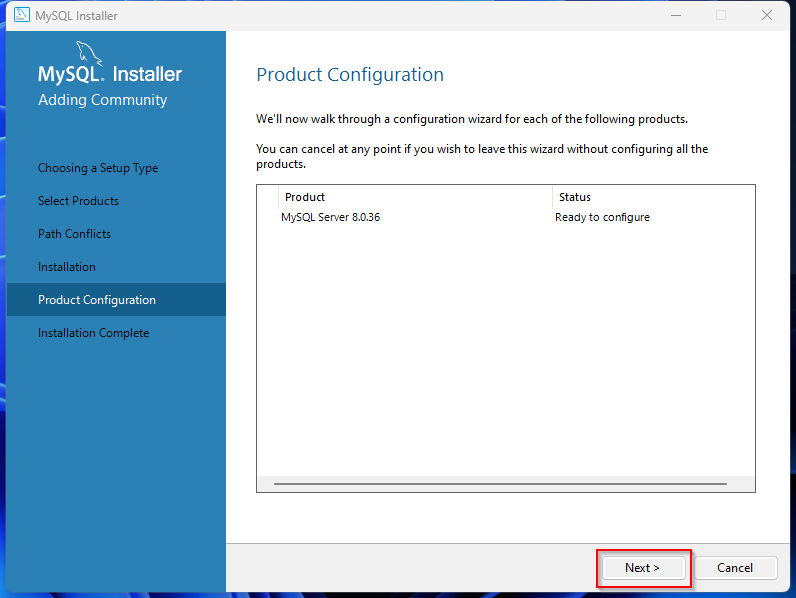
Select "Next’ to begin MySQL Server configuration:
-
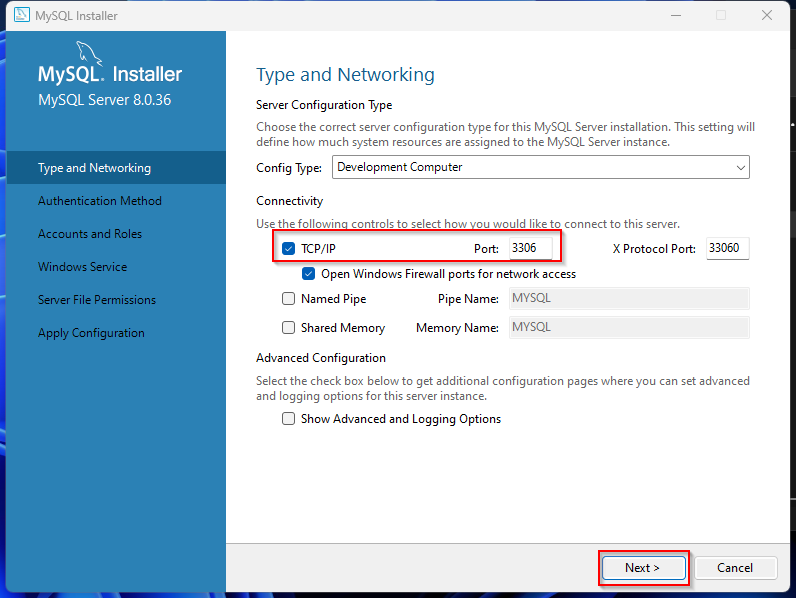
Ensure that “TCP/IP” is selected and the port number is “3306”. Click “Next” when finished:
-
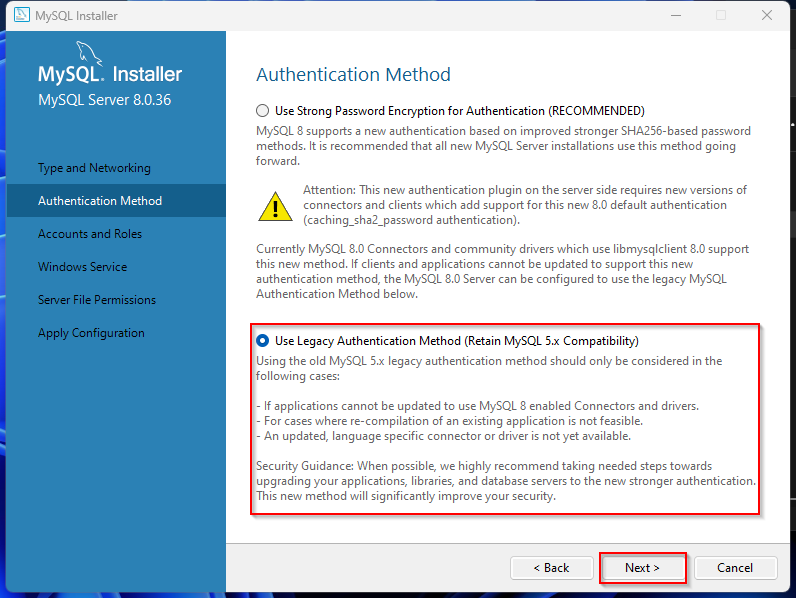
Choose the “Use Legacy Authentication Method (Retain MySQL 5.x Compatibility)” option and click “Next”:
-
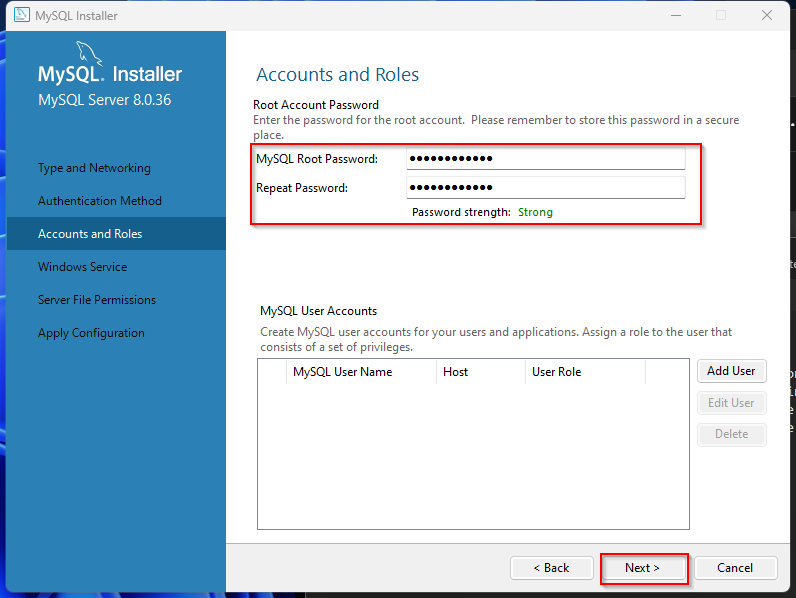
Enter a password for the MySQL Server root account and click “Next”:
-
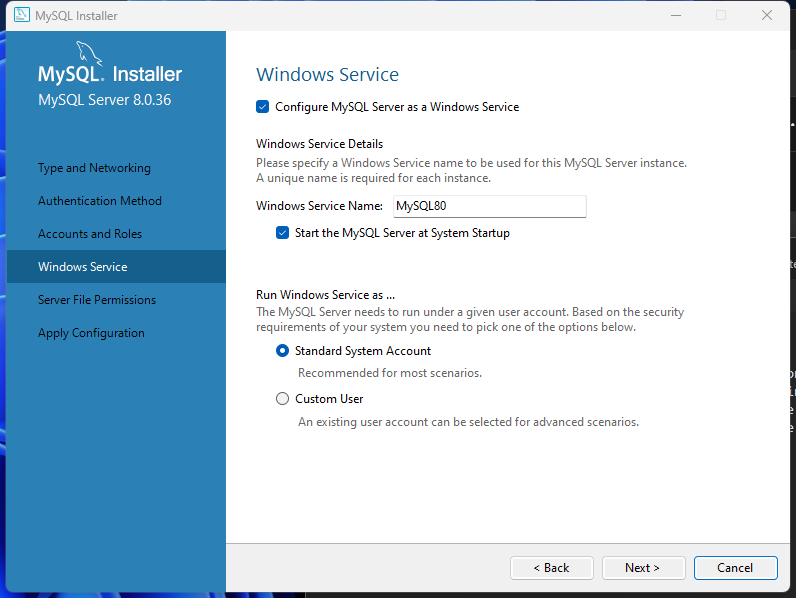
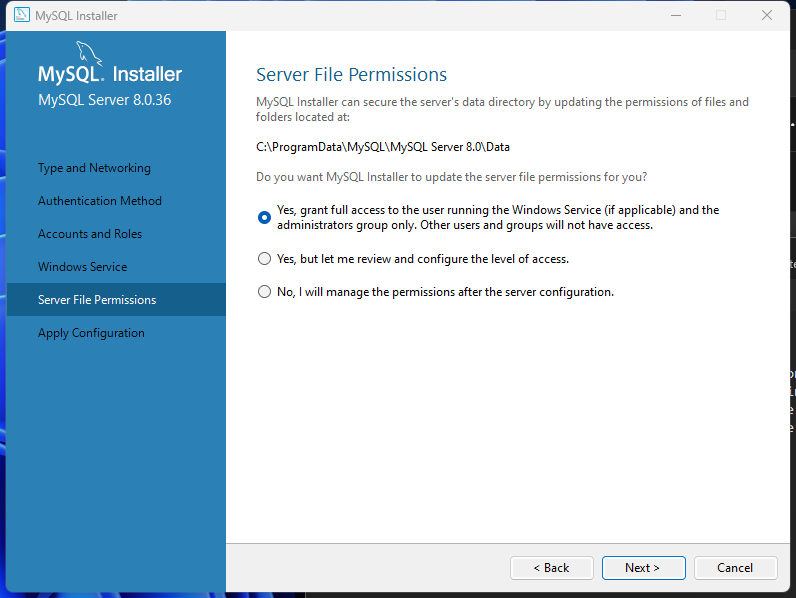
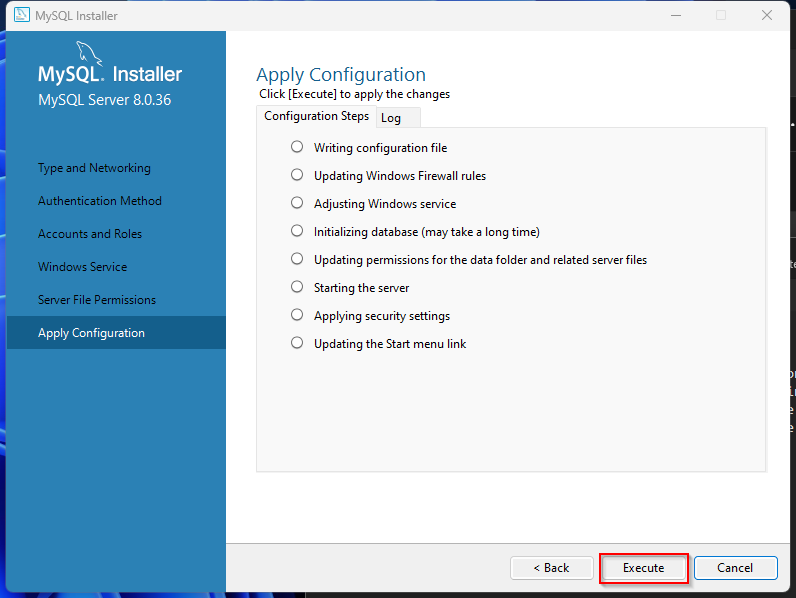
The settings in the following sections can remain default. Select “Execute” on the final page:
-
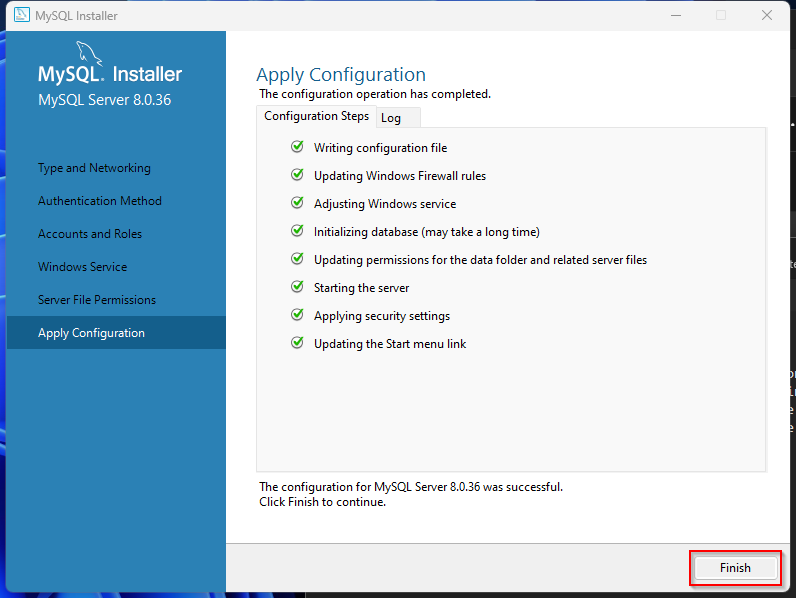
Select “Finish” when MySQL Server configuration is complete:
-
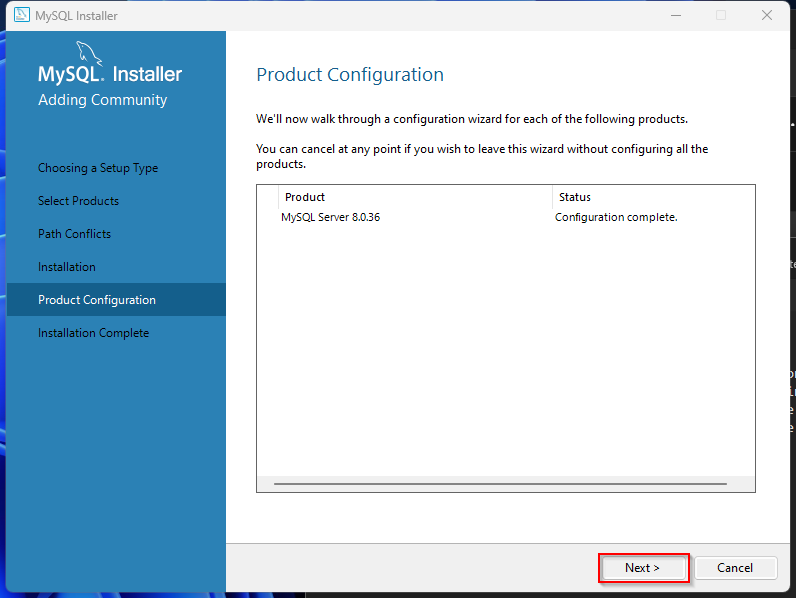
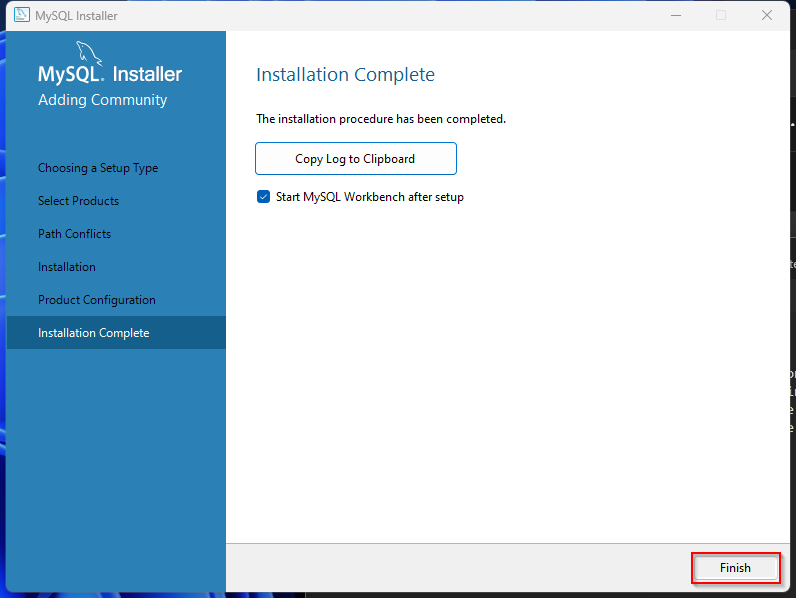
Select “Next” and “Finish” on the following windows:
Building a Database
After installing MySQL Server & Workbench, a Schema must be created for synchronizing HMI historical data.
-
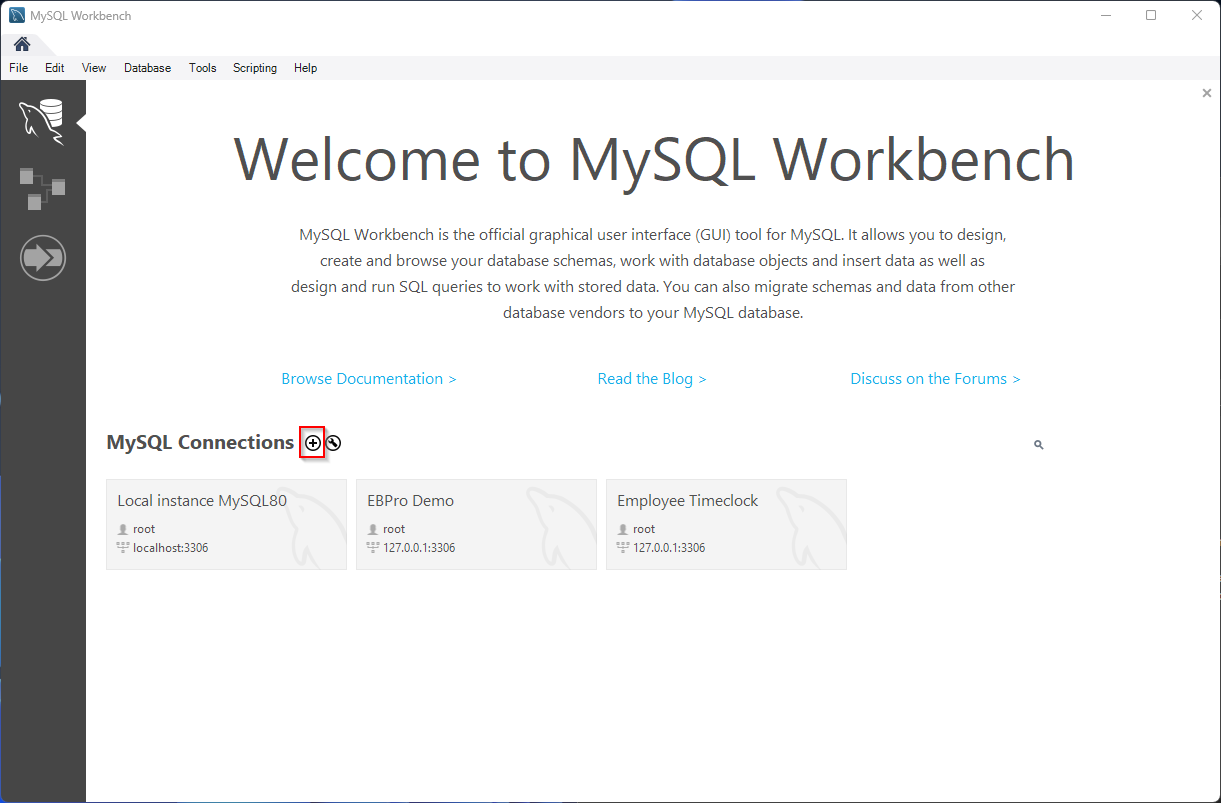
Launch MySQL Workbench and click the plus icon to build a connection with the Database Server:
-
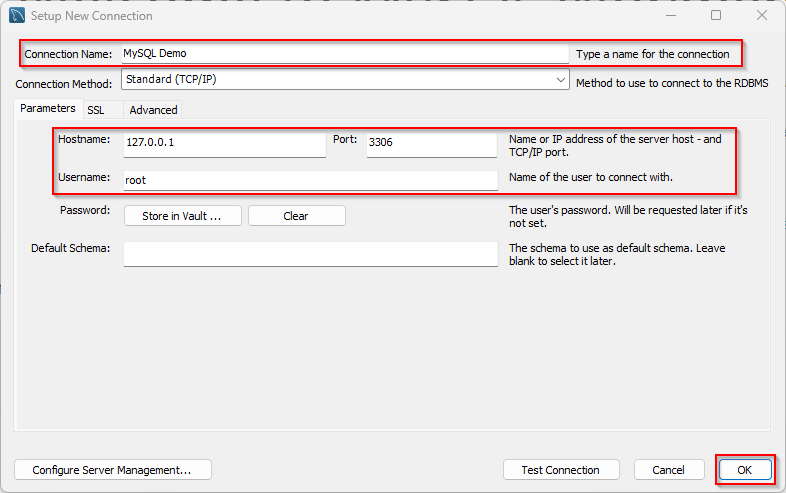
On the following window, enter a “Connection Name,” “Hostname,” “Port” (3306), and “Username.” Click “OK” when finished:
Note: For the “Hostname,” I’m using the loopback address of my PC, as this database server will be hosted locally. A loopback address will allow a device to send and receive its own data packets.
-
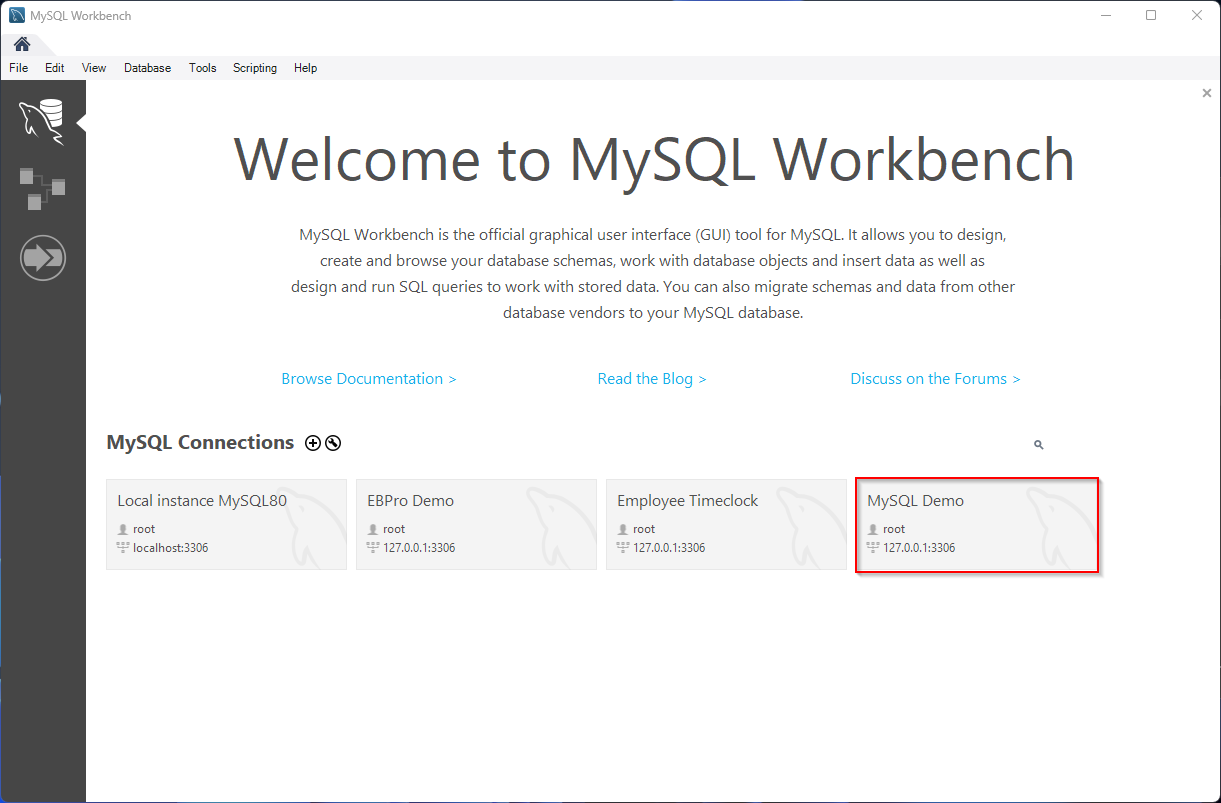
When finished, the new server can be found within your “MySQL Connections.” Click the new server and enter your password:
-
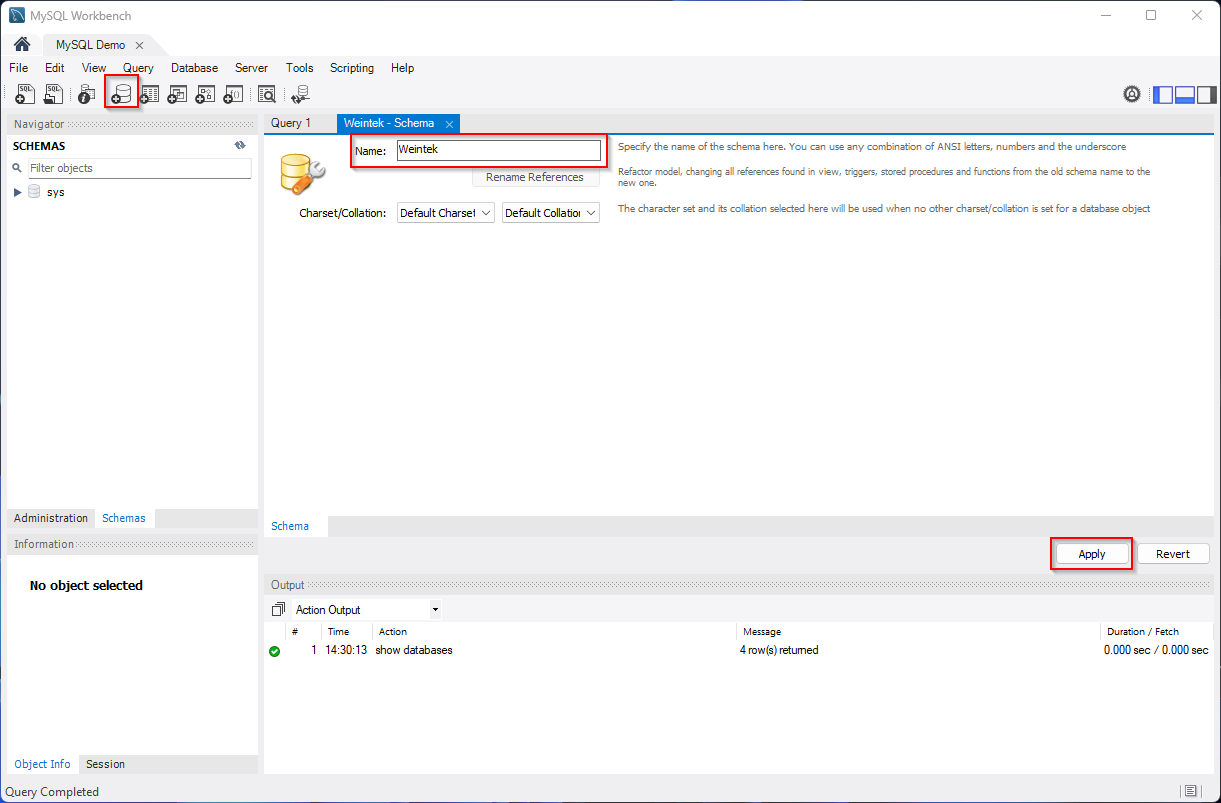
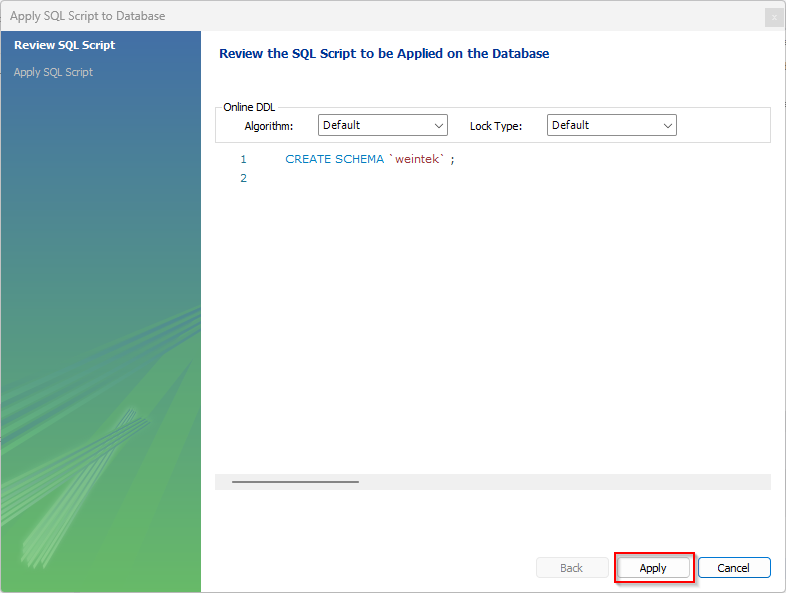
Select the “Create a new schema” icon and enter a name for the schema. Click “Apply” when finished:
-
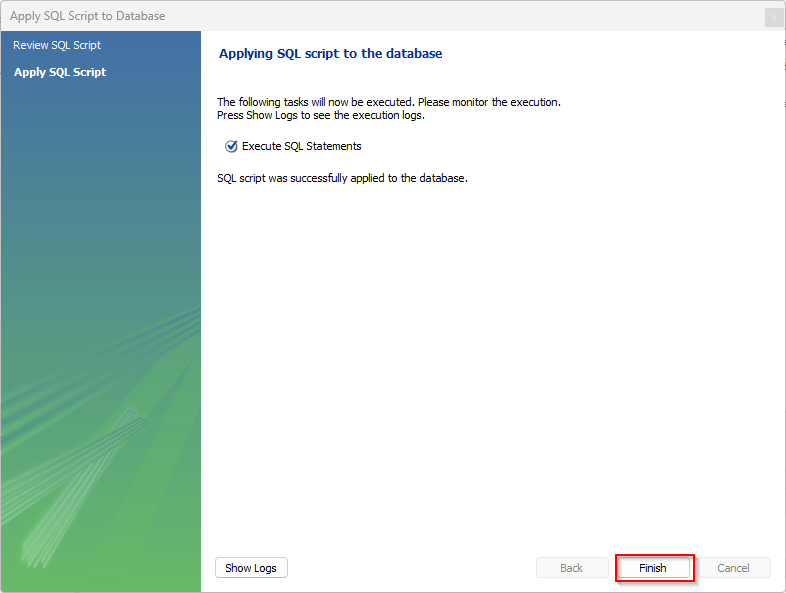
Click “Apply” and “Finish” on the following windows:
-
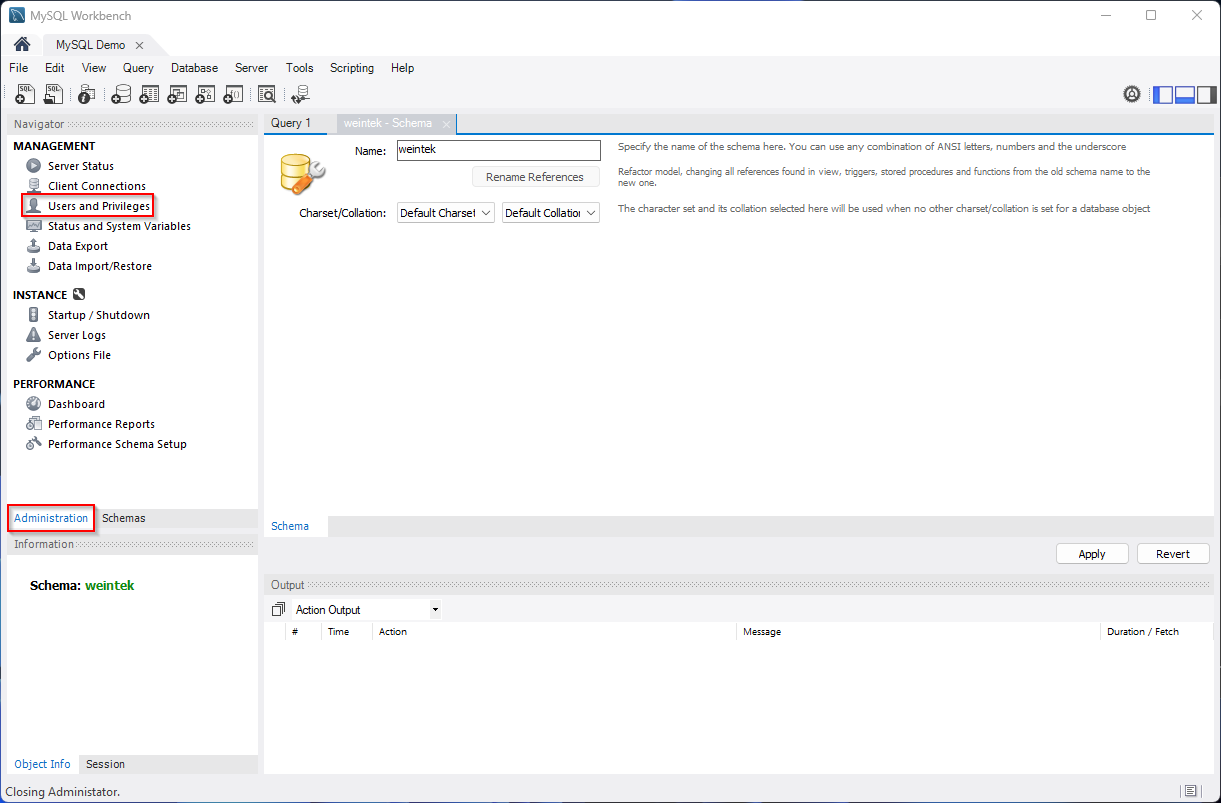
In the “Administration” tab of the “Navigator,” select “Users and Privileges”:
-
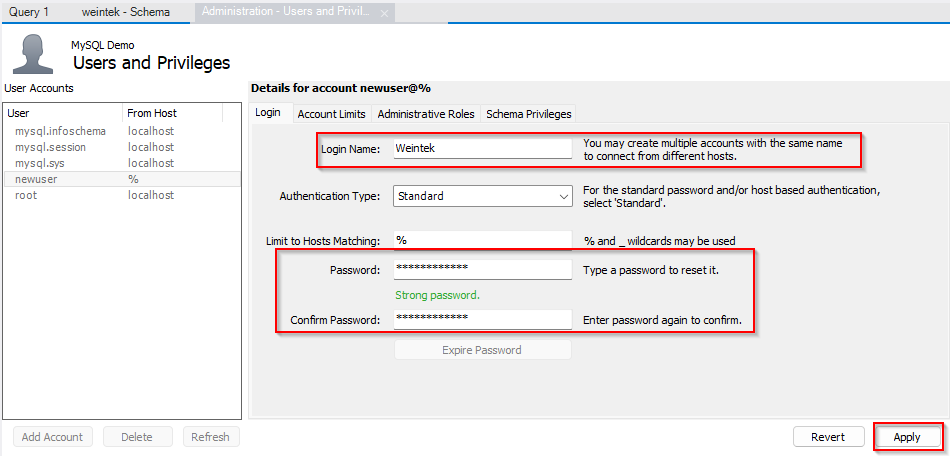
Select “Add Account” and enter user credentials in the “Login” tab. Click “Apply” when finished:
-
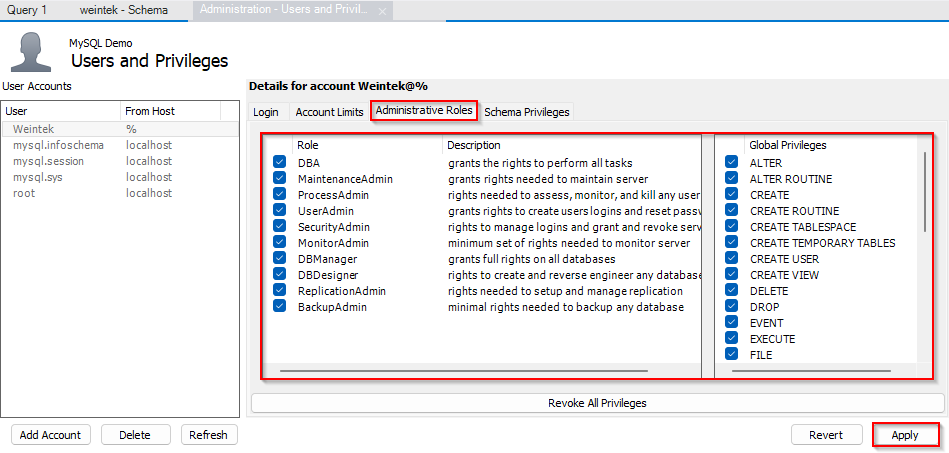
Select all of the “Roles” and “Global Privileges” within the “Administrative Roles” tab. Select “Apply” when finished:
-
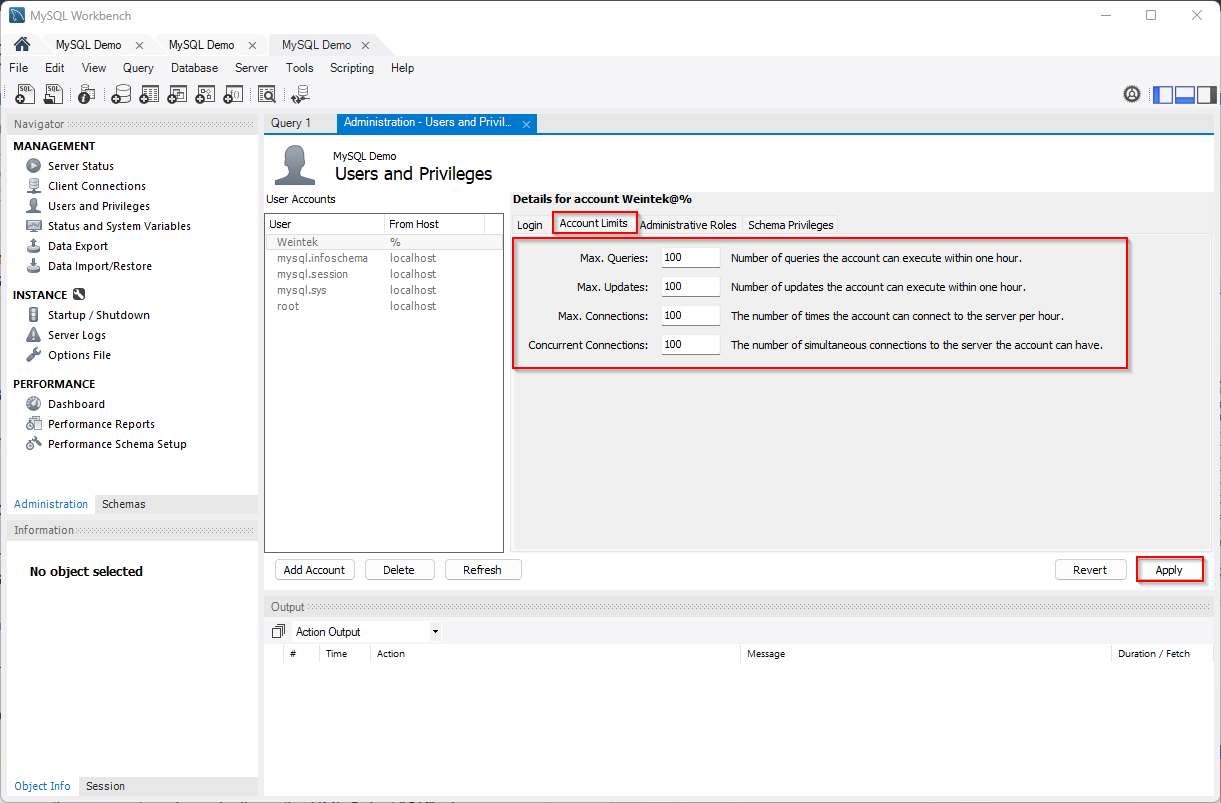
In the “Account Limits” Section, you may also configure maximum queries, updates, connections, and concurrent connections per user. Select “Apply” when finished:

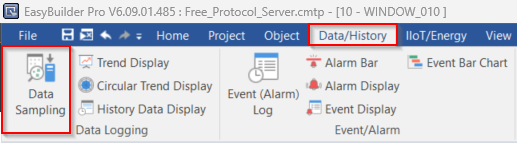
EasyBuilder Pro Project Configuration
-
Within the “Data/History” tab, select “Database Server”:
-
Select “New” to configure a new Database Server:
-
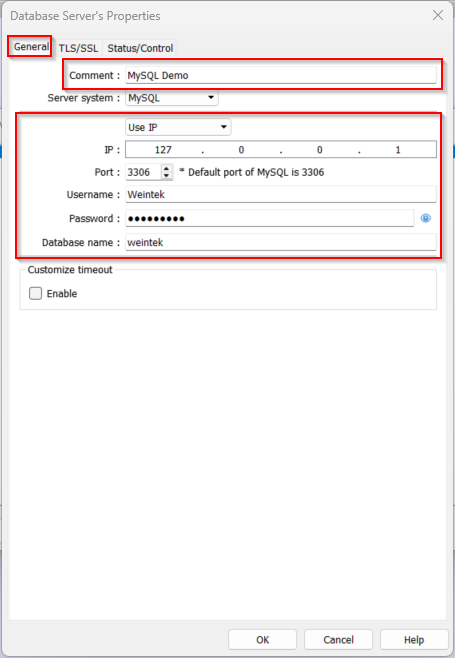
In the “General” tab, enter the database server parameters configured earlier when we set up MySQL Server. Text entered in the “Comment” field will essentially name the server within your EasyBuilder Pro project and can make it easier to choose this server from a list within other objects that sync (i.e. the “Data Sampling” or “Event (Alarm) Log” object):
Note: Enter the schema name within the “Database name” field.
Note: the PC’s loopback address (127.0.0.1) may be used in the “Database Server” section of the project during simulation, while the PC’s IP address must be specified before project download.
-
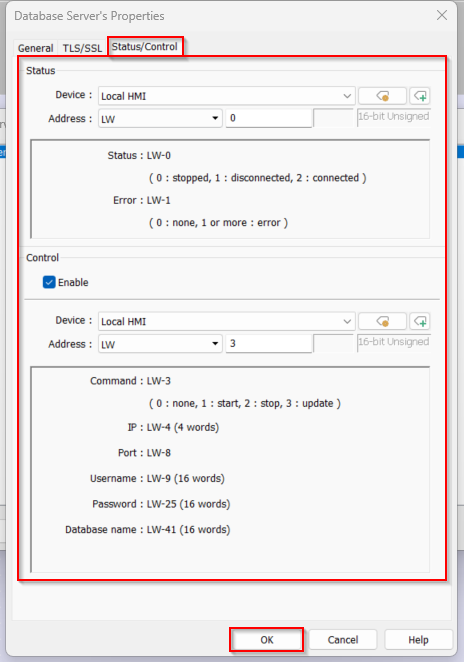
In the “Status/Control” tab, choose an address for the “Status” register and enable the “Control” address. The status addresses display the connection status with the SQL server on the HMI, and the control addresses can change connection parameters dynamically on the HMI. Select “OK” when finished:
-
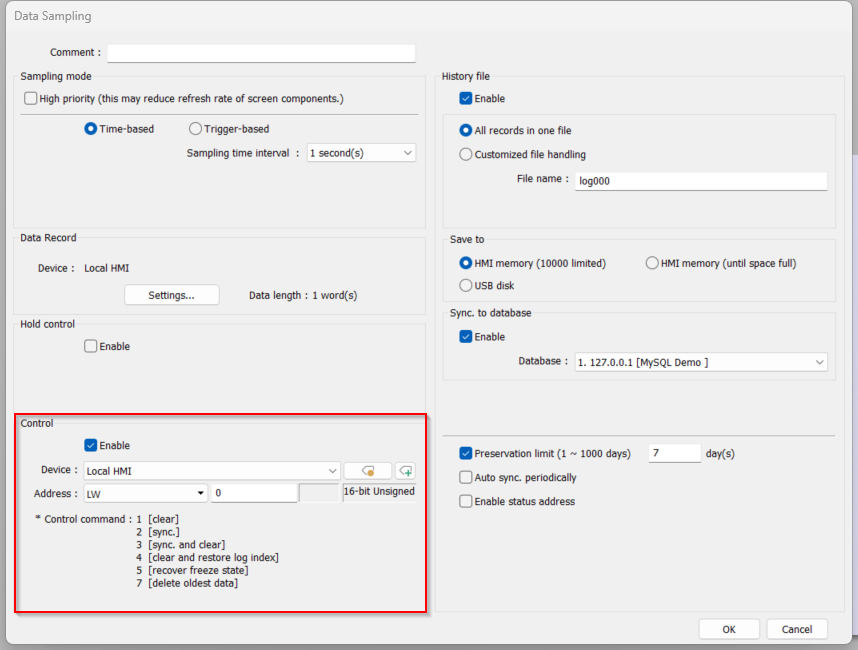
To sync sampled data within your project to your MySQL server, within your “Data Sampling” object, enable the “History File” and the “Sync to database” options. Choose your MySQL server’s IP address from the “Database” drop-down list. Click “OK” when finished:
Note: at least one “Data Record” must be configured before enabling the “History file.”
-
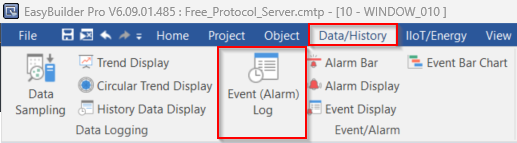
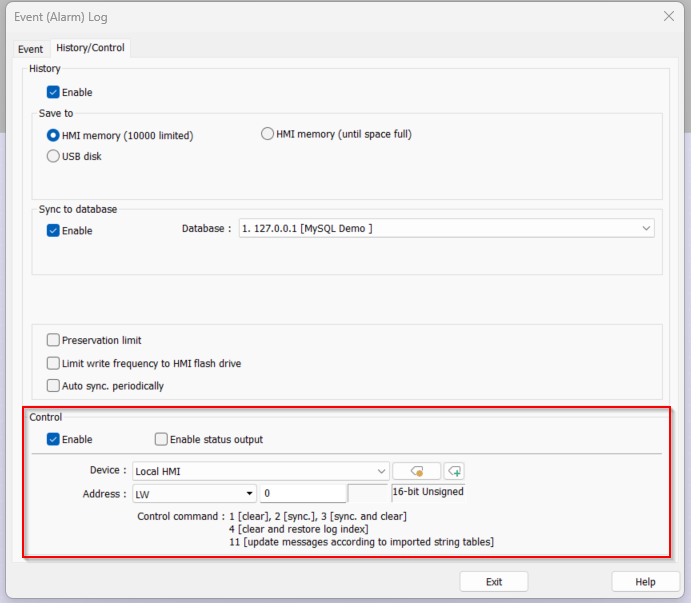
To sync event log data within your project to your MySQL server, within the “History/Control” tab of the “Event (Alarm) Log,” enable the “History” and the “Sync to database” options. Choose your MySQL server’s IP address from the “Database” drop-down list:


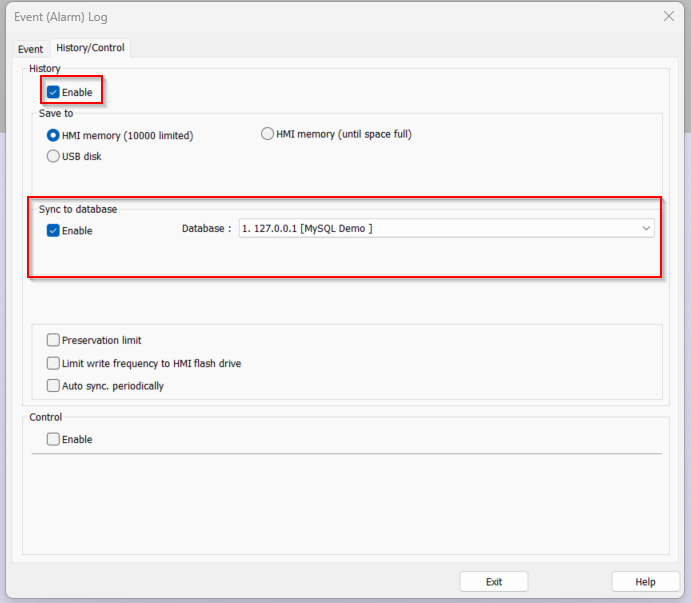
Note: data will be synchronized to the MySQL server only when the number of “Data Sampling”/“Event (Alarm) Log” records reach 10000. To start synchronization manually, please select the “Enable” check box in the “Control” section in the settings of the “Data Sampling”/“Event (Alarm) Log” object. Then, give a command by entering the corresponding value in the designated address.
Keywords
sql, mysql, server, workbench, work bench, local, database, install, installing, installer, schema, record, synchronize, synchronization, synchronized