Introduction:
In this post, we explain how to design a button that allows the operator to change windows and prompts them to log in, only if they are currently logged out.
Software Version:
EasyBuilder Pro 6.04.02.508+
Demo:
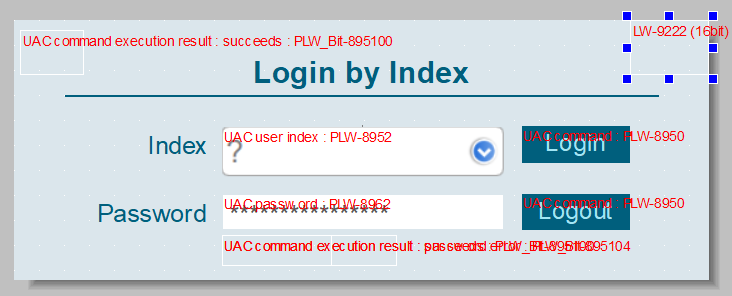
v1.0 ![]()
*requires 6.09.01.556+
Instructions:
-
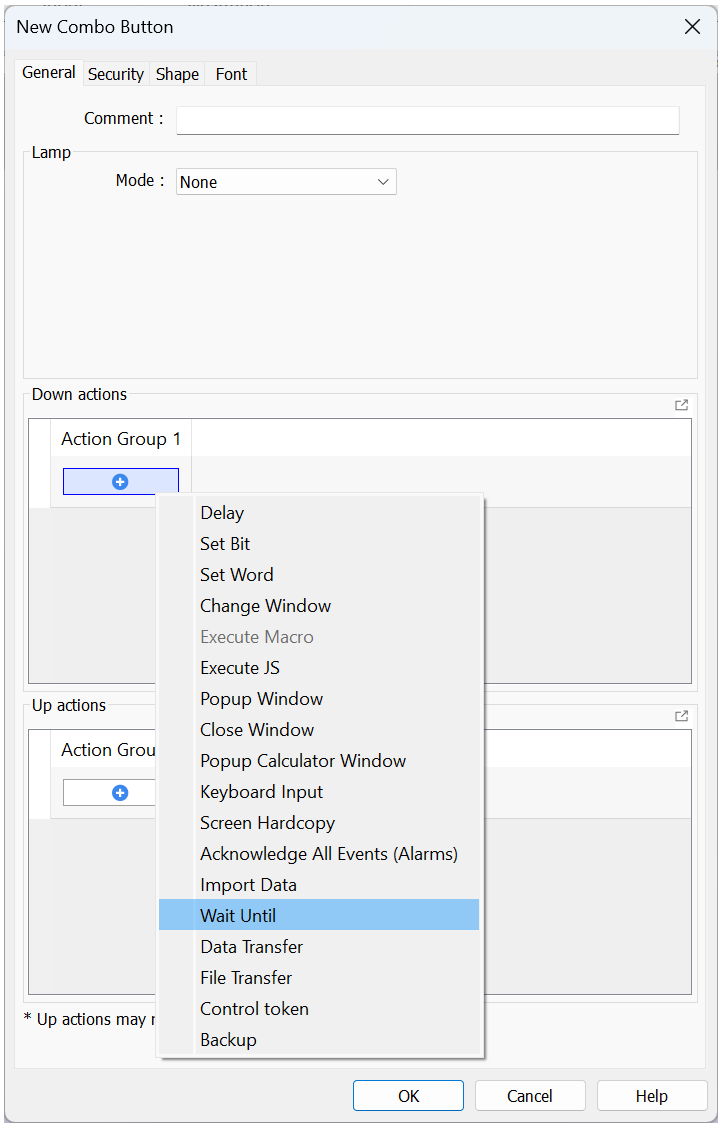
Within the “Object” tab, create a “Combo Button”:
-
Within the “Down actions”, create a “Wait Until” action:
-
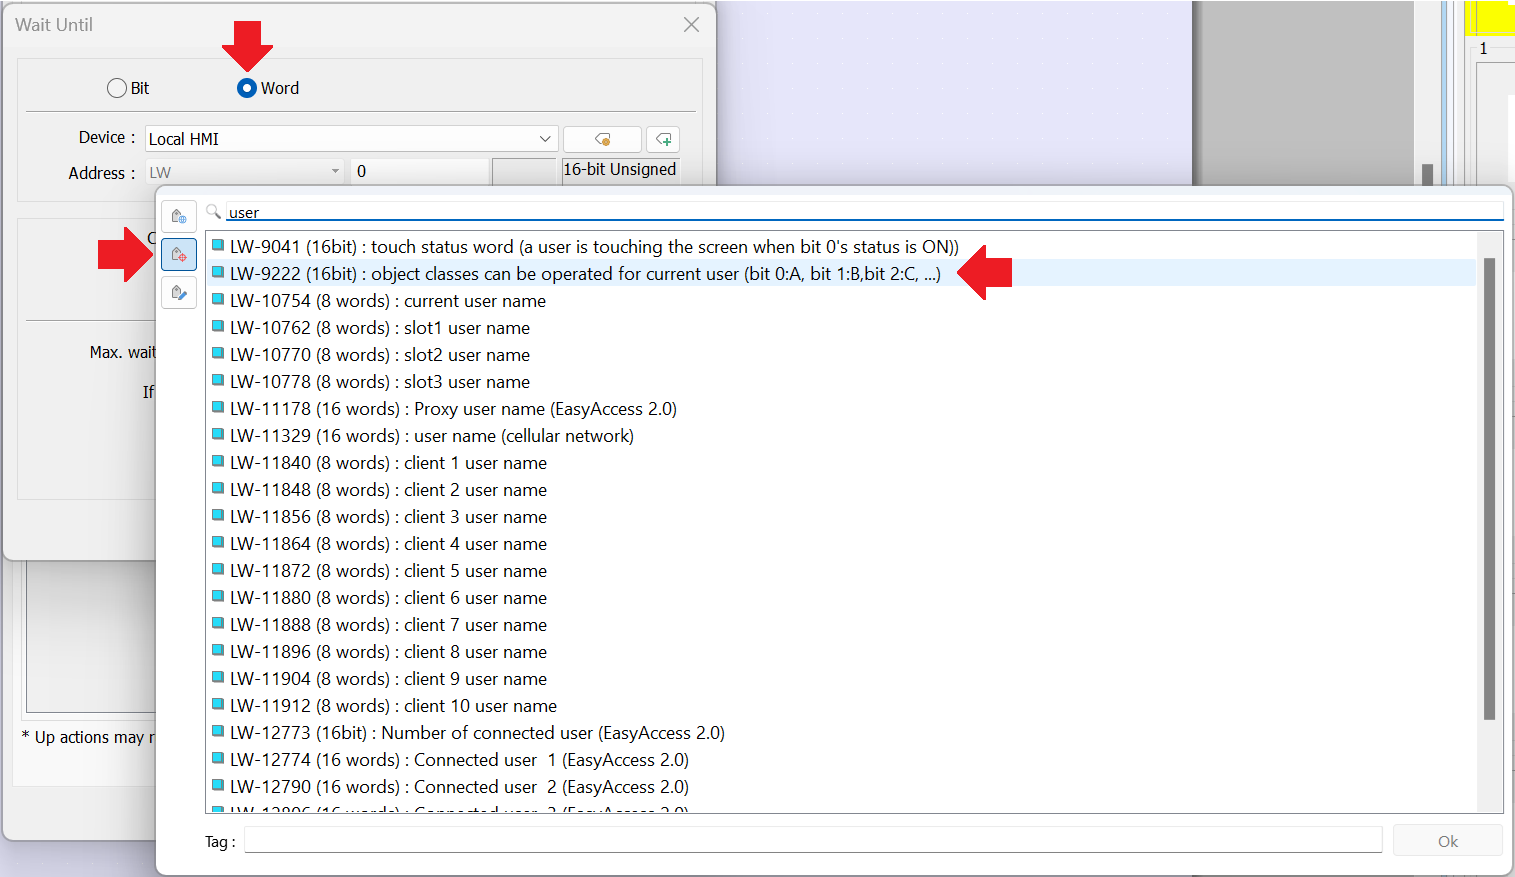
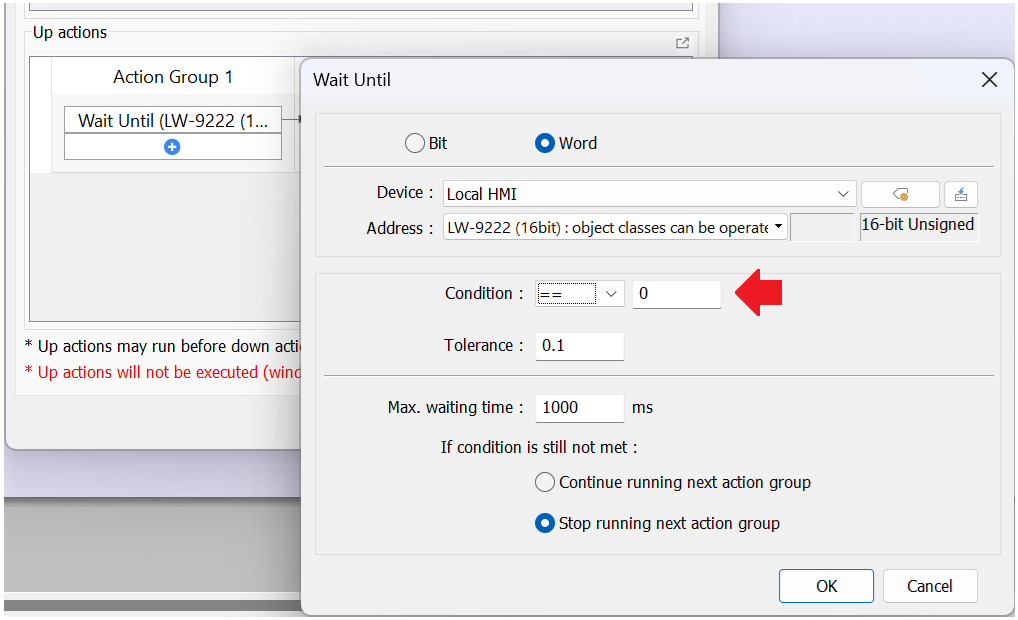
Set the type to “Word”, click the “Address” drop down list, select the target icon, search for ‘user’, and choose LW-9222 from the options listed below:
Note: When the value of LW-9222 is greater than 0 a user with security clearance is logged in.
-
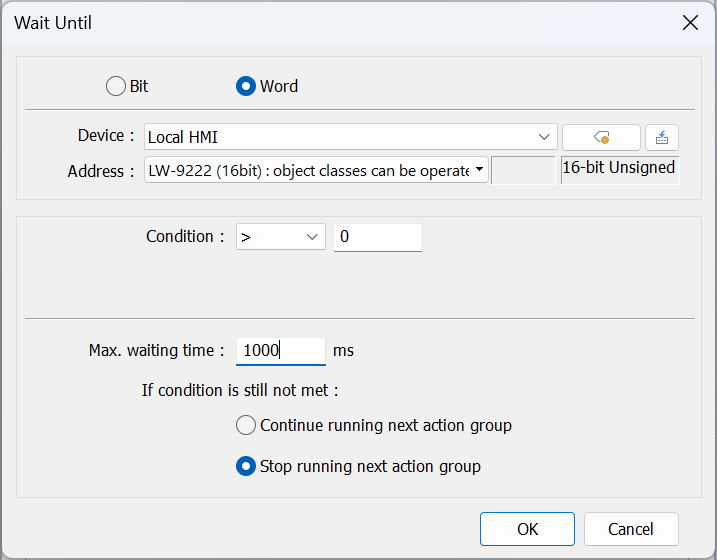
Set the “Wait Until” action as follows:
Note: The condition checks if LW-9222 is greater than 0. “Stop running next action group” should be enabled.
-
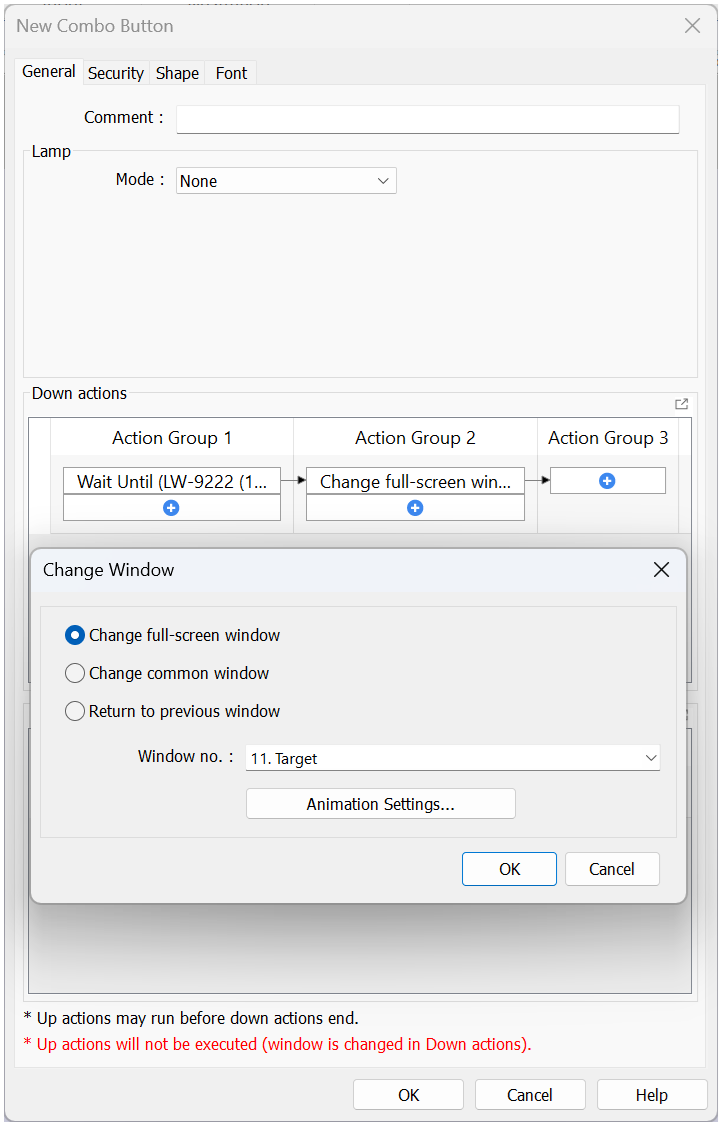
Add a “Change window” action to “Action Group 2” to change the current window to the target if the operator is already logged in:
-
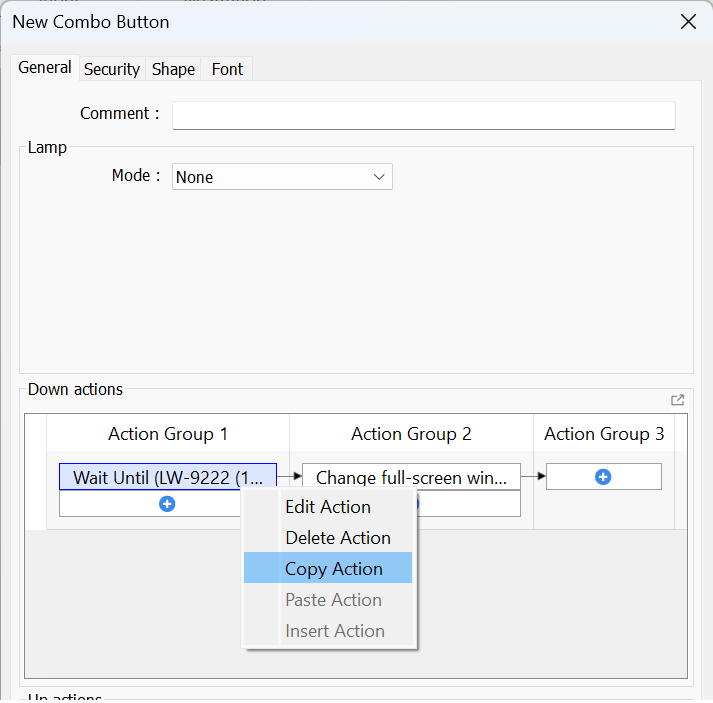
Right-click the “Wait Until” action and select “Copy”:
-
Right-click the “Plus” sign in the blank action located in the “Up actions” section and select “Insert Action”:
-
Within the duplicated “Wait Until” action modify the condition value to ‘0’. This will allow us to check if the current user does not have clearance or is logged out:
-
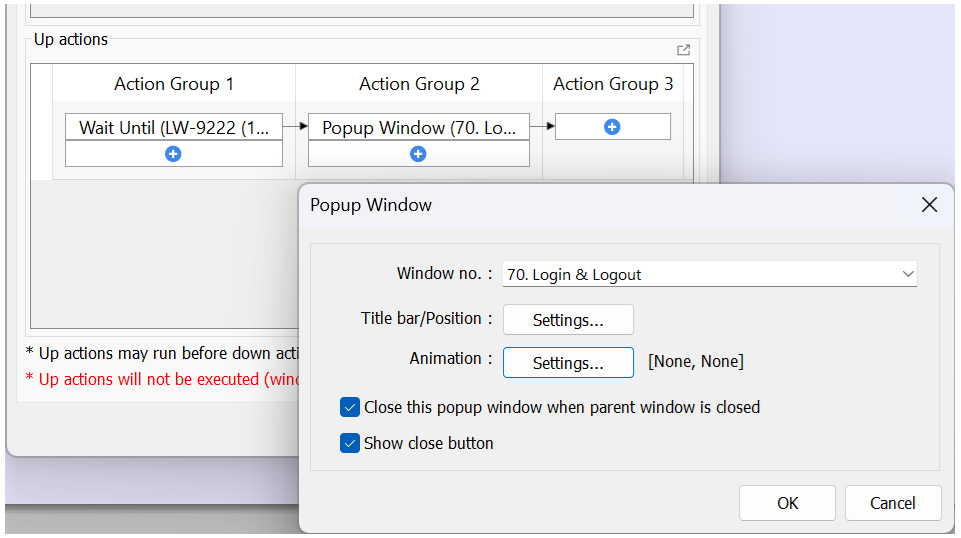
Create a new action to display the “Login” prompt window as a popup:
Note: At this point, the button will accomplish the scope and goals of the introduction. The steps below are optional and will allow the display window to change to the desired window once the user has logged in.
-
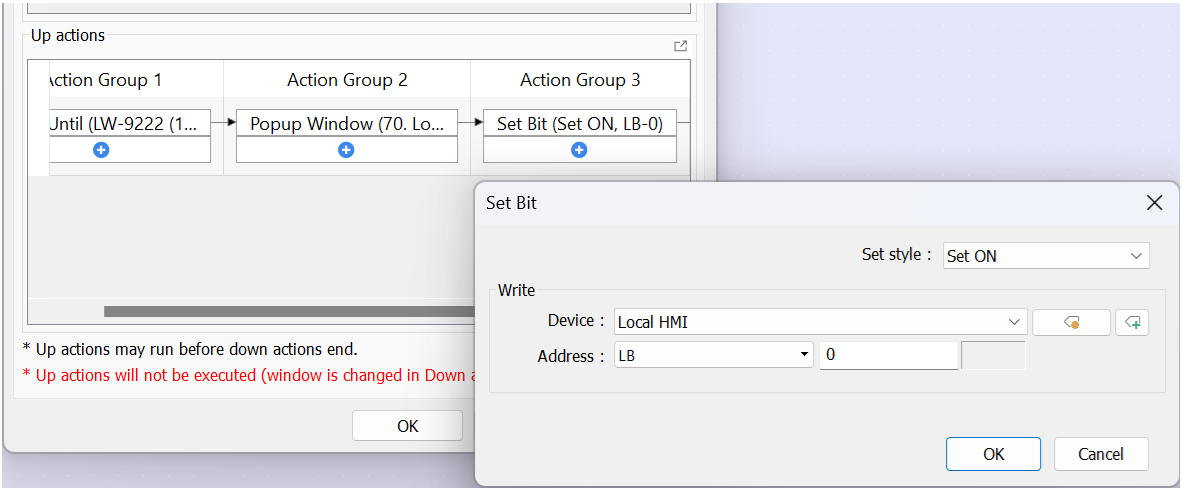
[Optional] Set an arbitrary bit on when this button is pressed to allow the “Login & Logout” window to change to the appropriate window when this specific button is pressed:
-
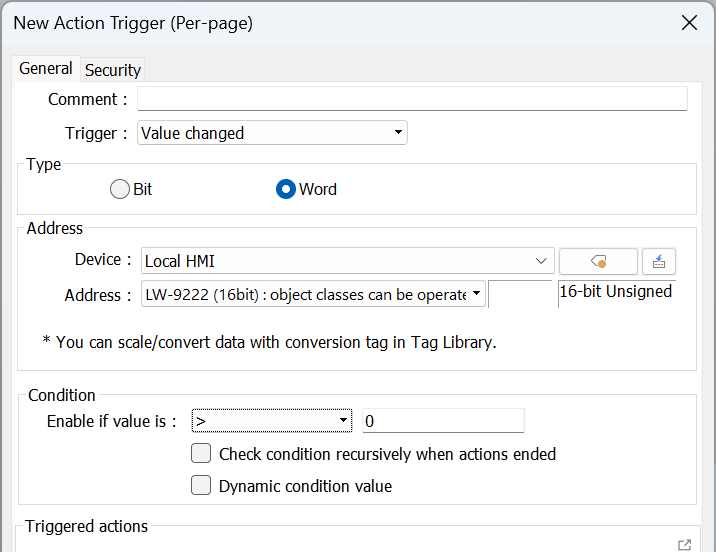
[Optional] Place an “Action Trigger (Per-page)” object on the “Login & Logout” window. Configure this object in a manner similar to the “Wait Until” action in step 4:
Note: This object can be found within the “Action-related” drop down list in the “Object” tab.
-
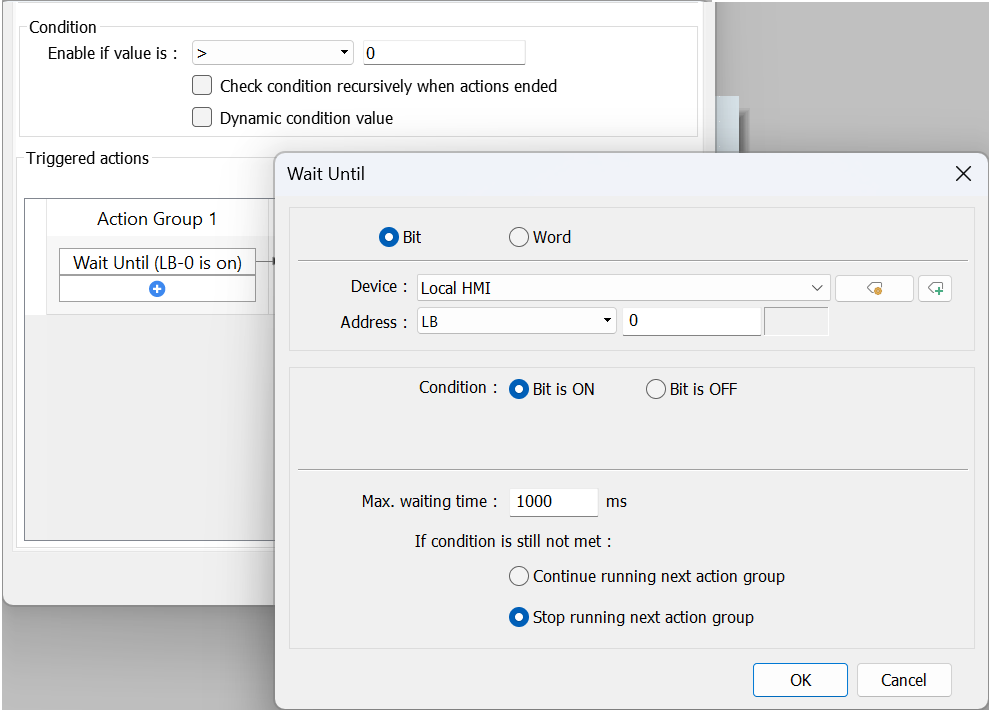
[Optional] Use a “Wait until” action to check if the ‘arbitrary’ bit used in step 10 is ON:
Note: A different bit can be used within different ‘action trigger’ objects to navigate to different pages unique to the button selected.
-
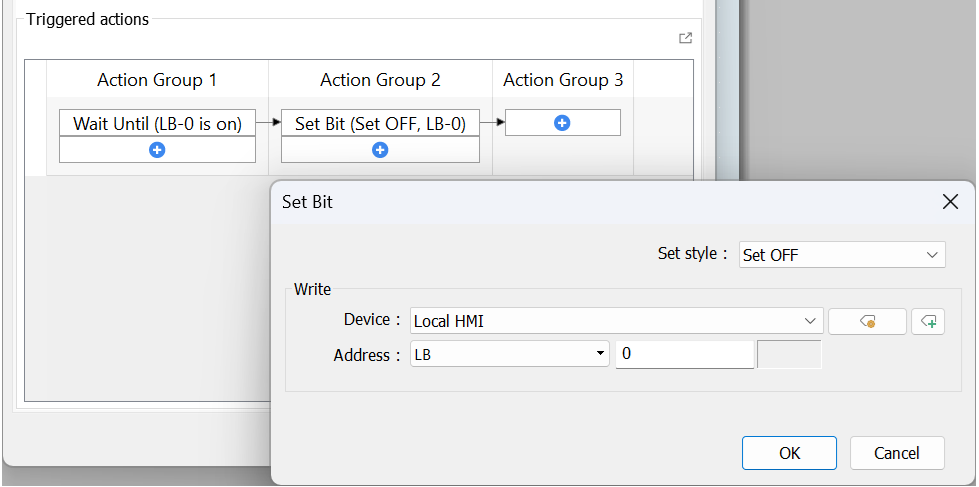
[Optional] Reset the “Wait until” bit in the succeeding action:
-
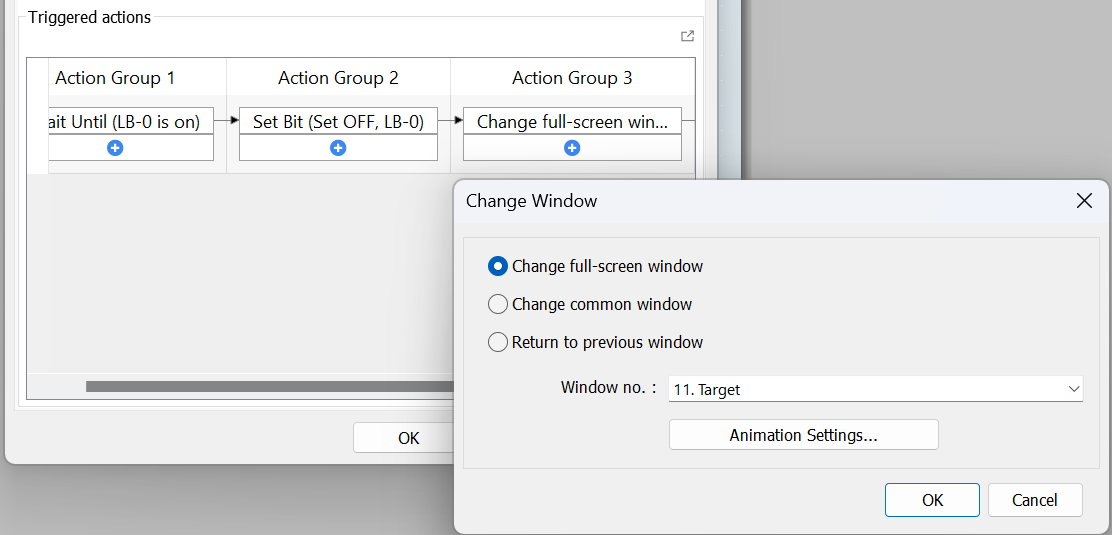
[Optional] Add a “Change Window” action after the “Set Bit” action to automatically redirect the operator to the desired target window:
-
When finished, place this object anywhere on the “Login & Logout” window: