Introduction:
Weintek HMIs allow you to send important data and warnings right to your phone as a text or email alert. Within this tutorial we demonstrate how to configure email alerts within EasyBuilder Pro.
Software Version:
EasyBuilder Pro 6.03.02.463+
Instructions:
-
Navigate to the “System Parameters” section within the “Home” tab of EasyBuilder Pro:
-
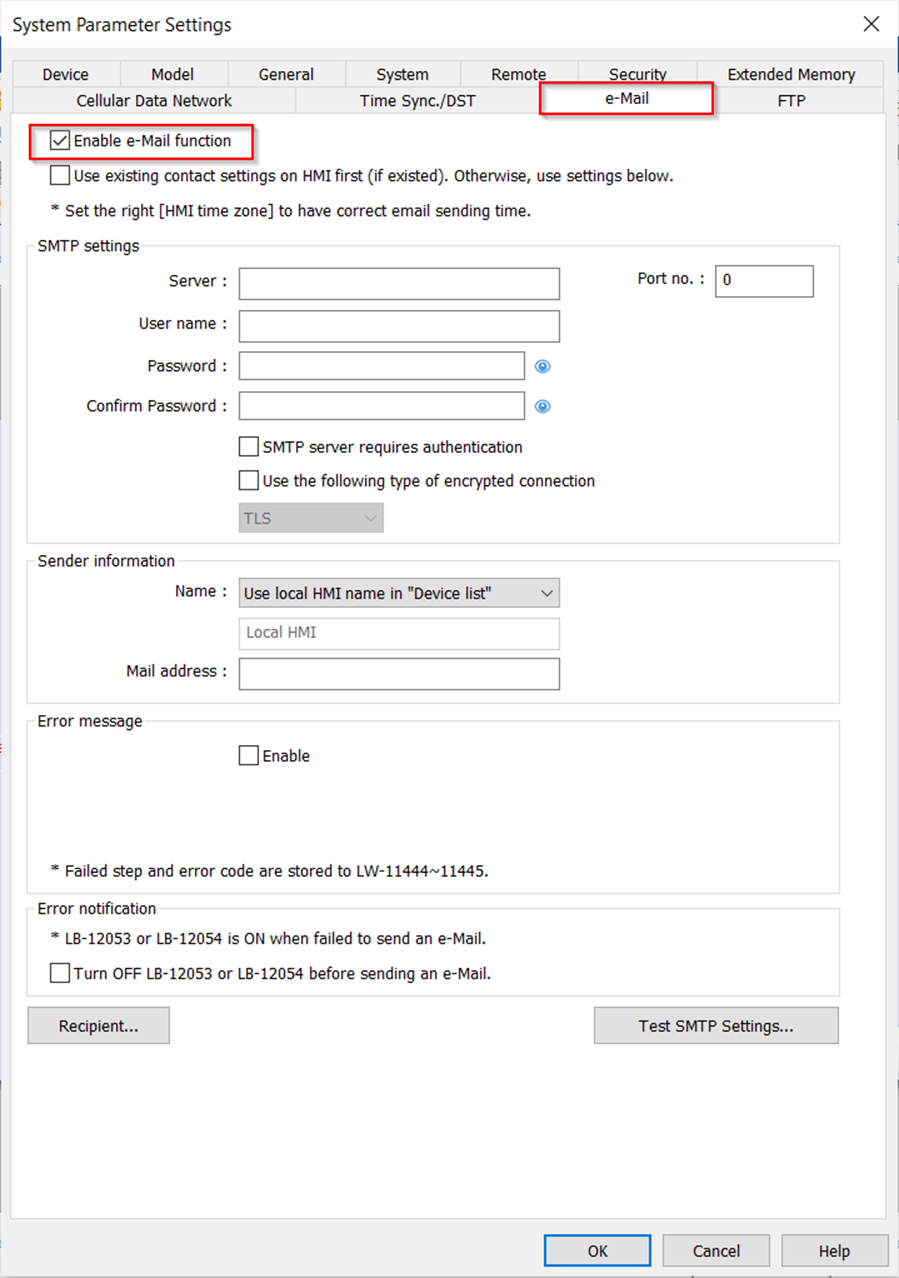
In the “System Parameters Setting,” locate the “e-Mail” tab. Then, select the “Enable e-mail function” option:
-
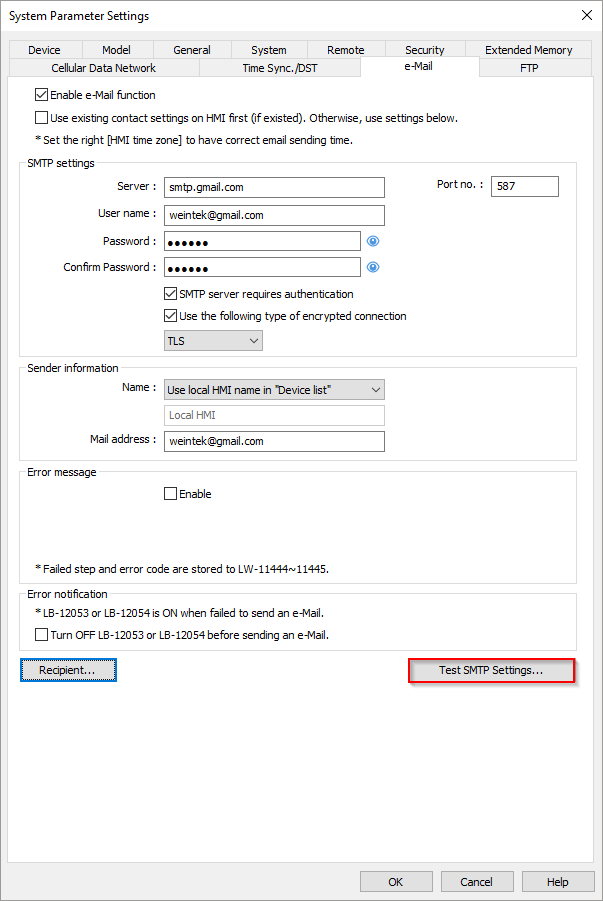
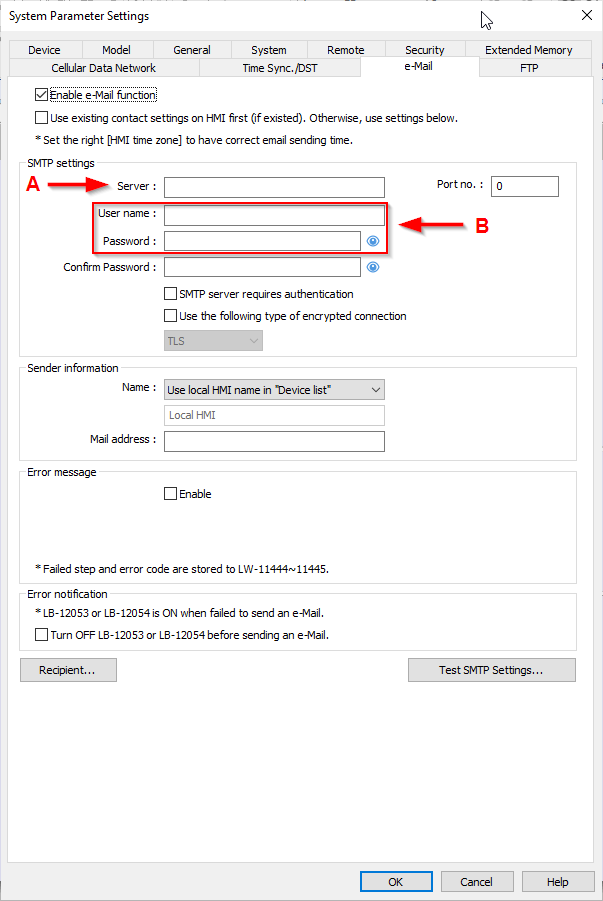
Configure the (A) “Server” and “Port no.” that you would like to use. Below, you will find a list of common servers. (B) When finished, input your email address and password:
Note: Depending on your email provider, you may need to configure your email settings to allow third-party email providers to send messages to your email.

| Common servers | Port [TLS] | Port [SSL] | Reference | Notes |
|---|---|---|---|---|
| smtp.gmail.com | 587 | 465 | Link | App password is required |
| smtp.mail.yahoo.com | 587 | 465 | Link | App password is required |
| smtp-mail.outlook.com | 587 | N/A | Link |
-
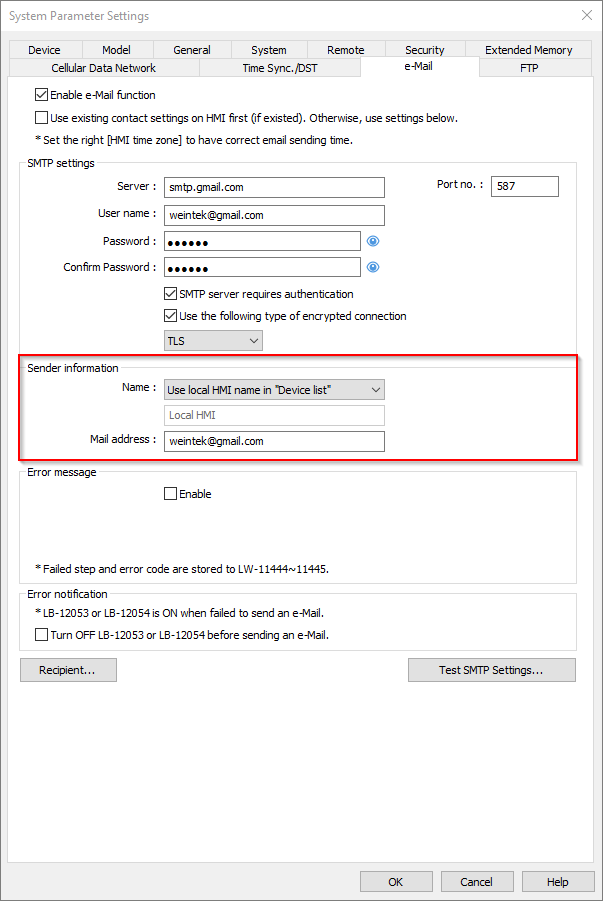
Now, customize the “Sender Information” section to your preferences. You can set a custom name for the sender or leave it as the default device name. Then, enter the “Mail address” for the HMI:
-
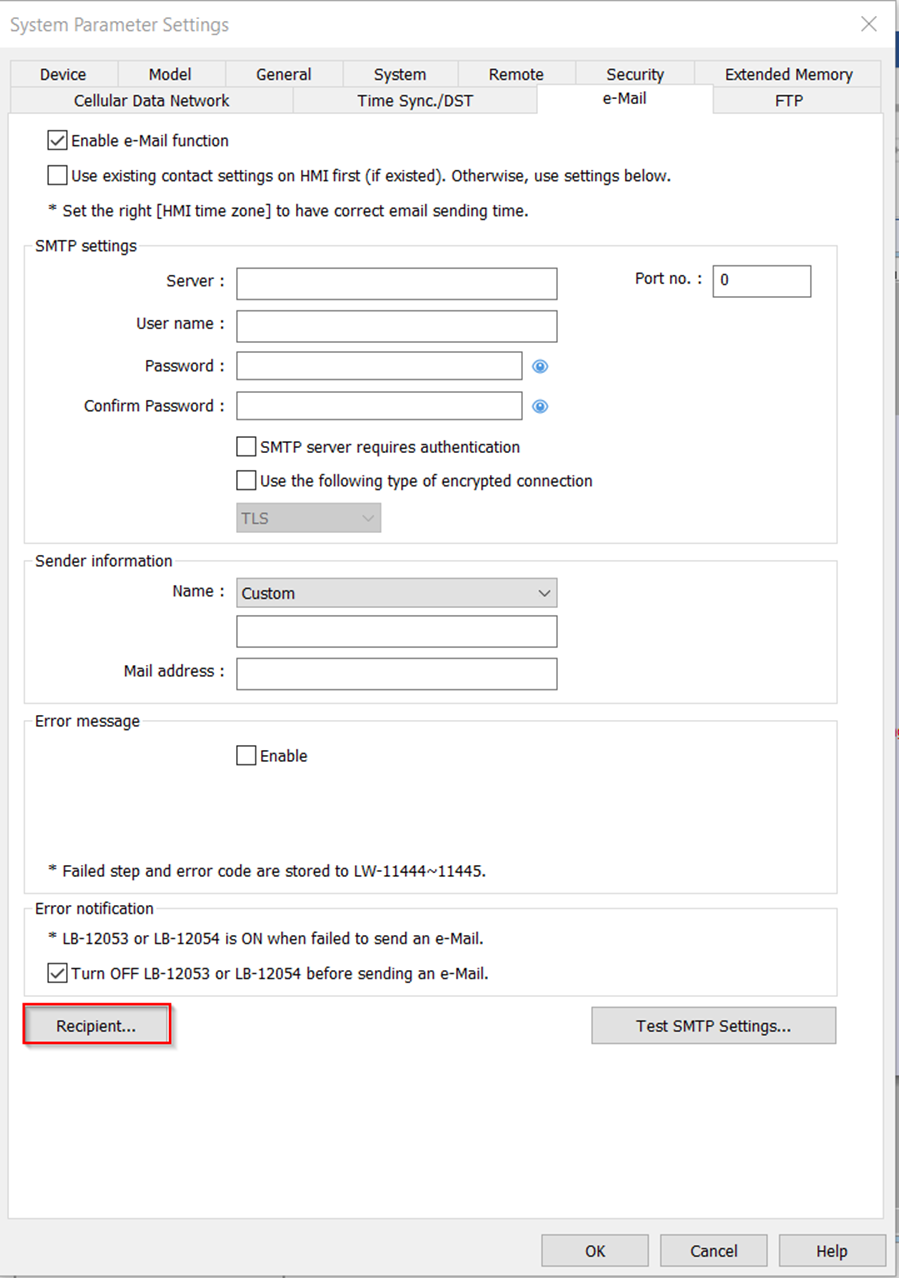
Click the “Recipient” button to enter recipient contact information:
-
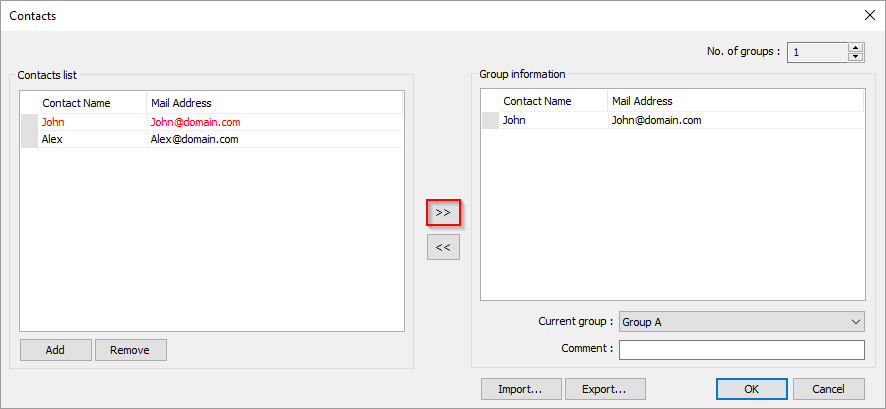
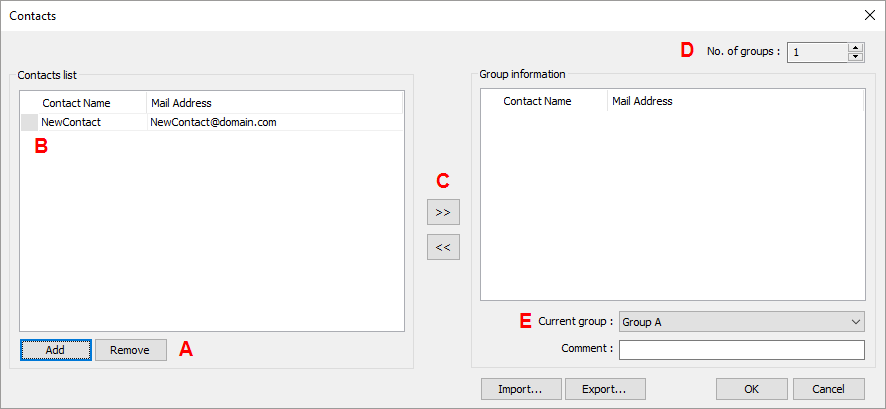
In the “Recipient” window, use the (A) “Add” or “Remove” buttons to configure the (B) “Contact list”. Configure the “Contact Name” and “Mail address” of each recipient and move a recipient into or out of the selected group using the (C) “Move” buttons. The (D) “No. of groups” can be configured and (E) “Current group” can be selected. To send a recipient a text message look up the domain required by the carrier and configure this within the “Mail address” section of the recipient. The domain for some common wireless carriers is defined below:
| Carrier | Domain | Example |
|---|---|---|
| T-Mobile | @tmomail.net | 1112223333@tmomail.net |
| AT&T | @txt.att.net | 1112223333@txt.att.net |
| Verizon | @vtext.com | 1112223333@vtext.com |
-
To assign a contact to a group, select the name in the “Contact List” and click the right arrow to move them into that group. If you want to remove someone from the group, select their name and click the left arrow. In the example below, you can see that John has been added to the group, while Alex has not:
-
Finally, test your email configuration using the “Test SMTP Settings” button. In the window that appears, select the group of recipients that your would like to send the test message to. If the recipients receive the test message, your SMTP settings are ready to use!
-
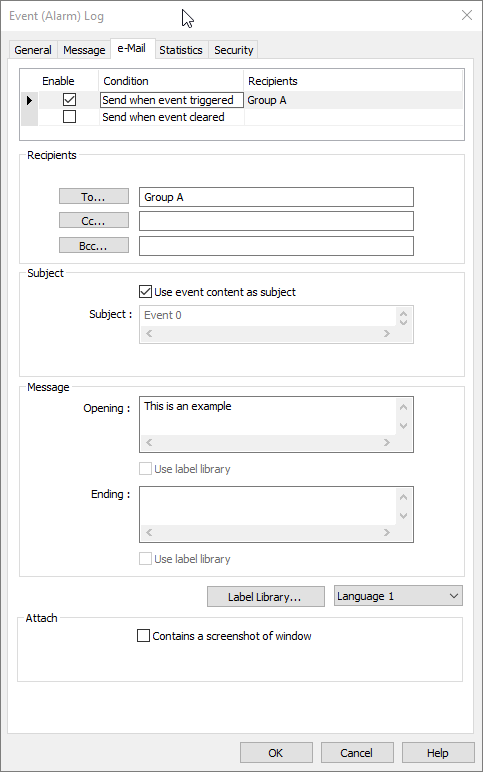
To send a message regarding an alarm, please use the “e-Mail” tab within the settings menu of an alarm as shown within this tutorial: Link.