Introduction:
To transfer variables between CODESYS PLCs we often recommend using a client-server method where one device implements the ModbusServer function block and the other utilizes a generic Modbus TCP device. However, this method requires a sophisticated mapping procedure that can be difficult to implement due to differences in data type especially when passing a large assortment of data as an array. In certain cases, a more efficient method is to implement a faux NVL or network variable list using a DUT, GVL, and certain function blocks from the Network library. Within this post, we will describe the latter method.
Important:
Weintek, like other vendors has validated certain drivers as compatible with our Codesys runtime. If you do not use the drivers and Codesys IDE that we recommend, the application may produce compilation and /or runtime errors that will be difficult to resolve.
| Device | Version |
|---|---|
| Codesys IDE | 3.5.15.50 [Download] |
| Ethernet adapter | 3.5.15.0 |
| Network | 3.5.7.0 [Download] |
Software Version:
Codesys IDE 3.5.15.50
Codesys package
[Optional] Codesys firmware
Demo:
v1.0 ![]()
*requires 3.5.15.50
Instructions:
Client:
-
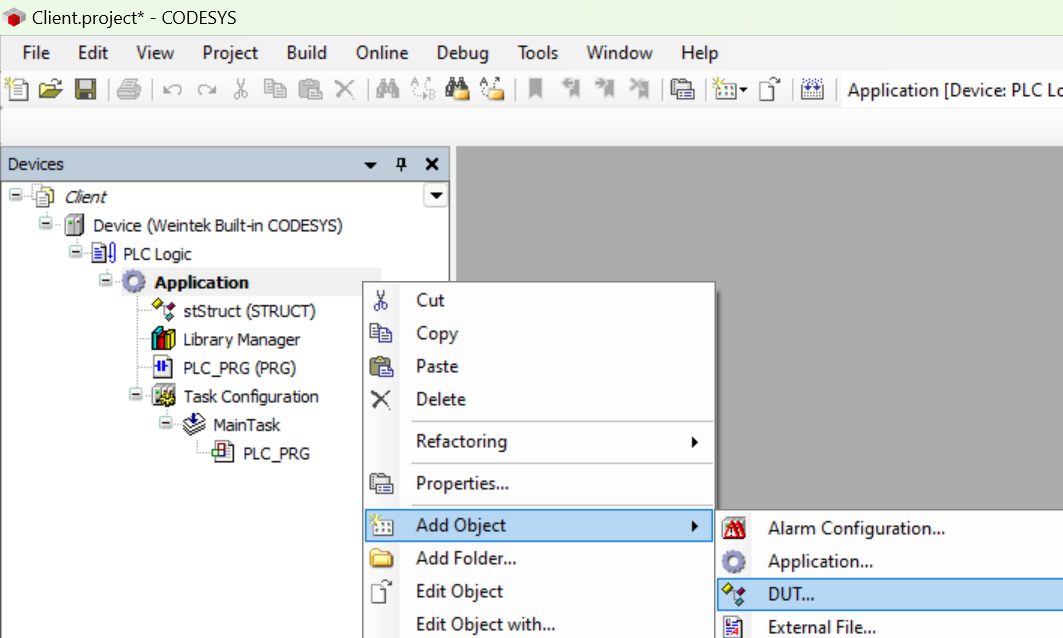
To send data to the target device, we should first define and organize the data that we would like to send. This can be data in the form of primitive types like bool or user defined structures. After we define our scope we should add all common variables to a DUT. To create a DUT, please right click “Application”, select “Add object”, and within the sub-menu select “DUT…”:
-
Within this example, we’ve added two primitive types and a user defined structure to our DUT:
-
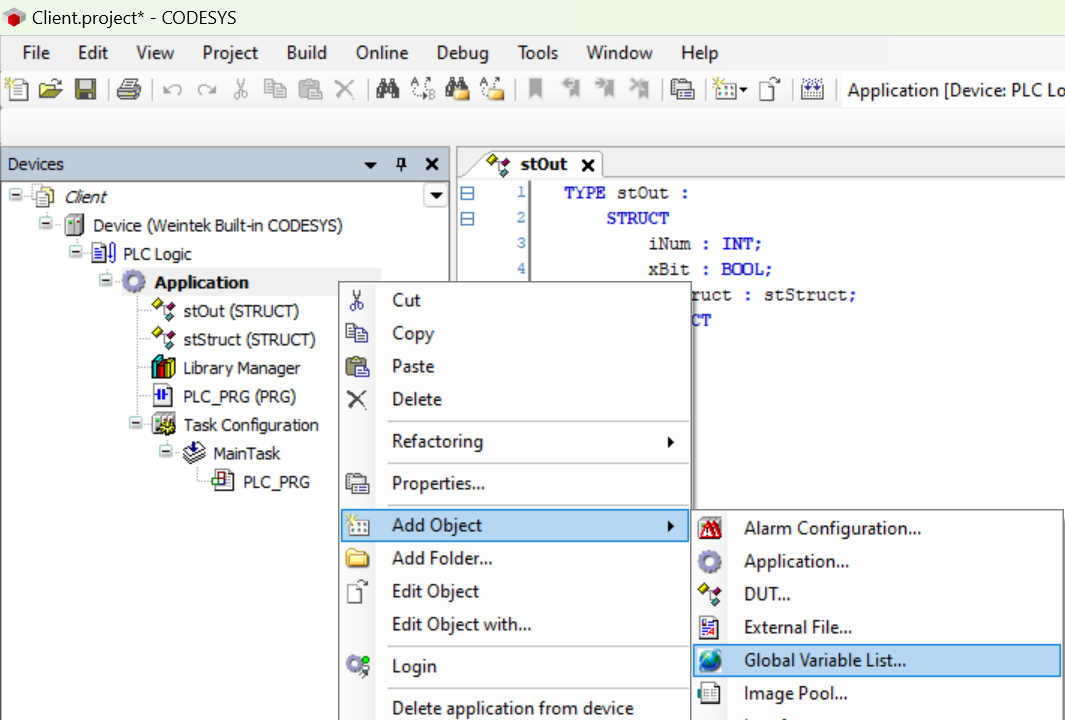
To use the members of your DUT within a program, right click “Application”, select “Add object”, and select “Global Variable List…”:
-
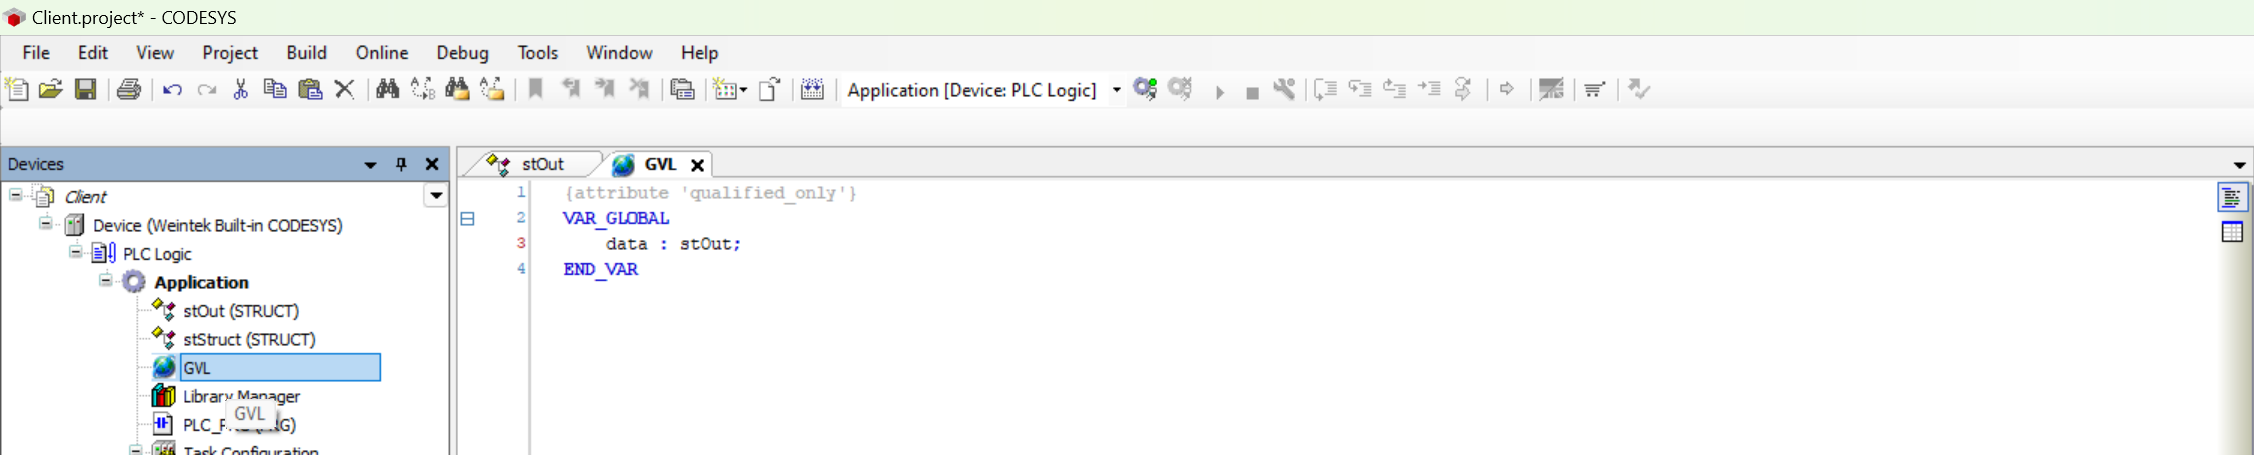
Within the “Global Variable List” or GVL, add an instance of the DUT:
-
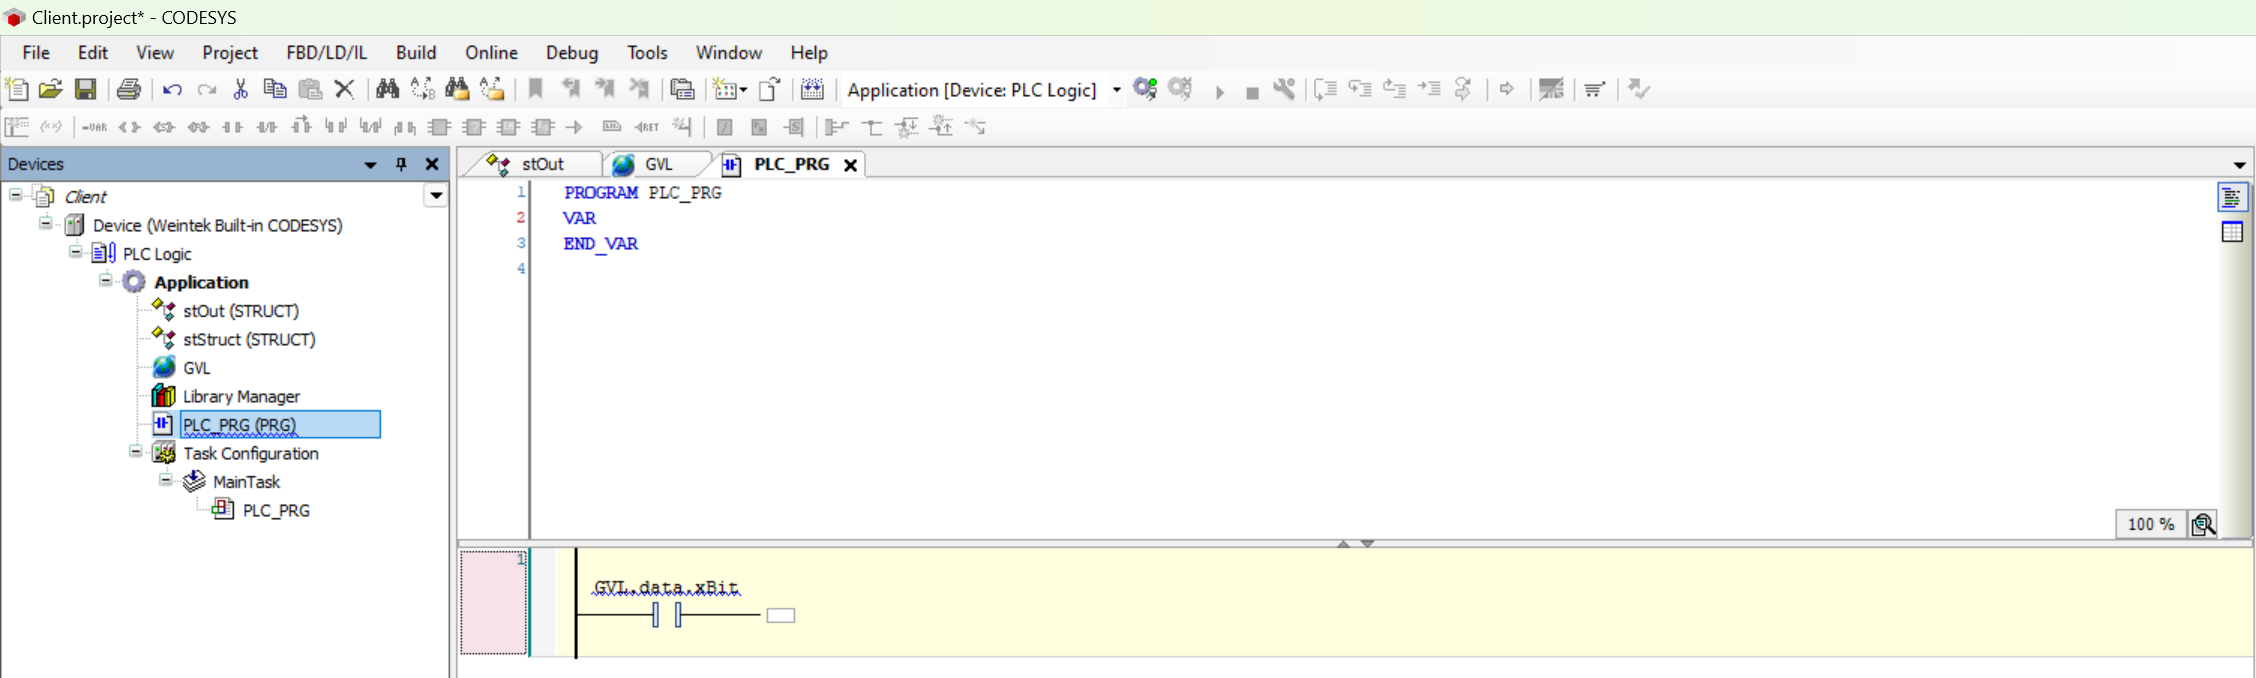
You can then reference instances of the DUT within your program as in the example below:
-
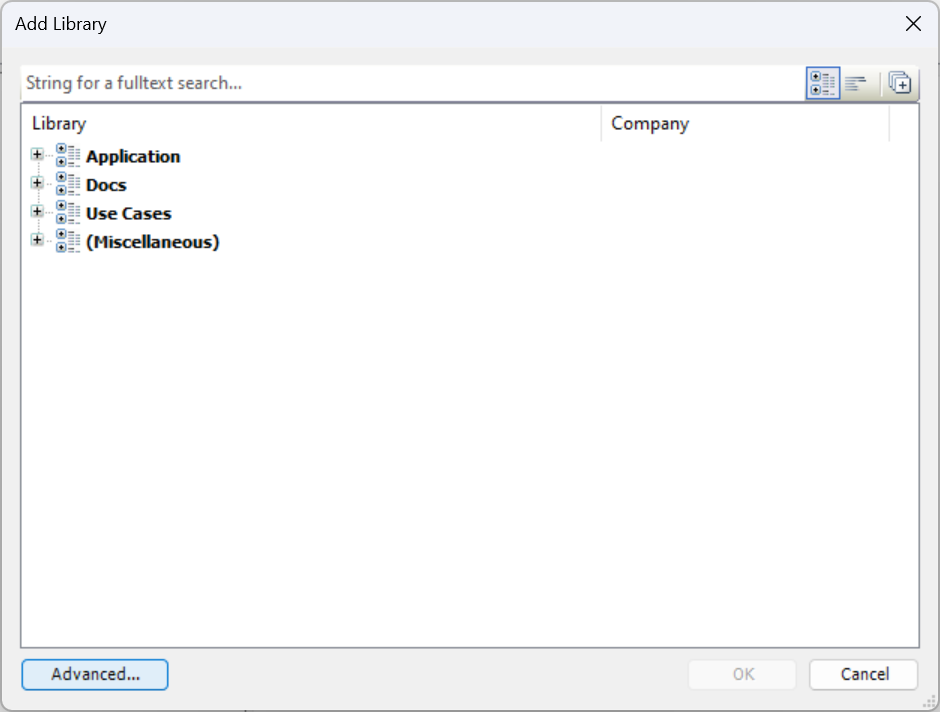
To send the DUT instance, we will need to add the “Network” library mentioned at the top of this post. To add this library, please open the “Library manager”:
-
Within the following window, select “Add Library” and click “Advanced…”:
-
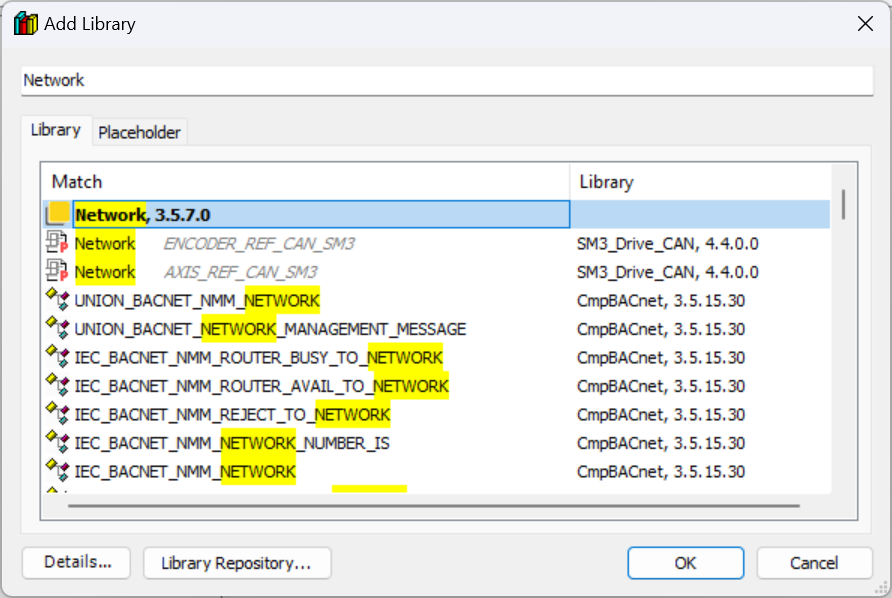
Within the “Advanced” window search for “Network” and add the following library:
Note: If the network library does not display within the search results, please download the required library via the link at the top of this post and follow these instructions to install the library.
-
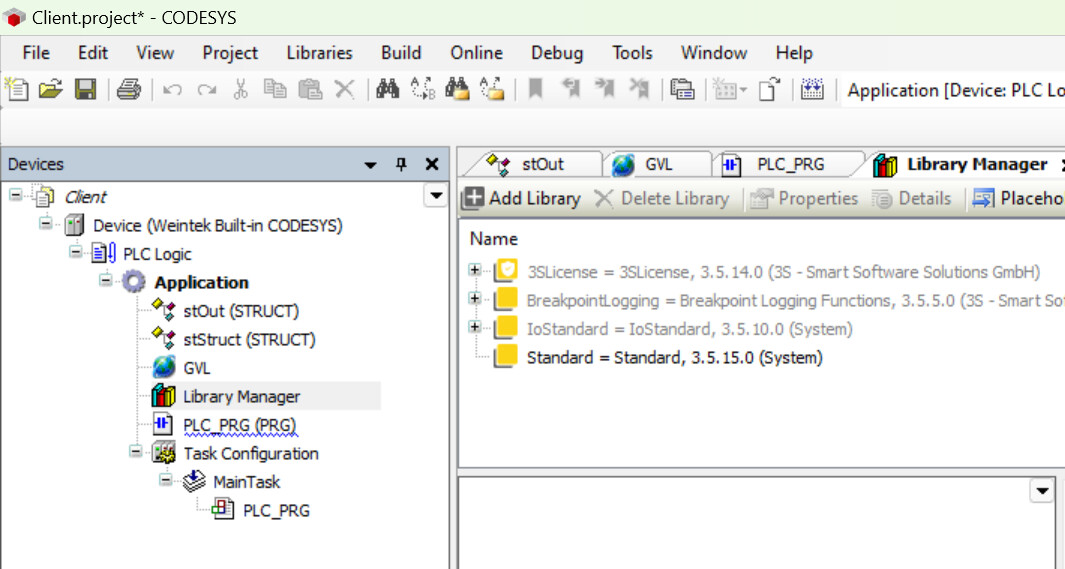
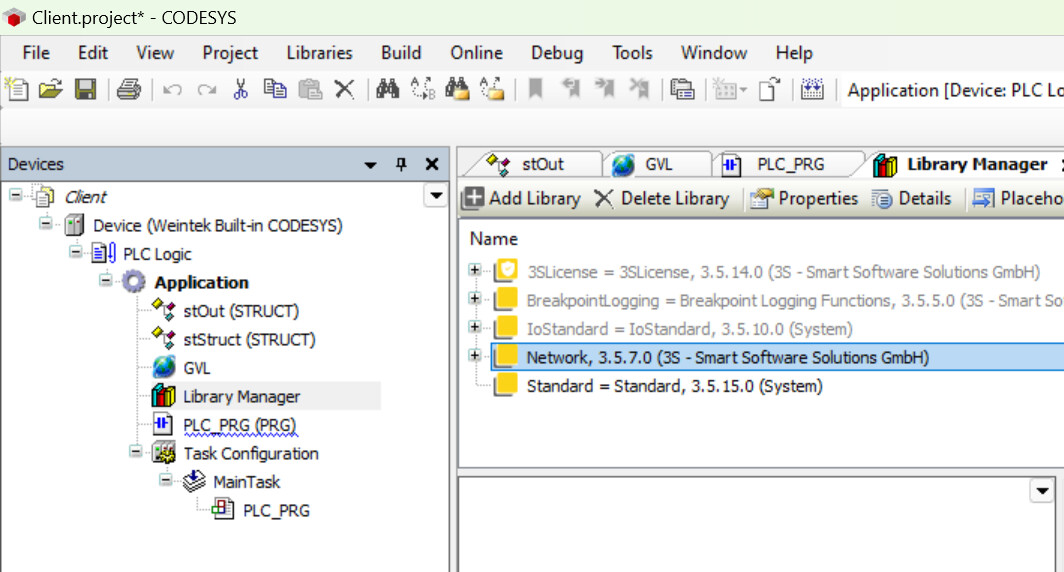
The library manager should now include this network library:
-
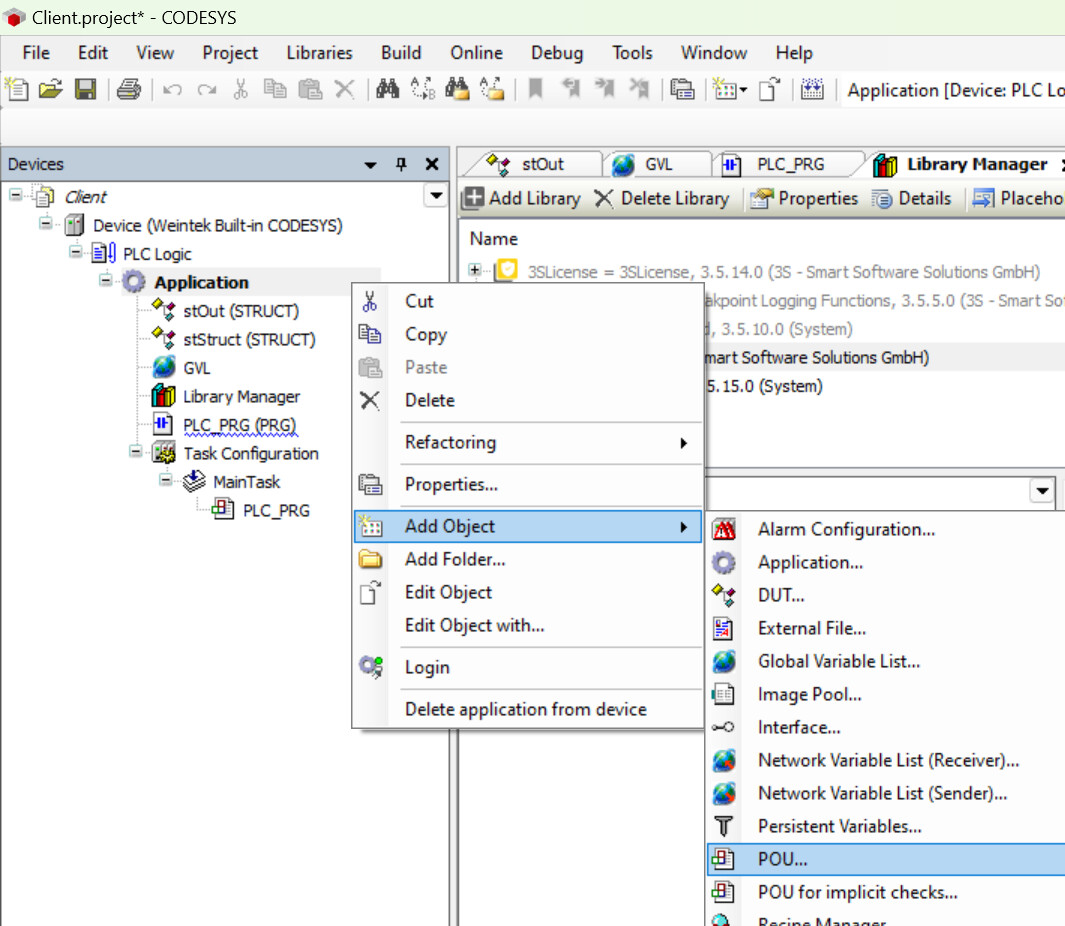
To send the DUT, we will need to write both a “send” and “receive” function. To do this, right click “Application”, select “Add object”, and select “POU…”:
-
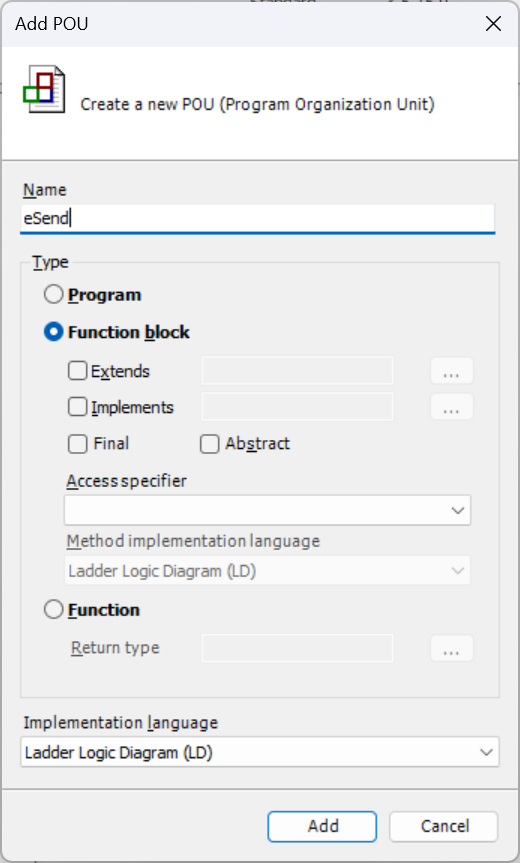
Select the following options and click “Add” to create the send function block:
-
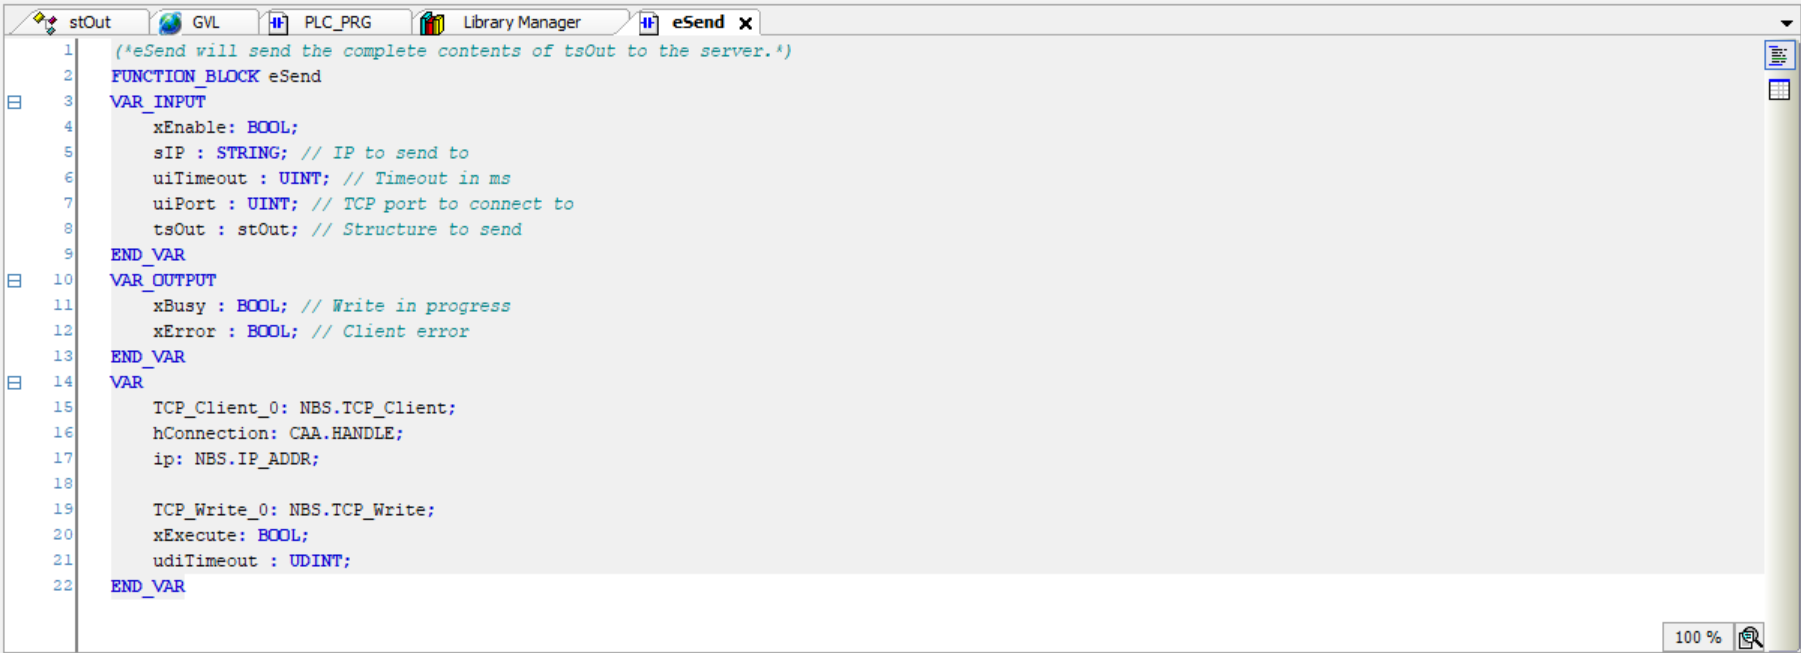
To simplify these steps, I’ve listed the variables used below:
Note: The function block shown in steps 12 ~ 13 was created for use in a test environment and may require modification.
-
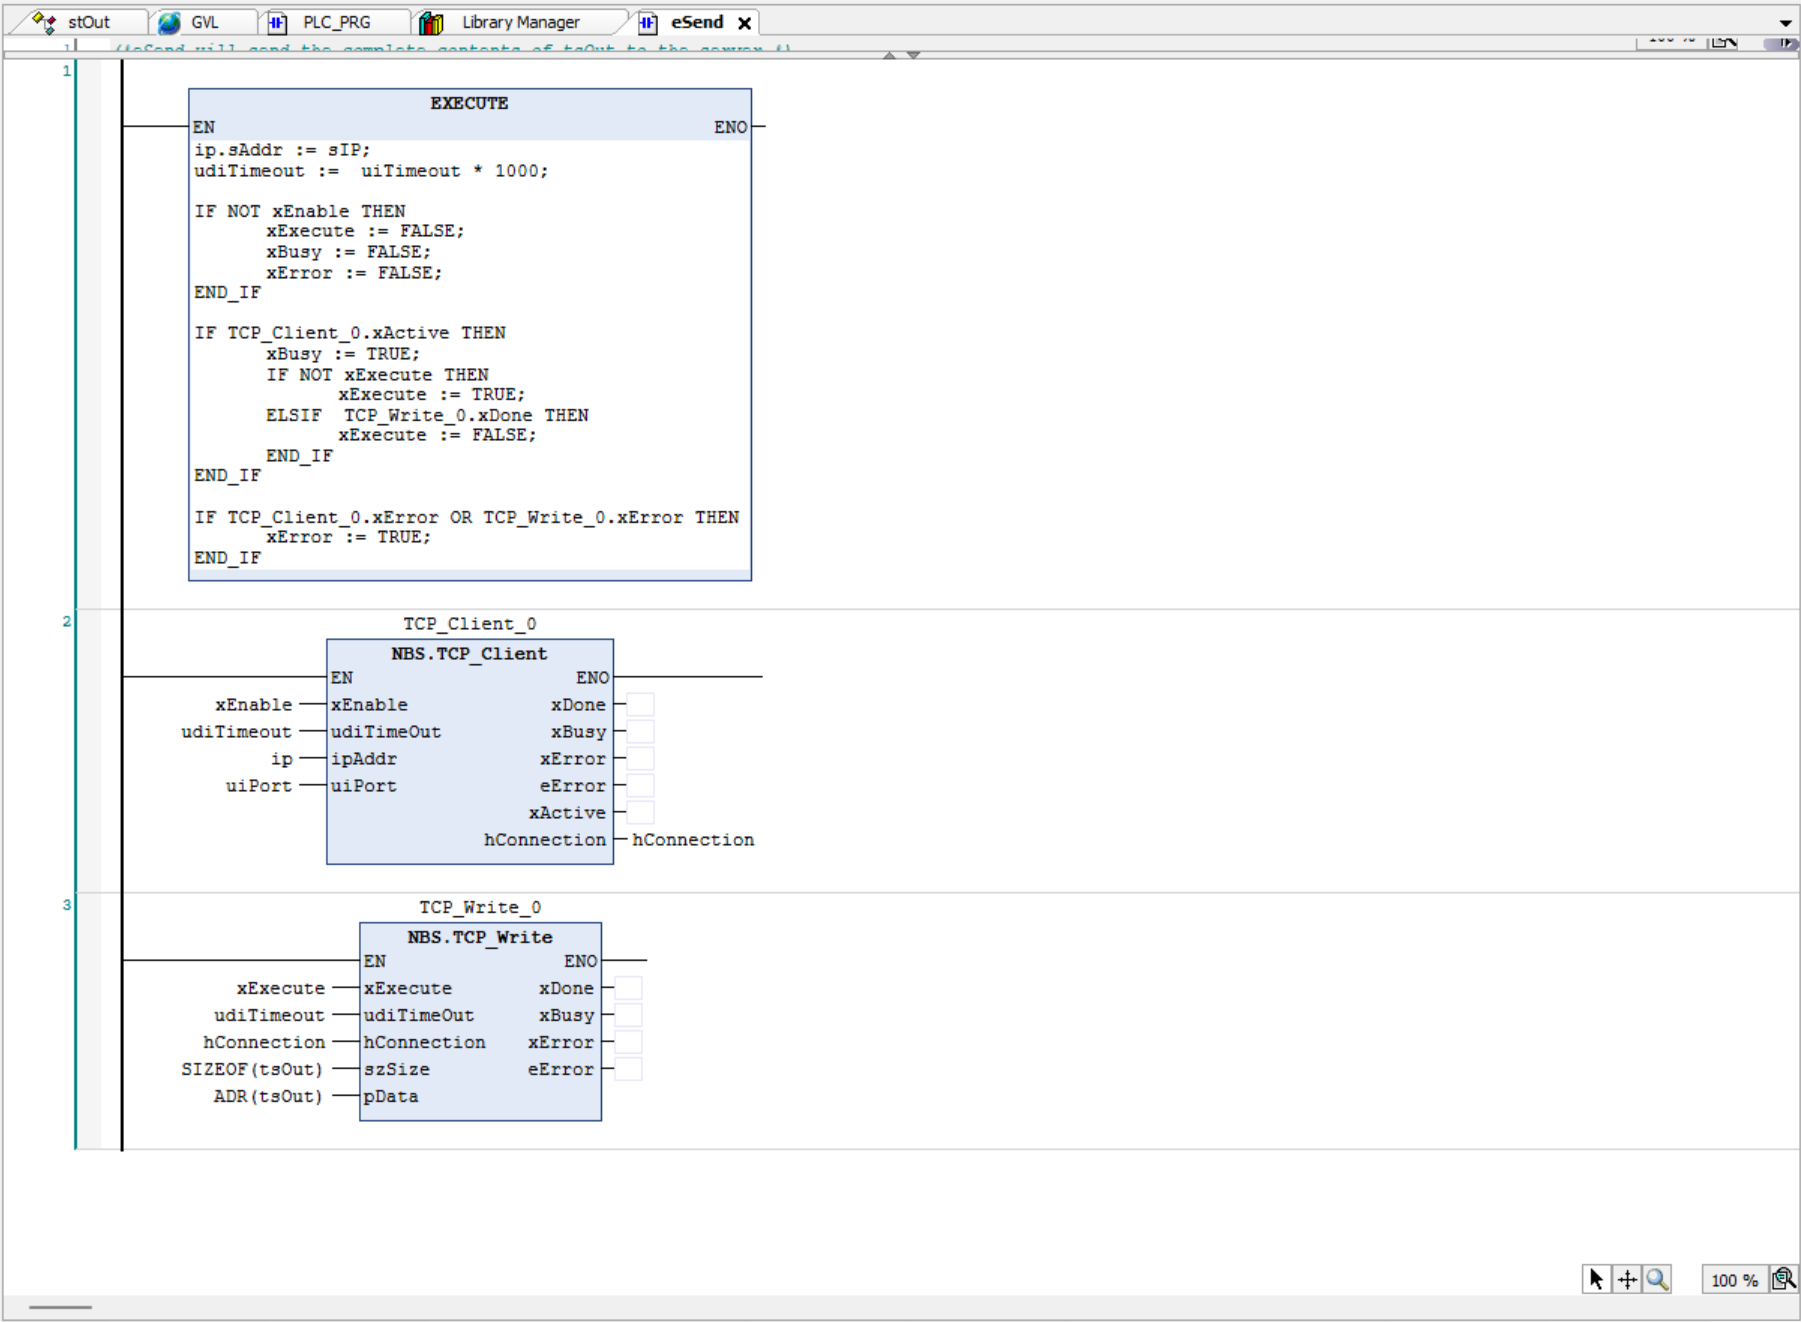
The function block was designed as shown:
Note 1: Take note of the EXECUTE function as this is where the server’s IP is utilized and where the xExecute parameter of the TCP_Write_0 function block is cycled.
Note 2: To utilize create these function blocks, please see appendix a.
-
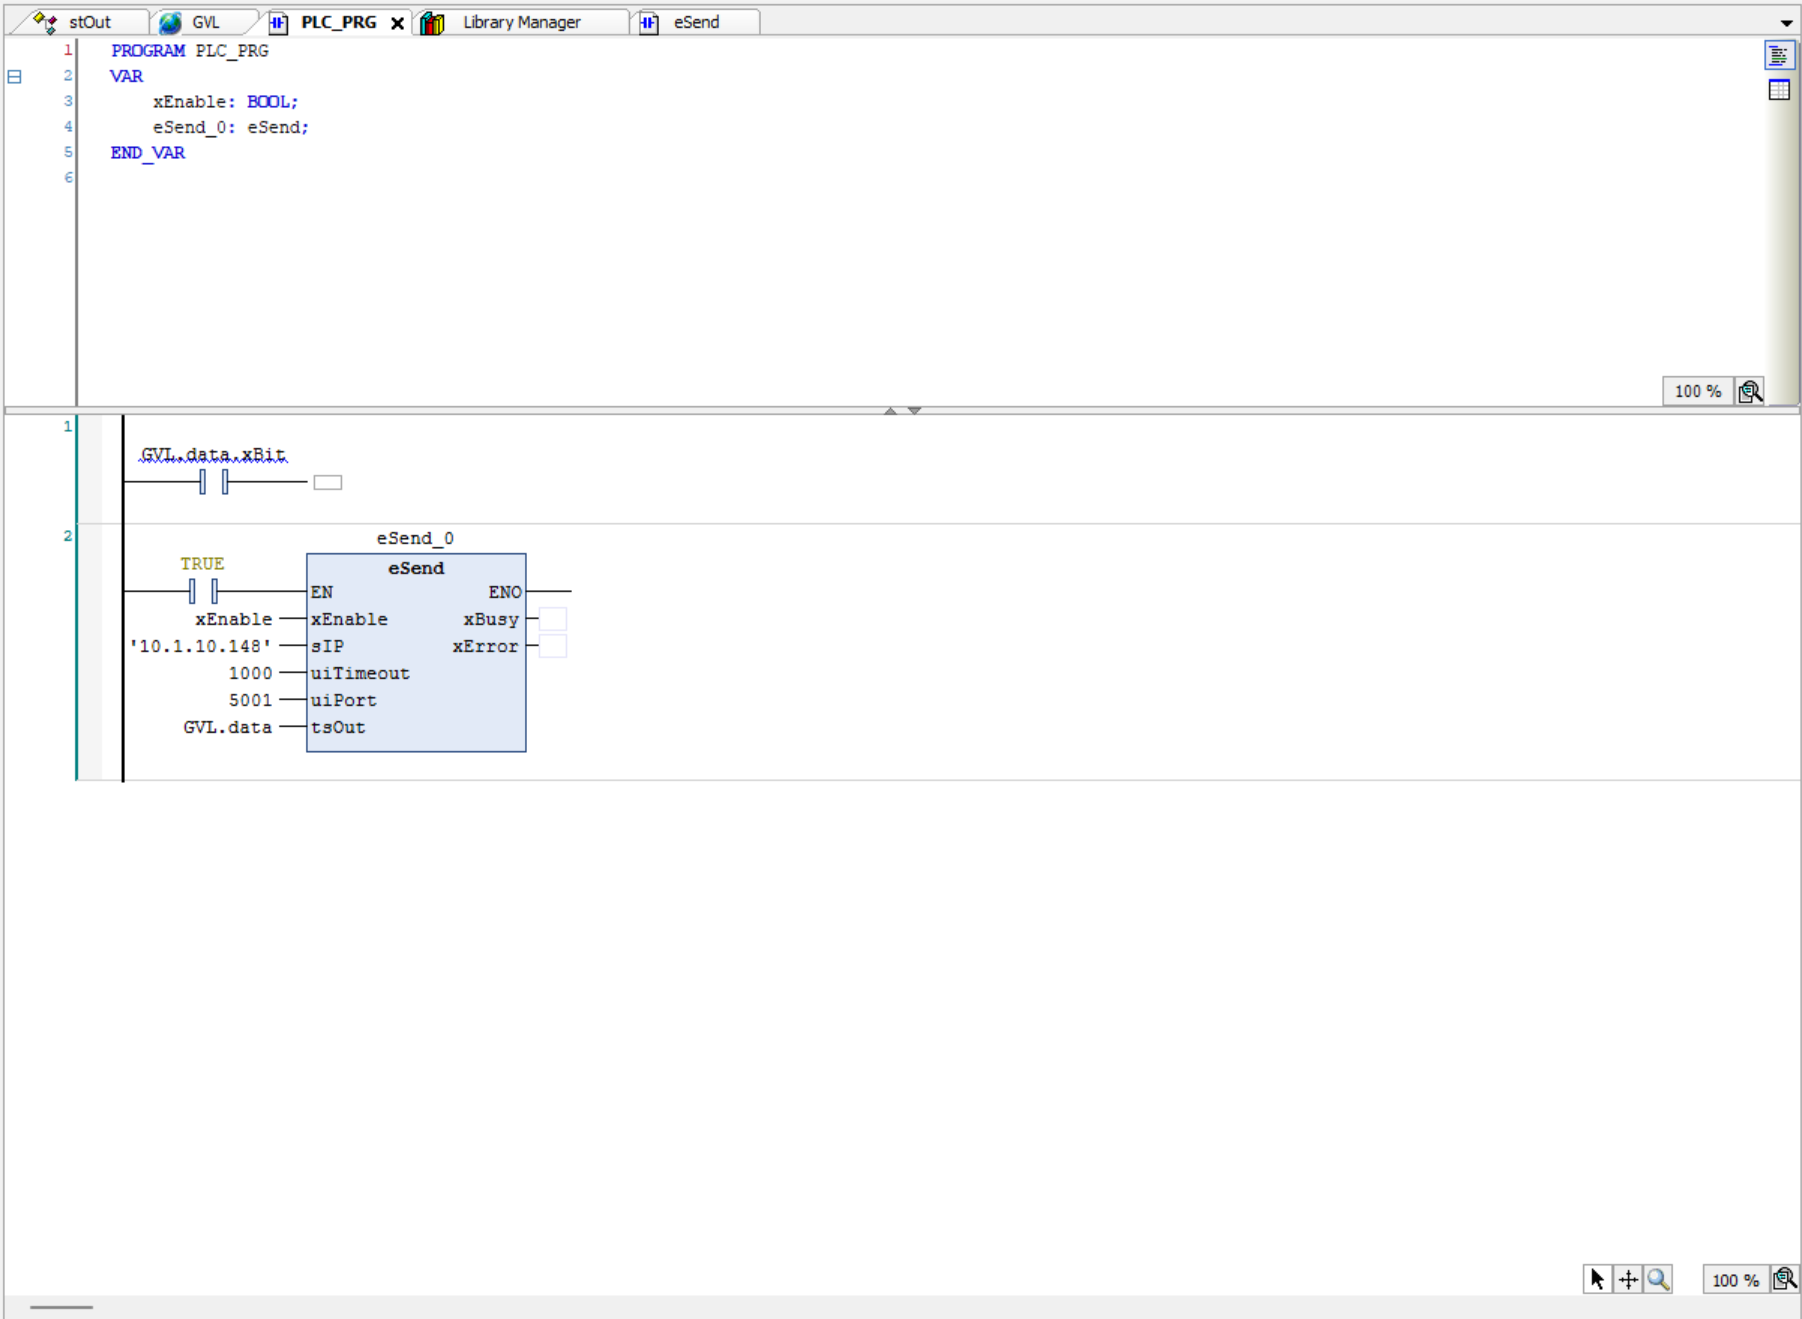
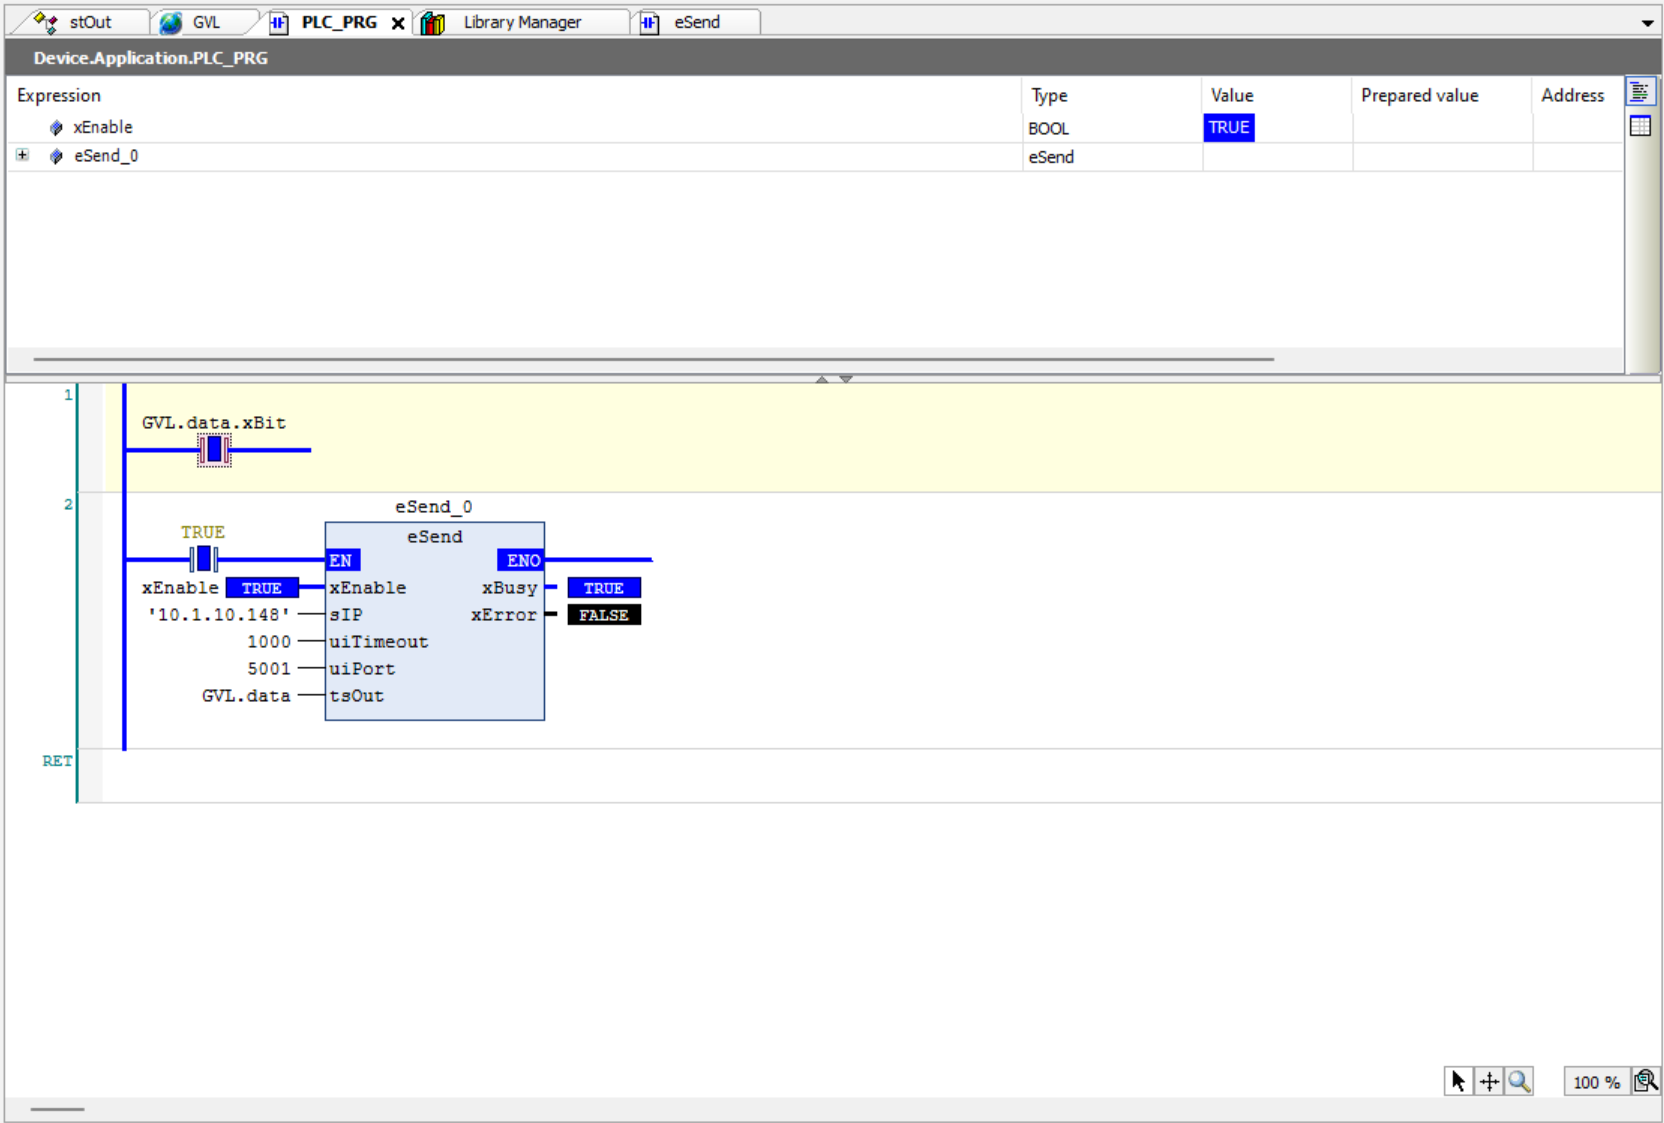
To use this function block, enter the IP of the server PLC, timeout, port number, and an instance of the structure that you would like to send:
-
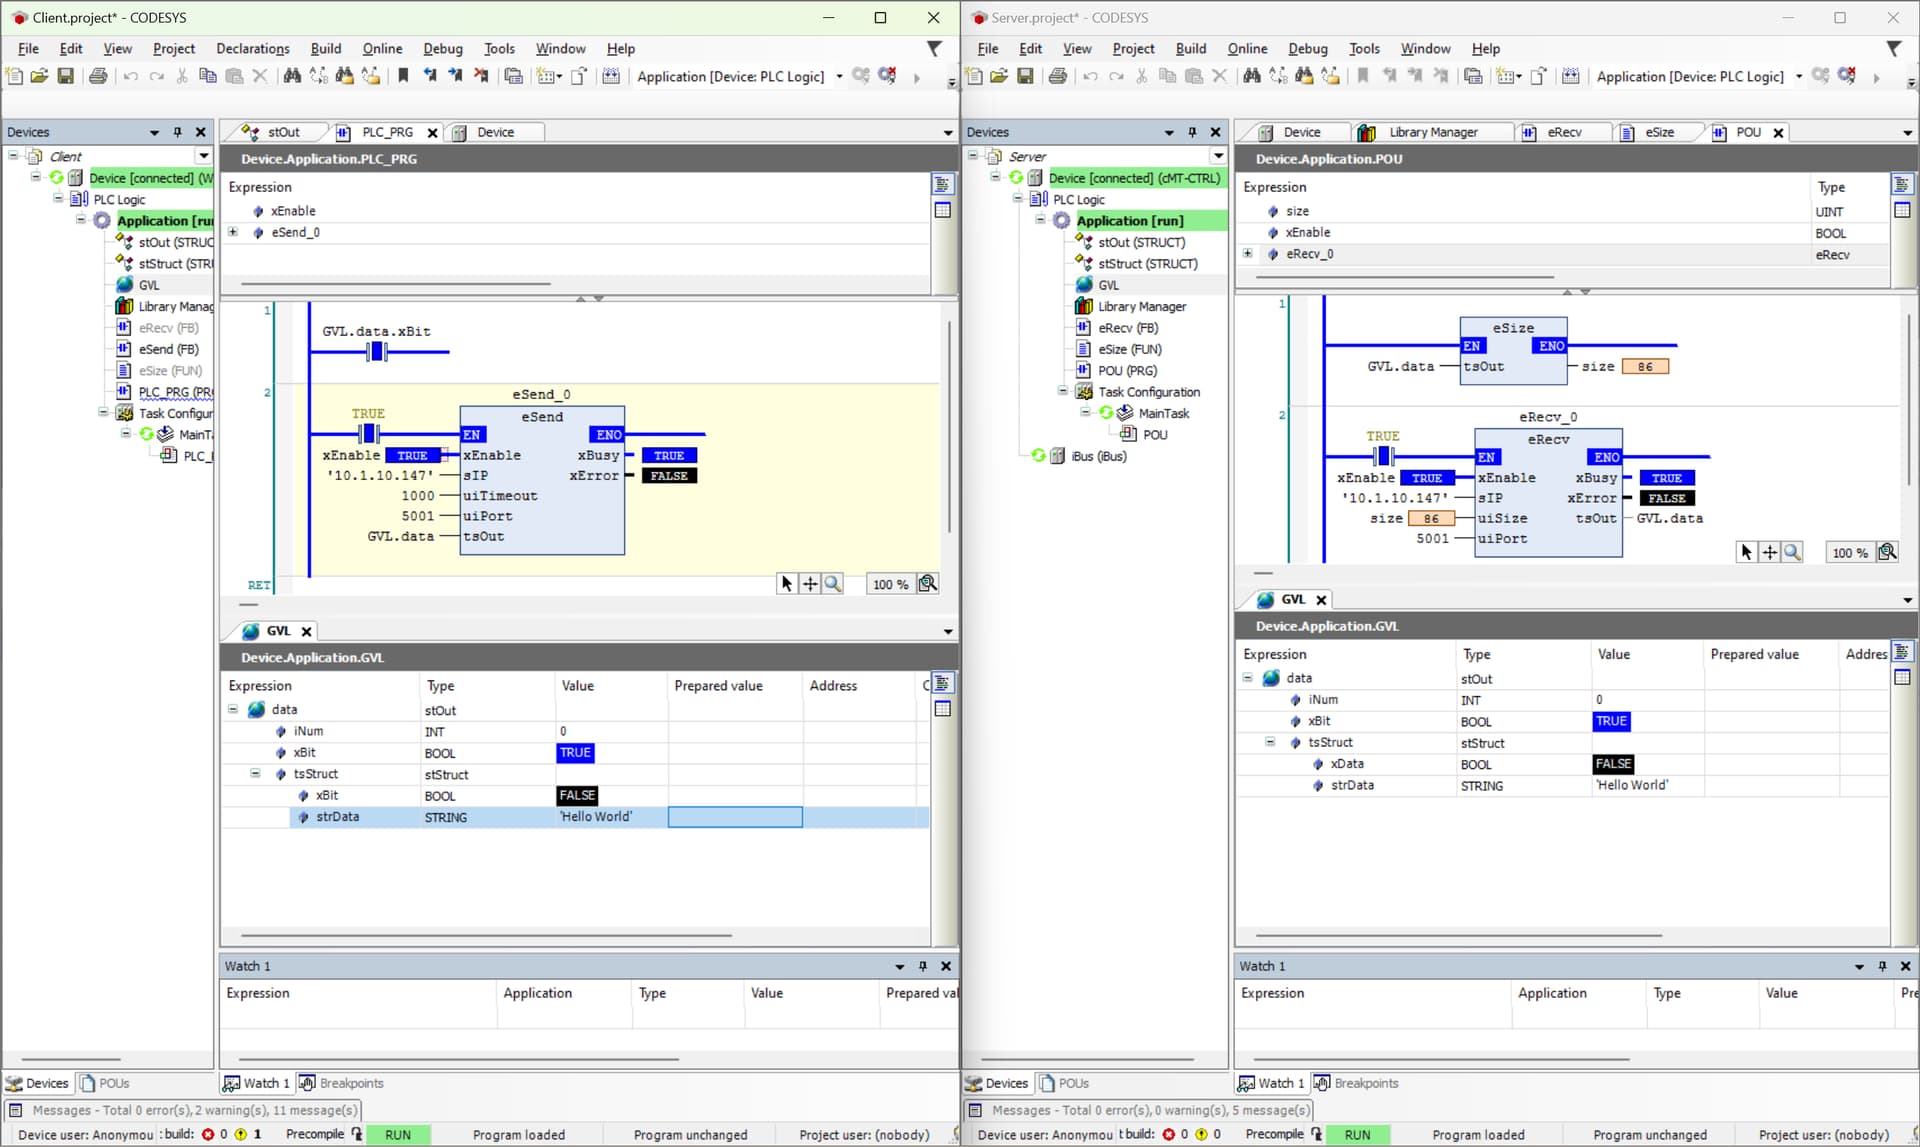
When xEnable is true, the variable instance that we’ve called GVL.data will be sent periodically to the client:

Server:
Note: The structure of stOut within the client must be configured in the same way and in the same order in the server project.
-
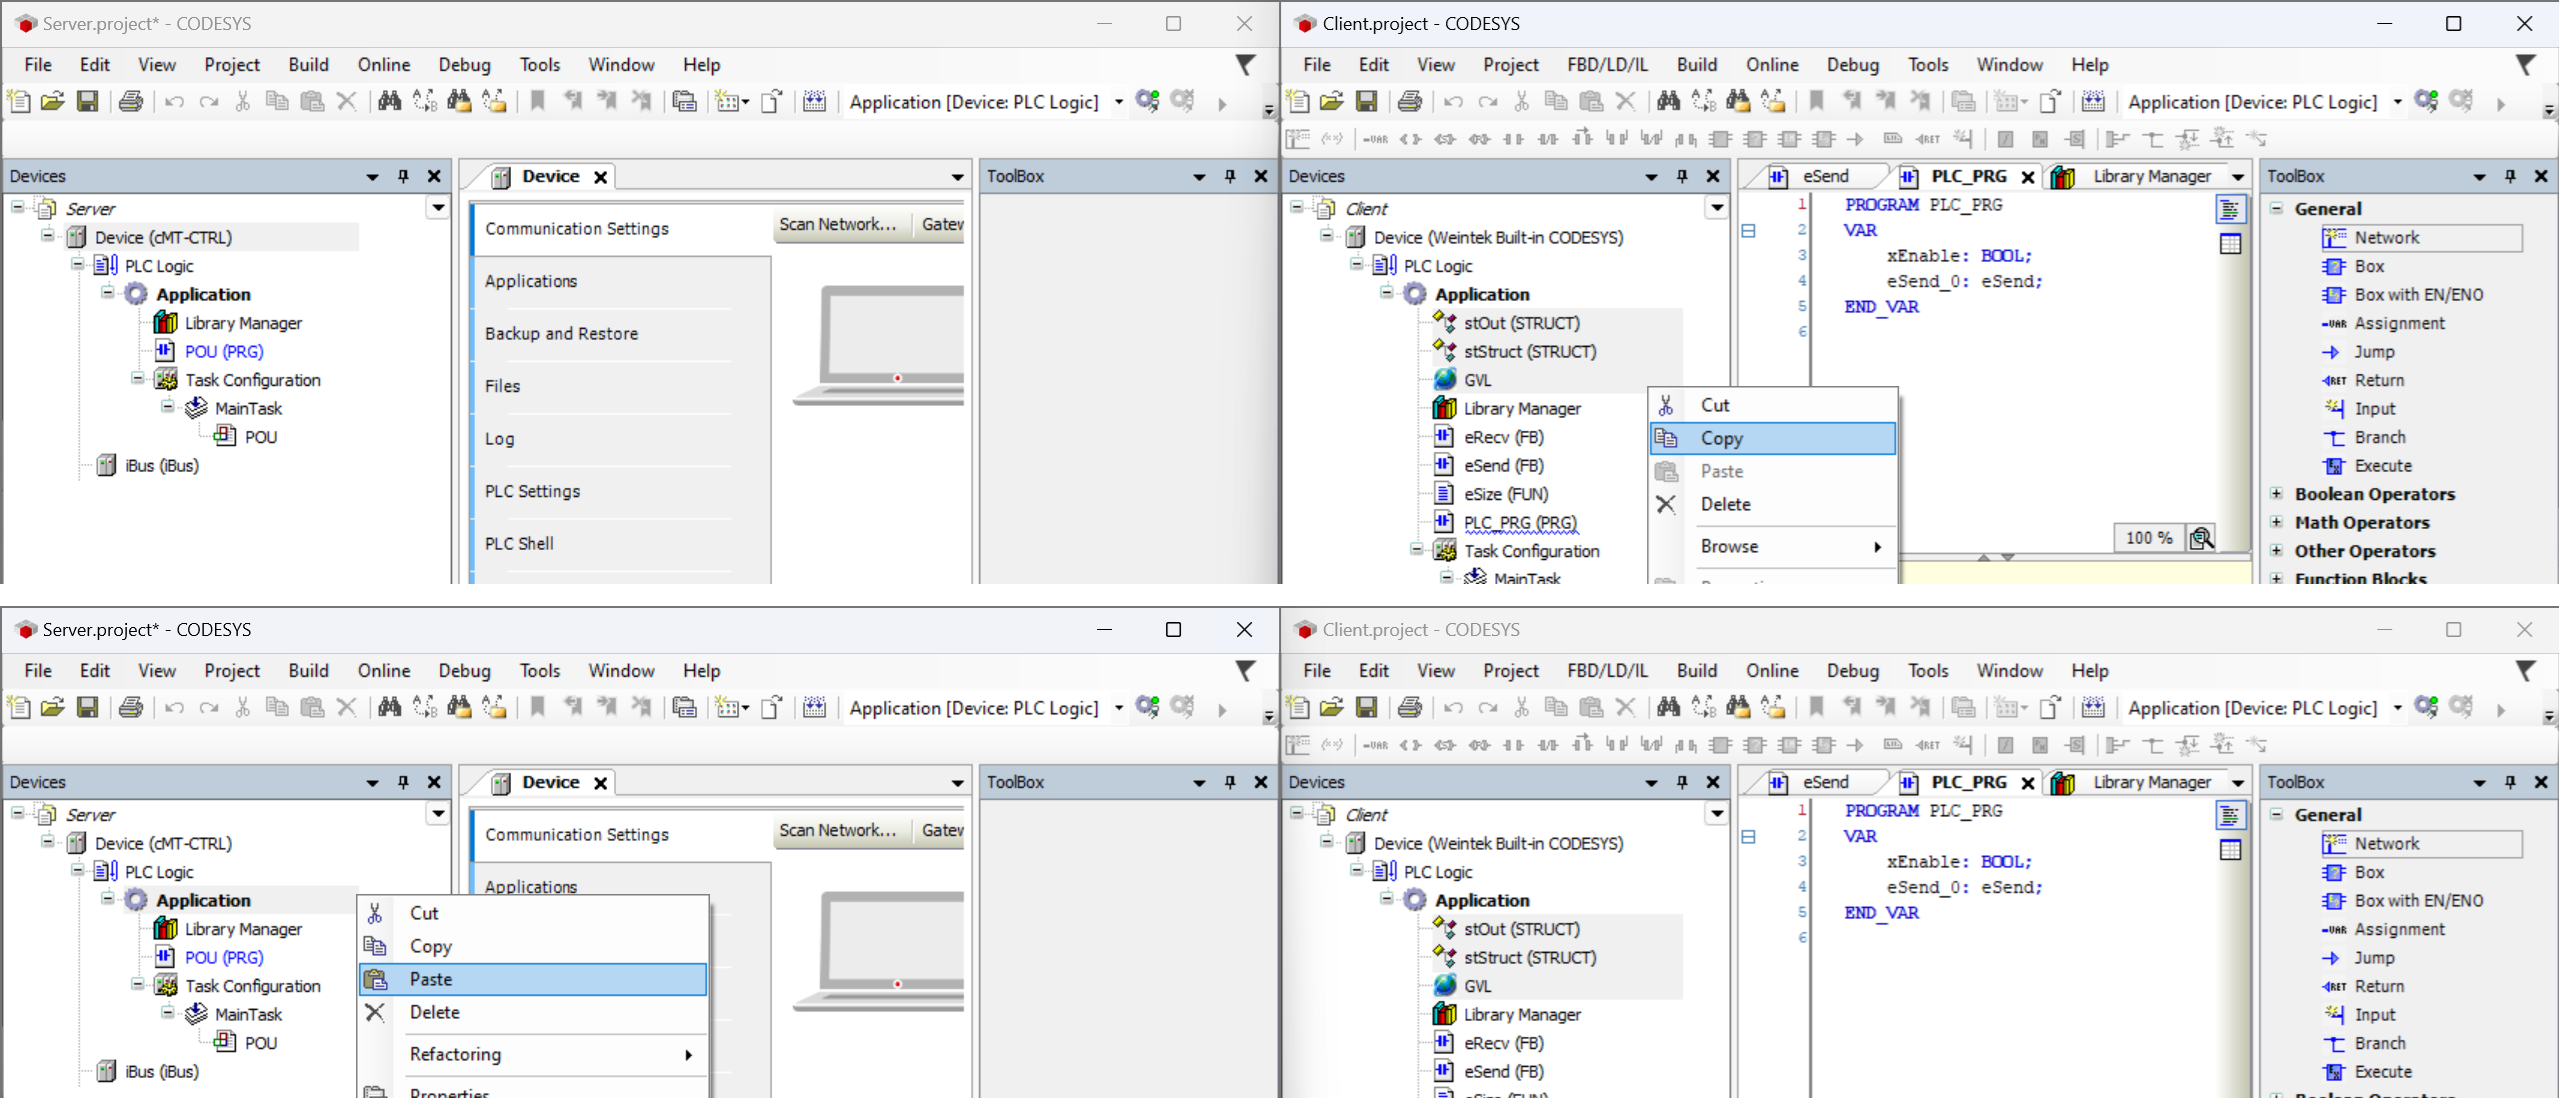
To capture data sent by the client we will need to implement steps 1 ~ 4 within the server project, but the easiest way is to simply open both projects side by side and copy the structures and GVL from one, to the other:
Note: Copy the DUTs and GVL from the client project then, right click “Application” within the server project and select paste.
-
Repeat steps 6 ~ 9 within the server project to add the network library:
-
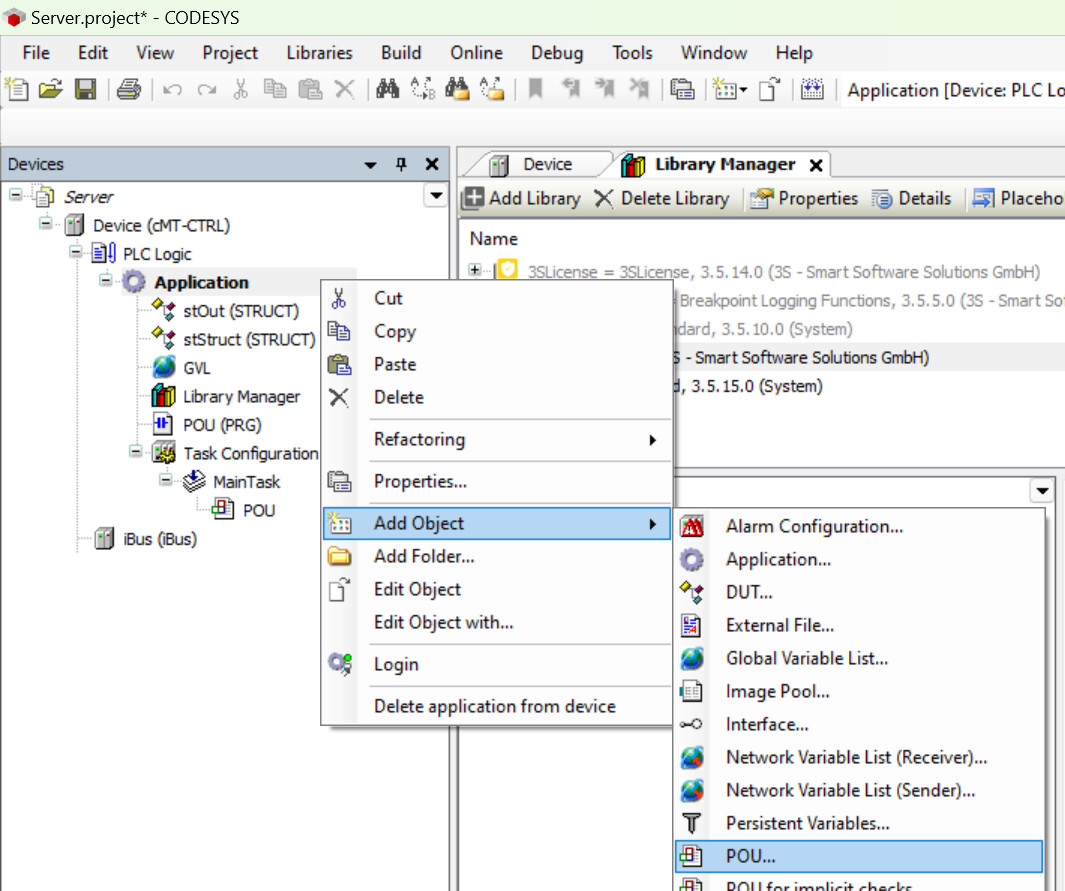
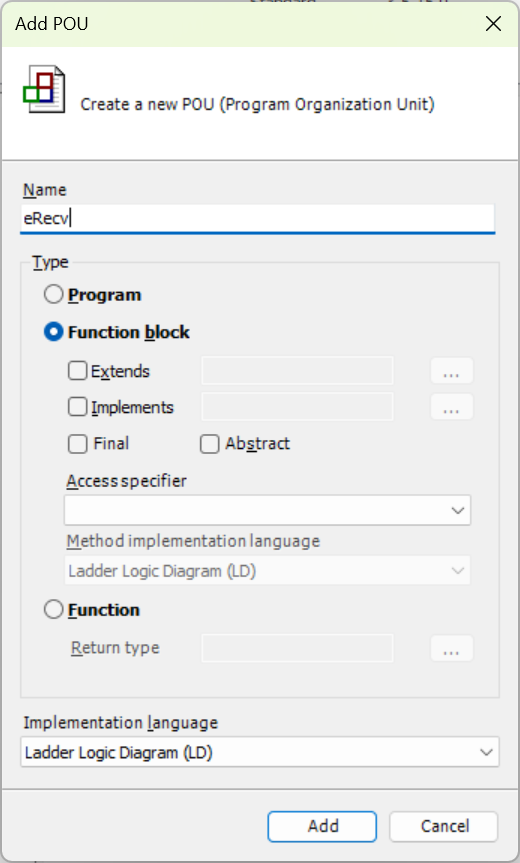
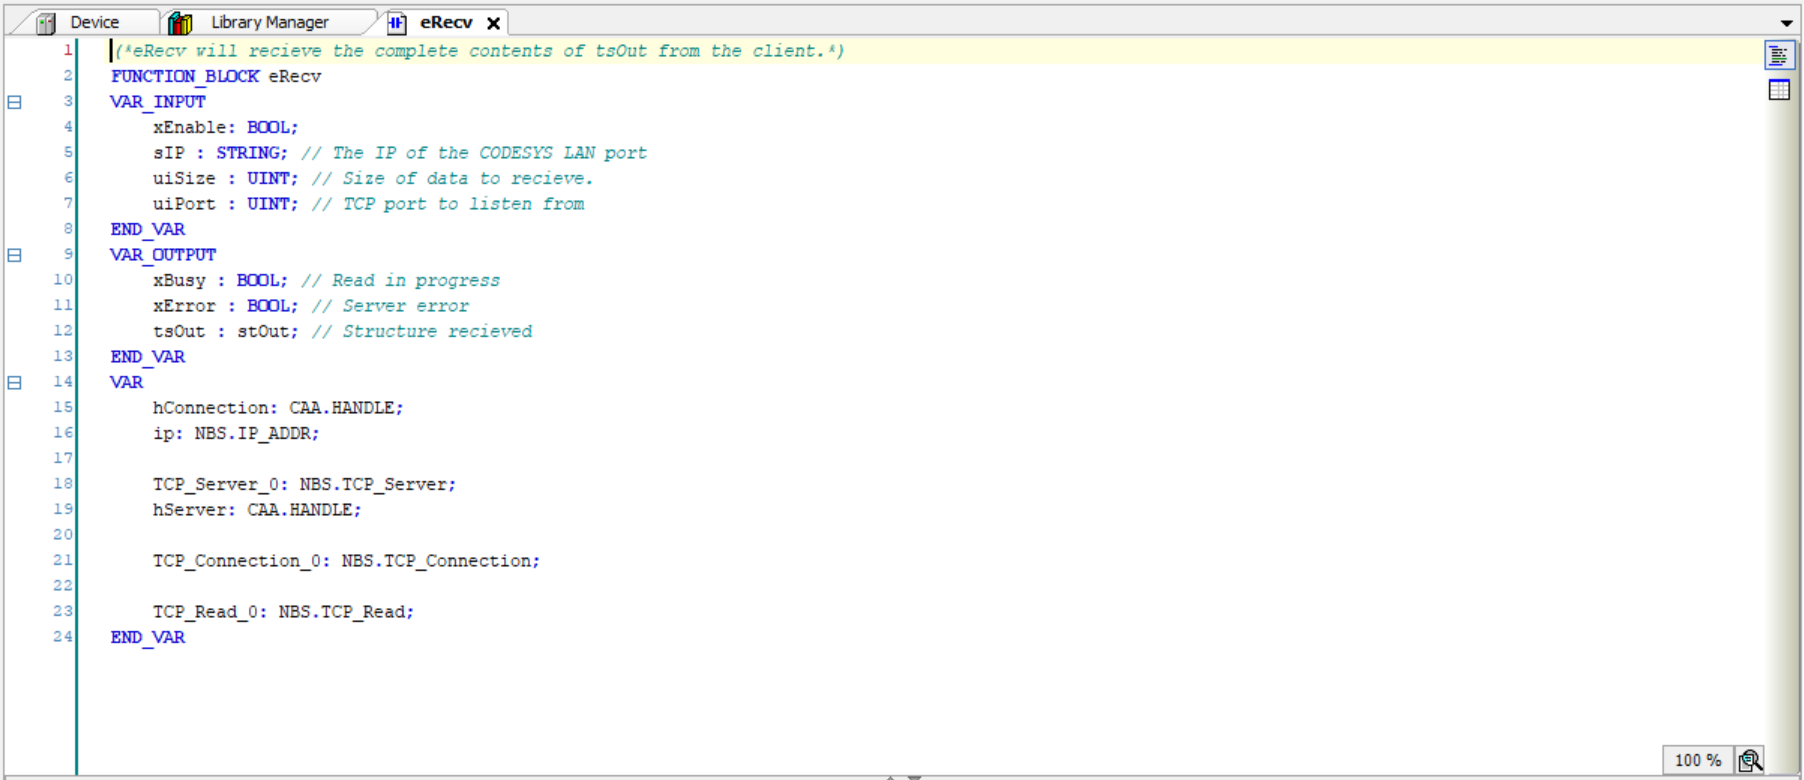
To receive the DUT, we will need to write the “receive” function. To do this, right click “Application”, select “Add object”, and select “POU…”:
-
Select the following options and click “Add” to create the send function block:
-
To simplify these steps, I’ve listed the variables used below:
Note: The function block shown in steps 5 ~ 6 was created for use in a test environment and may require modification.
-
The function block was designed as shown:
Note 1: Take note of the EXECUTE function as this is where the server’s IP is utilized and where the xEnable parameter of the TCP_Read_0 function block is enabled.
Note 2: To utilize create these function blocks, please see appendix a.
-
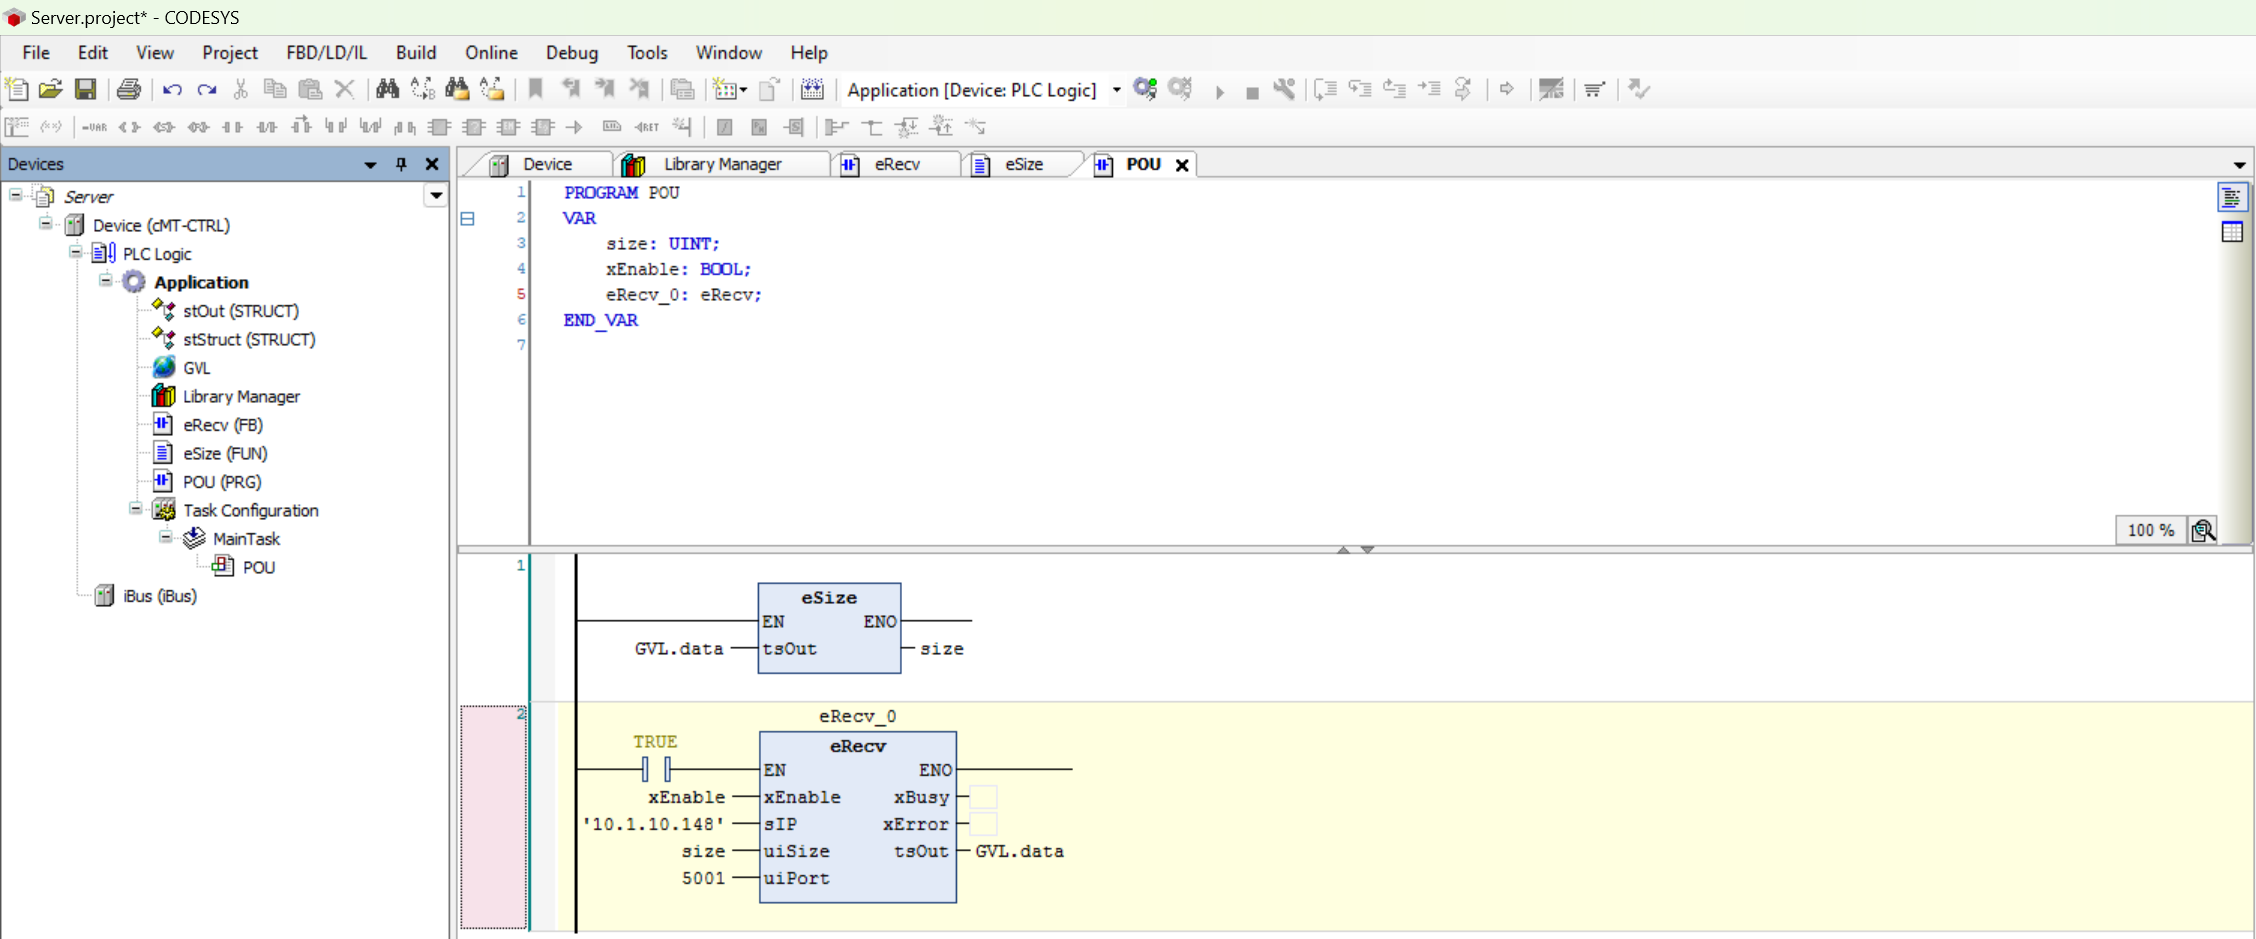
To determine the uiSize parameter, we have created the eSize function shown below:
-
To use the eRecv function block, enter the IP of this server PLC, timeout, port number, and an instance of the structure that you would like to send:
Note: The IP of the server PLC, this PLC, must be used within the eRecv function block as well. This parameter should be the same as the IP address of this device.
-
When xEnable is true, the variable instance that we’ve called GVL.data that is sent by the client will be received and mapped to the local GVL variable on the server:


Appendix a:
-
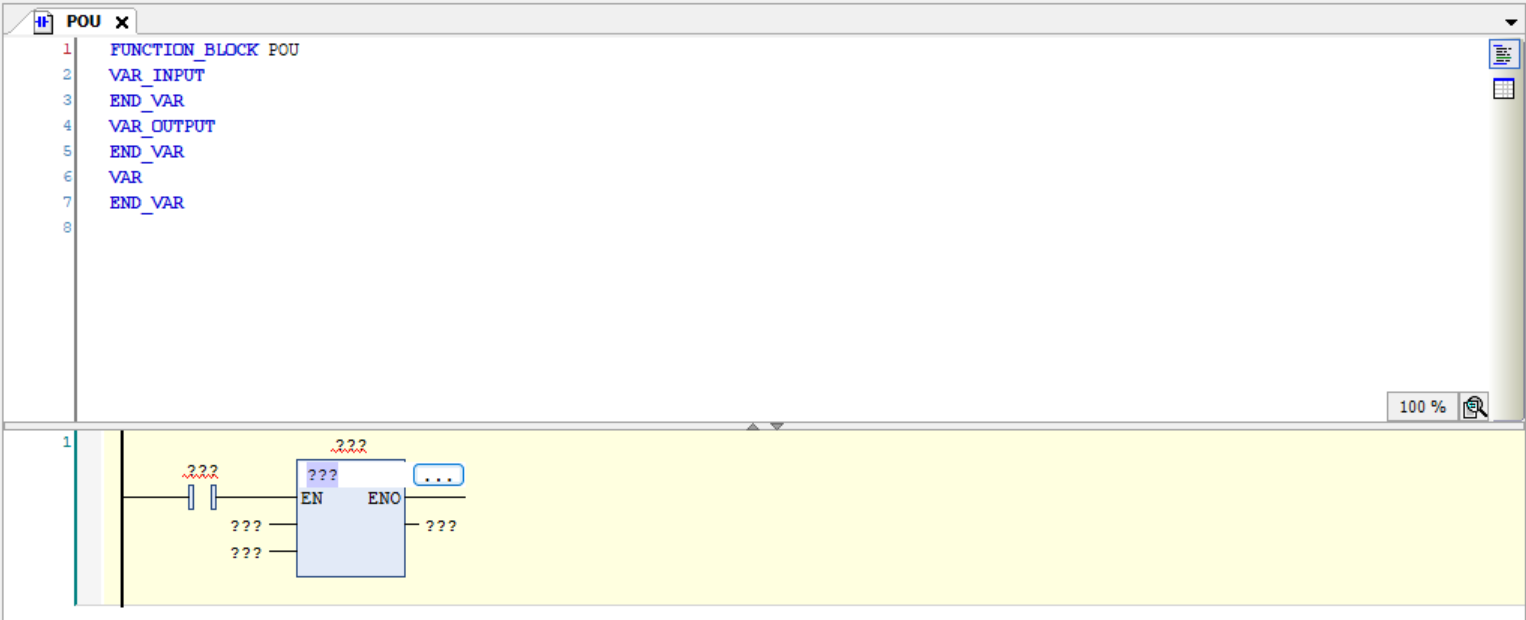
To create a function block using an added library, select an add a ‘Box’ or ‘Box with EN/ENO’ from the toolbox:
-
After placing this box, click the [???] within the box and select the ellipses […] to access the Input assistant:
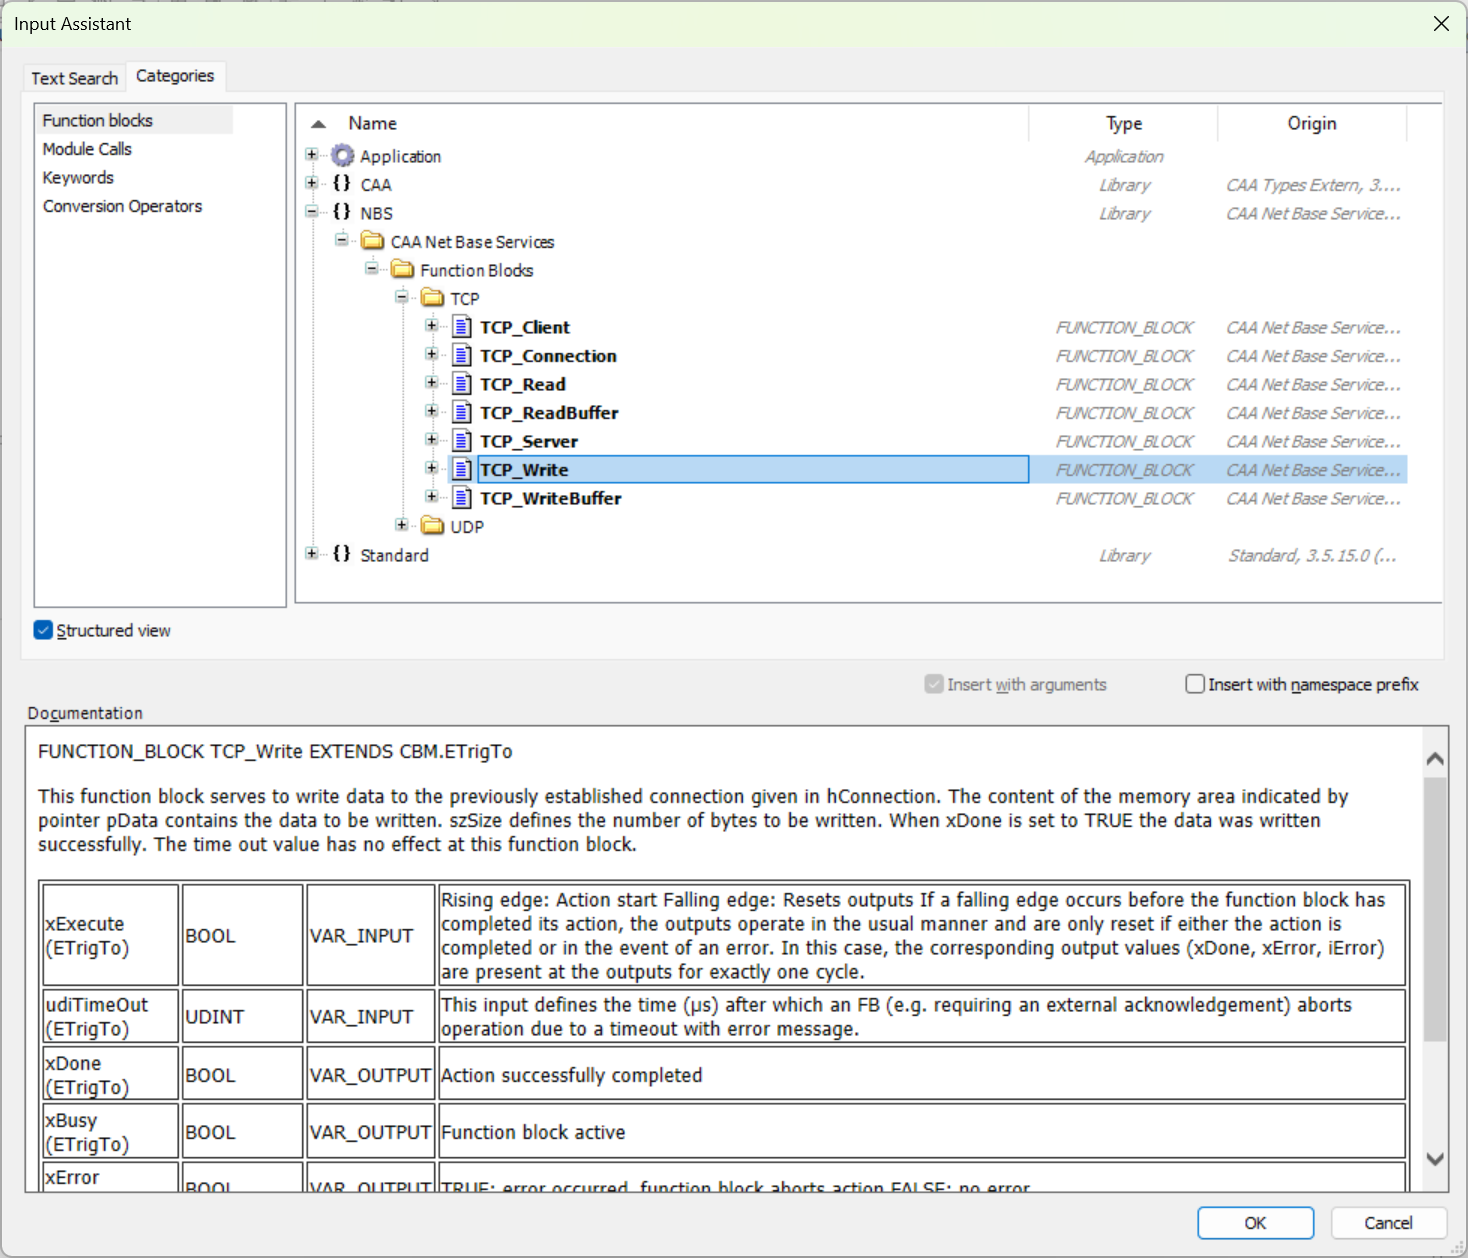
-
Use the Input assistant to select the required function block from the network or NBS library:
-
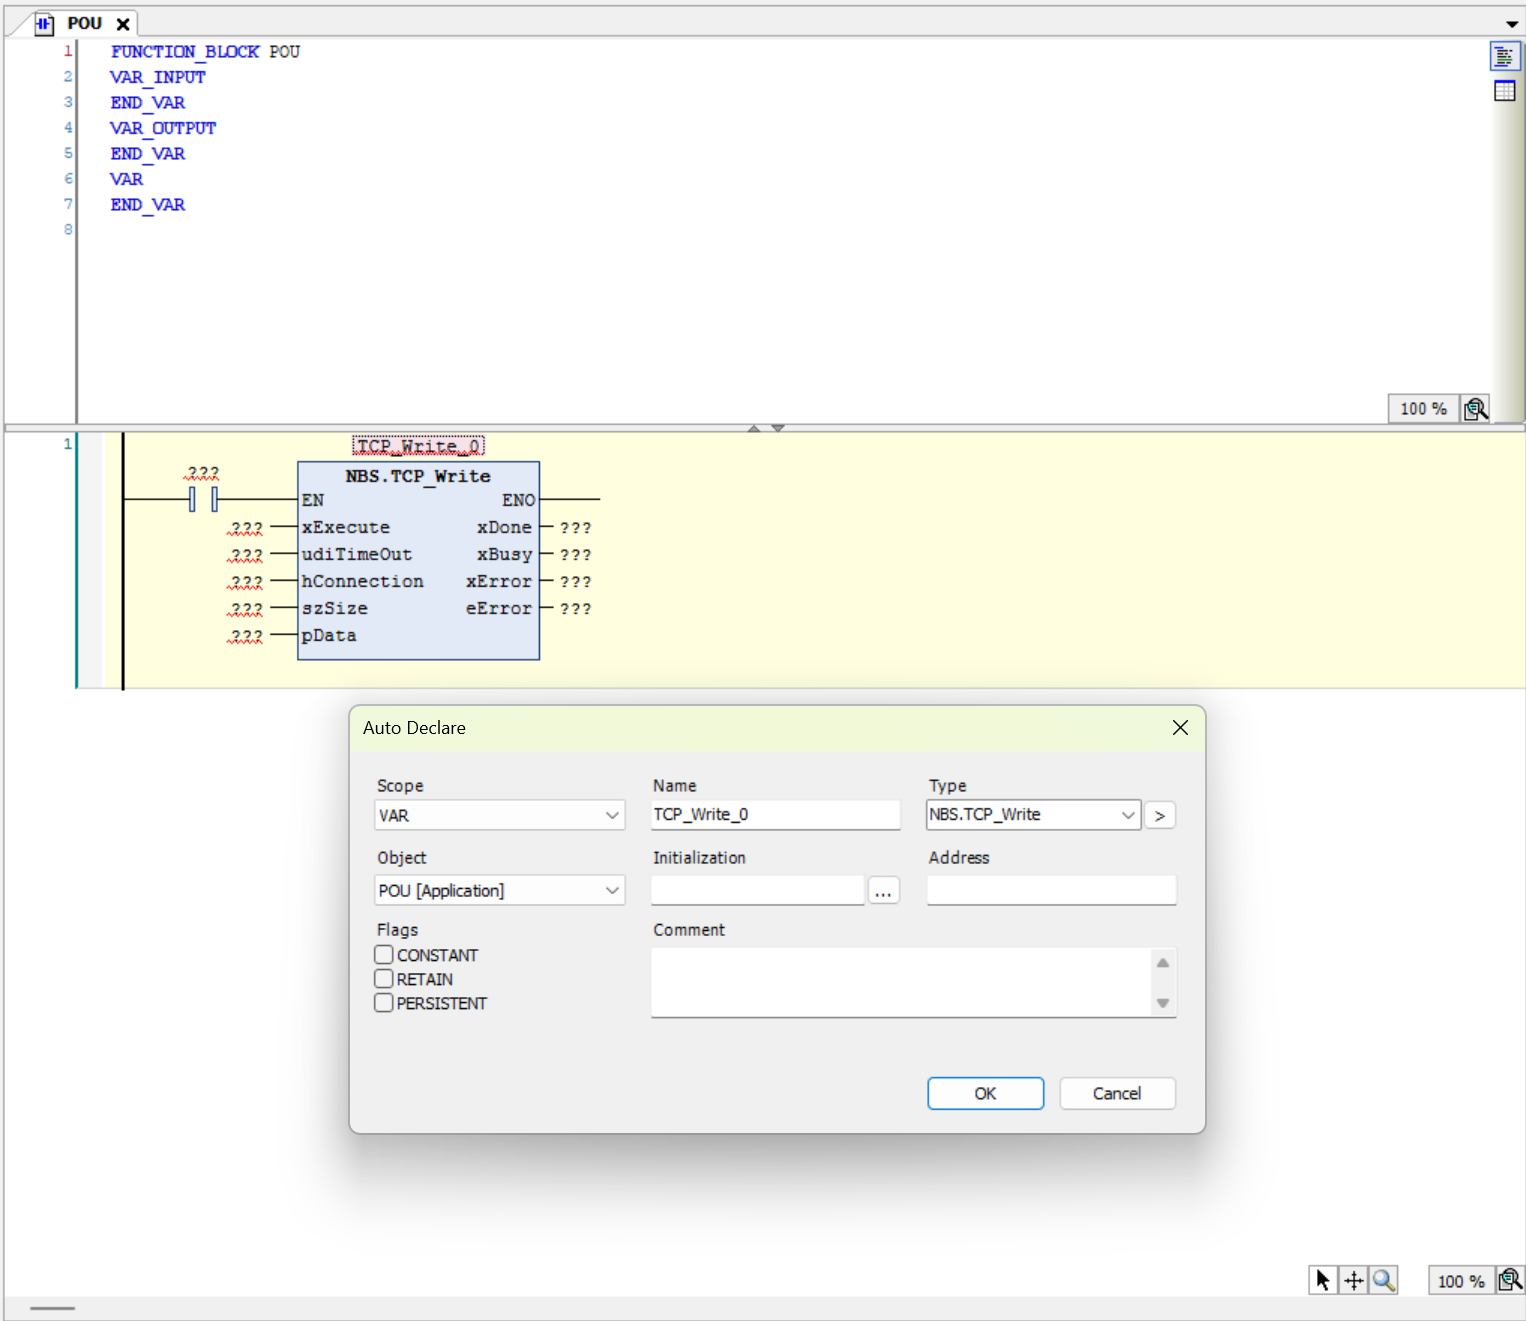
Click “OK” to select the function and the function name will display in the field below:
-
Click the [Enter] key and follow the prompts to add a declaration for the function block: