Introduction:
In EasyBuilder Pro, the “Indirect window” is a utility that will allow you to display a dynamic pop up window.The “Indirect window” is triggered when the a value that corresponds with an existing window number is written into the “Read” address.
Software Version:
EasyBuilder Pro 6.03.02.463+
Instructions:
-
In this example, we will be using a “Numeric” object to change windows. You can find this option in the “Object” tab within the “Input” section:
-
Within the “Read/Write” section, assign this object a free space in HMI or device memory:
-
Next, create a secondary window using the “Window Tree.” If the window tree is not displayed on your left, navigate to the “View” tab and select “Window Tree”:
-
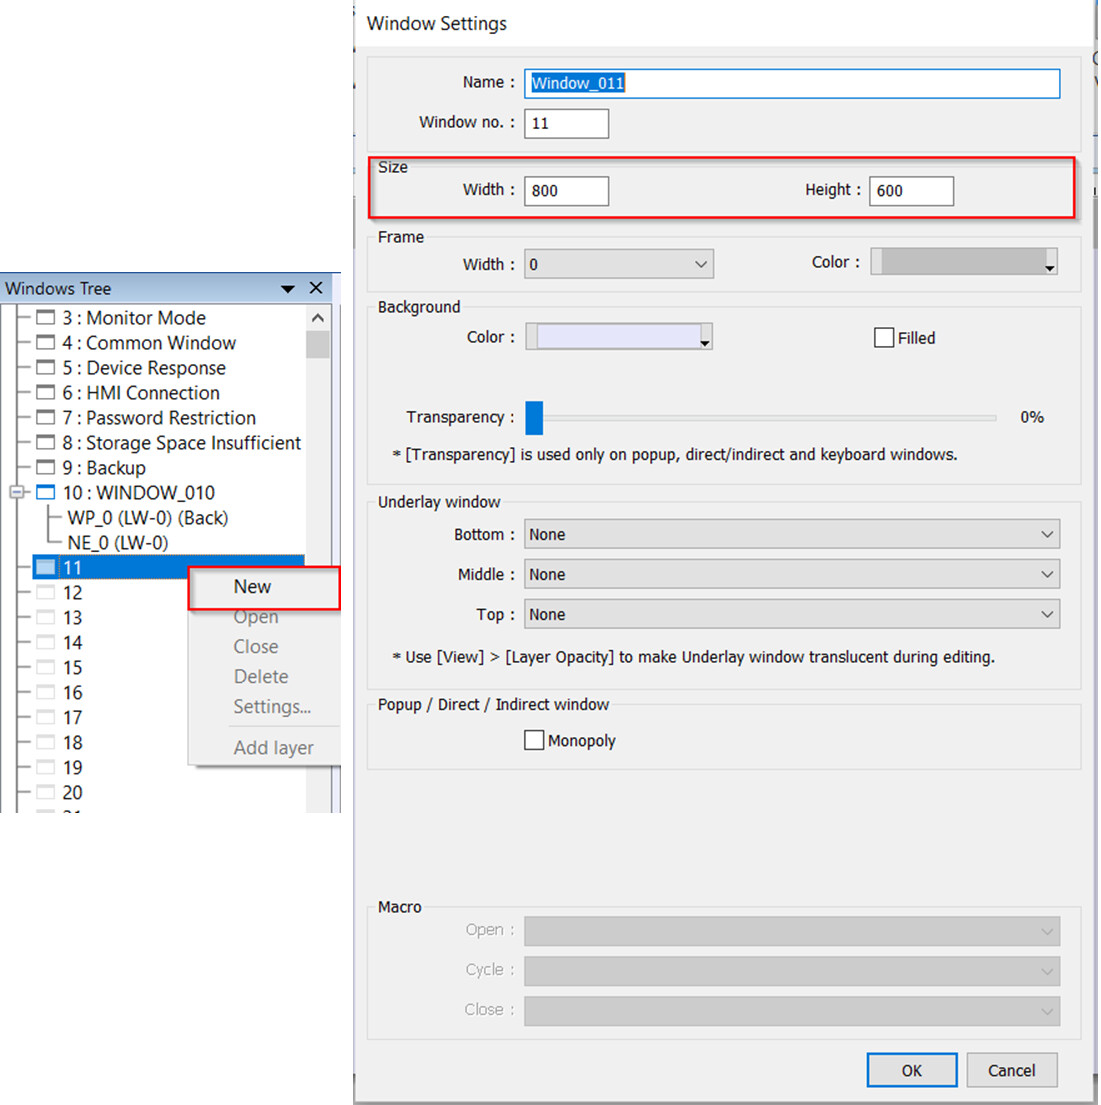
In an empty window, right-click and select “New,” followed by “OK.”:
Note: In this example, this window will be displayed by the “Indirect window” object on our primary window. If you wish to prevent the primary window from being obscured by the secondary window, you can adjust the size of the secondary window in the “Size” section before clicking “OK.” You can also modify this later by right-clicking on the specified window and navigating to “Settings”.
-
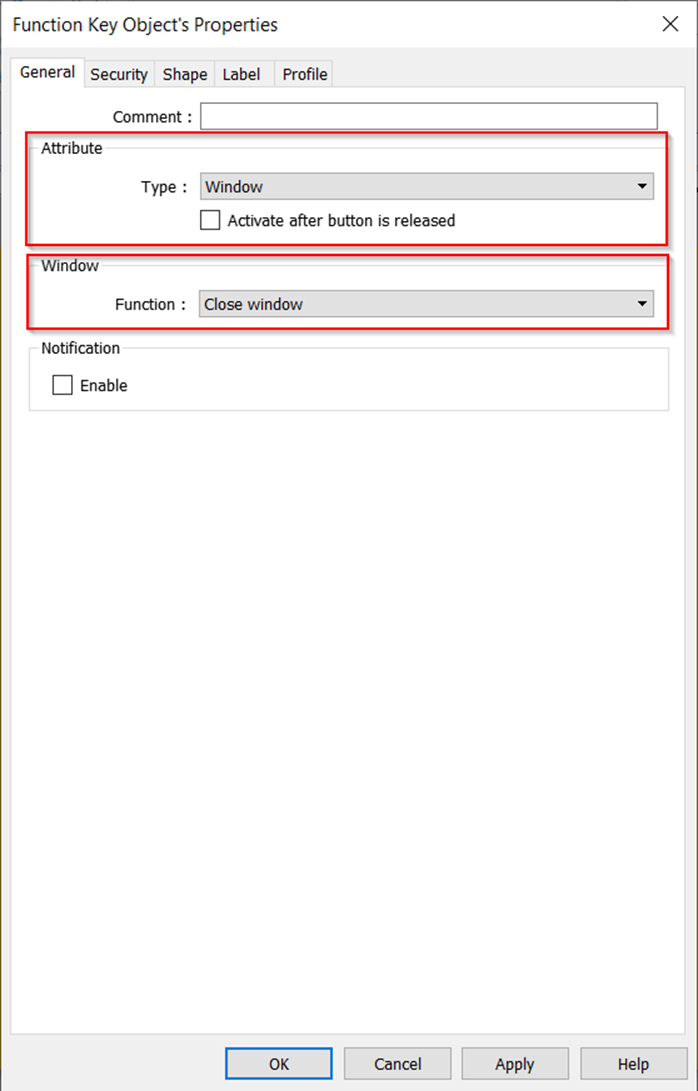
While on your newly created window, create a button to close this window. This can be accomplished using a “Function Key” object. You can find the “Function Key” object in the “Object” tab within the “Button/Switch” section. Within the “Type” drop-down list, select “Window” and ensure the “Function” is set to “Close Window”:
Note: As an alternative, you can use a “Set Word” object and write a value of 0 to the read address of the indirect window to close it.
-
In the primary window, we will create an “Indirect Window” object. This can be found within the “Object” tab under “Embed Window”:
-
Within the “Indirect Window,” you can select between (A) “Embedded in parent window” or “Popup window”. When “Popup window” is enabled, the indirect window will be placed on the highest layer. This means that all objects on the current base window will be displayed behind the popup window. Whereas “Embedded in parent window” will embed the indirect window in the calling window. If the indirect window is placed on an “Underlay” window that is being used as a background (see post) and “Embedded in parent window” is selected, the window that will be displayed may be placed behind other objects on the base window. In this example we will be using “Popup window”. (B) Within the “Read/Write” section, make sure the address matches up with the “Numeric Object” we placed earlier. (C) In the “Animation” section you can customize how your indirect window will be introduced and exit. You can choose an effect from the drop-down menu and then choose how long your animation will last according to the duration box.
-
We’ve created a “Numeric” object addressed to the Read address of our “Indirect window”. When we enter a number into the “Numeric” object, the HMI will display the window no. corresponding with the value written to its address: