Introduction:
In this guide, we demonstrate how to create a simple project that will allow you to specify a USB drive as either “USB disk 1” or “USB disk 2”. This approach eliminates the need to insert each USB in a specific sequence and permits the use of a USB dongle such that more than one USB drive may be used.
Software Version:
EasyBuilder Pro 6.05.02.712+
Instructions:
-
Configure an “ASCII” object to hold the USB partition ID of the last USB inserted into the HMI. To create an ASCII object, click the “ASCII” icon within the “Object” tab:
-
Configure the “ASCII” object to read system tag “LW-12492”. This stores the USB ID of the currently inserted USB drive in the HMI:
Note: Set the string length to 4 words (example).
-
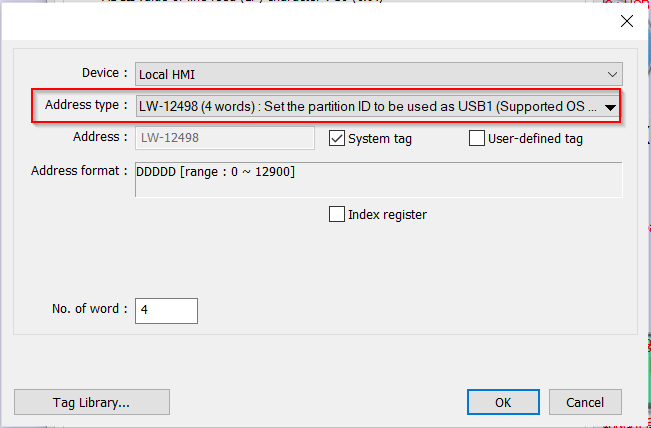
Make two copies of this “ASCII” object, resulting in a total of three “ASCII” objects. Configure the first copy such that it writes to “LW-12498 (4 words): Set the partition ID to be used as USB1”. This field will allow you to define the USB ID that the HMI will recognize as USB disk 1:
-
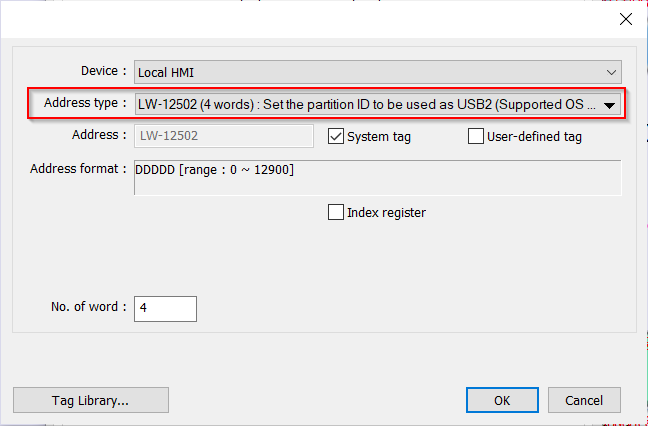
Within the third ASCII object, modify the “Address Type” to “LW-12502 (4 words): Set the partition ID to be used as USB2”. This field will allow you to define the USB ID that the HMI will recognize as USB disk 2:
-
Configure a “Data Transfer” object to transfer the USB ID of the last inserted USB to “LW-12502 (4 words): Set the partition ID to be used as USB1”. To do this, select the “Data Transfer” drop-down list within the “Object” tab, then select “Data Transfer (Per-page)”:
-
Within the “Data Transfer” object, follow these steps:
(A) Adjust the “No. of words” to 4.
(B) Configure the “Source” address as “LW-12492 (4 words): Last detected USB partition ID.”
(C) Configure the “Destination” address to “LW-12498 (4 words): Set the partition ID to be used as USB1.”
-
Copy the “Data Transfer” object and modify the “Destination” address to “LW-12502 (4 words): Set the partition ID to be used as USB2.”. Then, download this project to the HMI:
-
Insert a USB disk into the USB dongle and click the “Data Transfer” object to transfer the USB ID into either “LW-12498” or “LW-12502”. Within this example, the HMI will recognize that this is USB is “USB disk 1”:
-
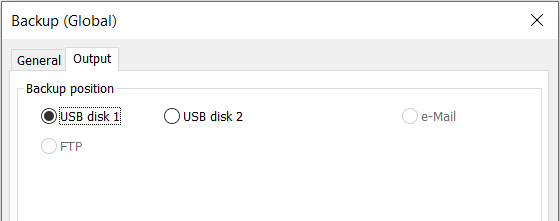
In addition, any object configured to write to “USB disk 1” will now only write to the USB drive with a matching partition ID:
Note: This “Backup” object will only write to the USB with the partition ID that matches the partition ID of “USB disk 1”.


Note
-
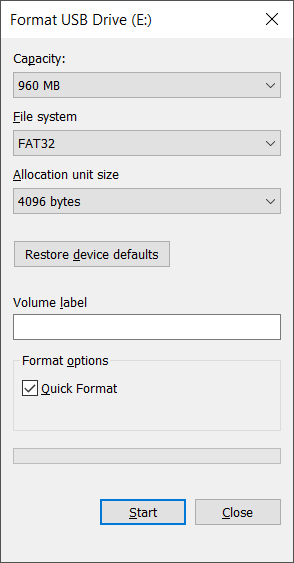
Each USB must be formatted to “Fat32”:
-
To obtain a demo project, please download the “USB Partition ID” demo from the “Application Specific” section of the “Demo Projects” post.