- HMI Model: Wientek MT8072iP/MT8071iE
- EasyBuilder Pro Version: V6.10.01.259
I’m converting a project originally created in FactoryTalk View Studio. It makes use of the “Replace Display Number” and “Remote Display Number” features.
Replace Display Number (Write): You set an address in the PLC which you will send the number of the display you wish to appear. I.e. If you set the address to N7:200 and you want display number 10 to appear you would set N7:200 to the value 10.
Remote Display Number (Read): You set an address in the PLC which will receive the current number of the display which appears on the PLC. I.e if you set the address to N7:201 when the display is changed to display number 15 the value of N7:201 would be set to 15.
Is there a way to create the equivalent functionality in EasyBuilder Pro?
Regards
Ian
Hi @Usireland,
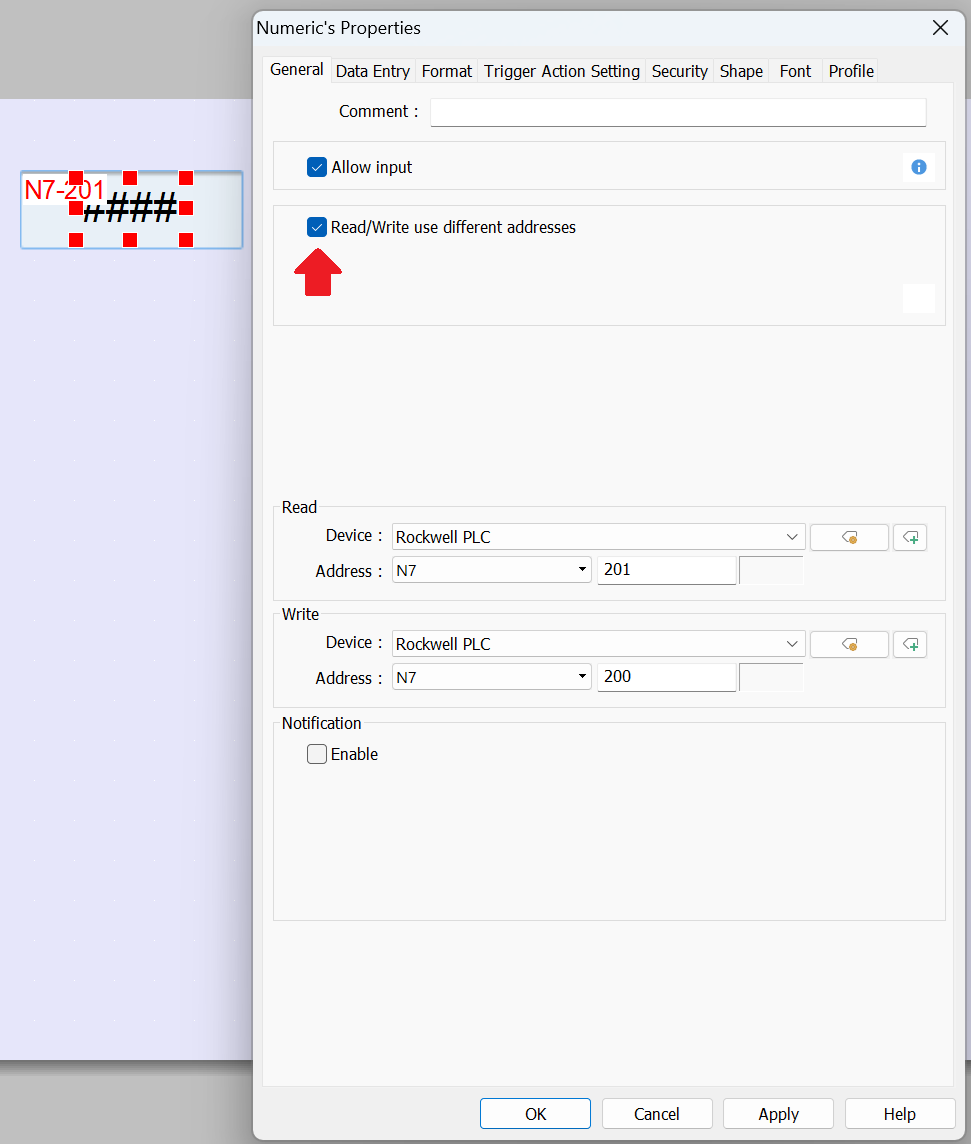
Based on your description, this sounds as if it may be accomplished by using a “Numeric” object with “Read/Write use different addresses” enabled:
In this example, the read address of N7:201 will display the “Remote Display Number” while the write address of N7:200 will allow the user to write a new value to the “Replace Display Number” register. Can you please let me know if this solution is suitable for your application?
Brendon,
Thank you for the reply, this maybe useful for me as well but it does not solve my problem.
I need to be able to read the “Remote Display Number”, i.e. the number of the display that is currently showing on the HMI. Perhaps we have a difference in terms, when I look at the “Window Settings” by right clicking on the display and selection “Attribute”, there is a value there “Window Number”, I’m guessing this is what Allen Bradley call “Display Number”
I also need to be able to set the “Replace Display Number” so that whatever number is placed in this register causes that numbered Window/Display to appear on the HMI.
Hi @Usireland,
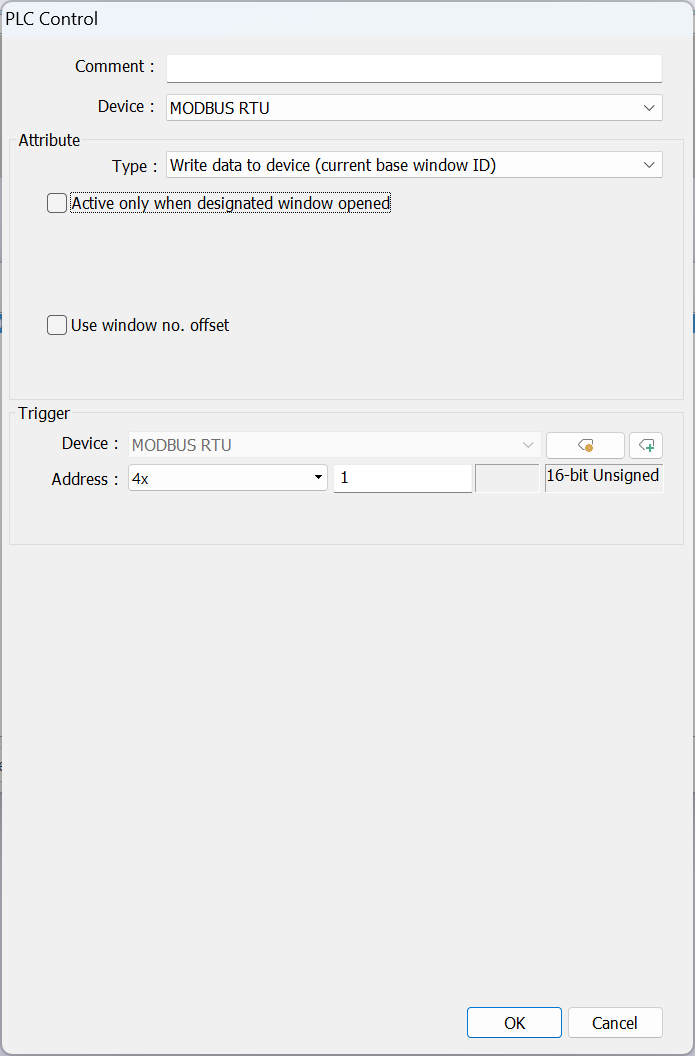
Thank you for clarifying, in this case you can use the “PLC Control” object in the object tab to write the current window number to your PLC:
To change the current window, you can use a separate “PLC Control” object as in this tutorial: Link
I hope this helps!