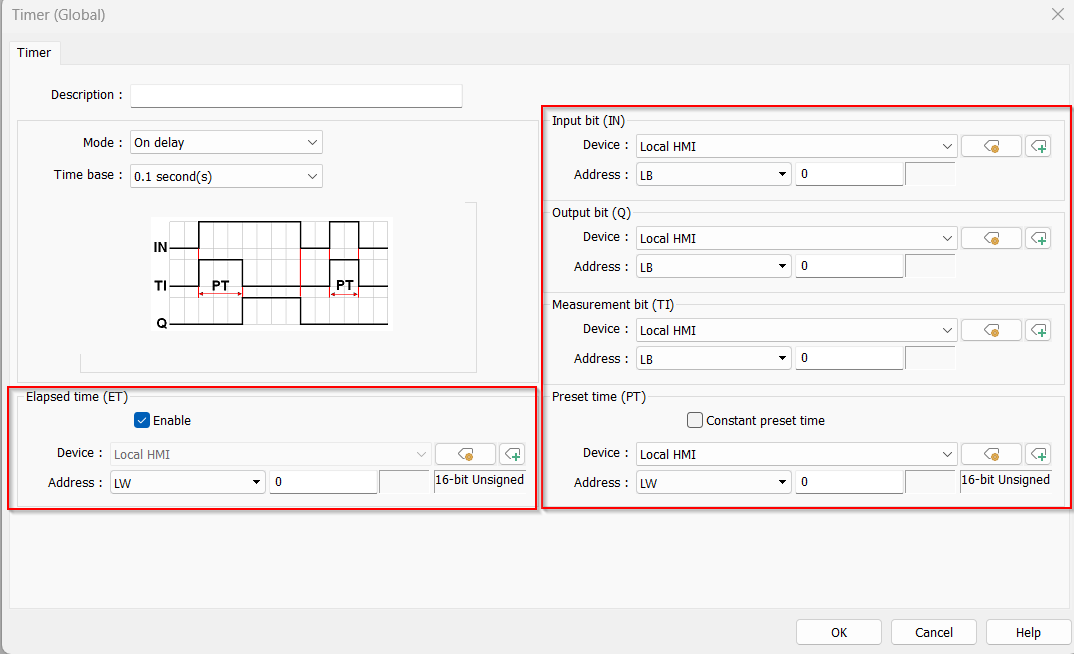
Introduction:
The timer object within Easy Builder Pro can be used to display and keep track to time throughout a project. There are multiple modes and bits within the timer object to allow for customization and modifications.
Software version:
Demo Project:
Instructions:
- The timer object can be found within Timer-related drop-down menu within the Object tab. There are two versions of the timer:
→ Timer (Per-page) = Scope of the object to restricted to the window its on. It only works when the window it is on is active. If you switch to another window and return, the elapsed time (ET) will reset to 0. (Will place a white outlined box on the page with the timer. It will not show up during project download.)
→ Timer (Global) = Timer is active regardless of what page you are on. It continues counting time even if you switch between different windows.
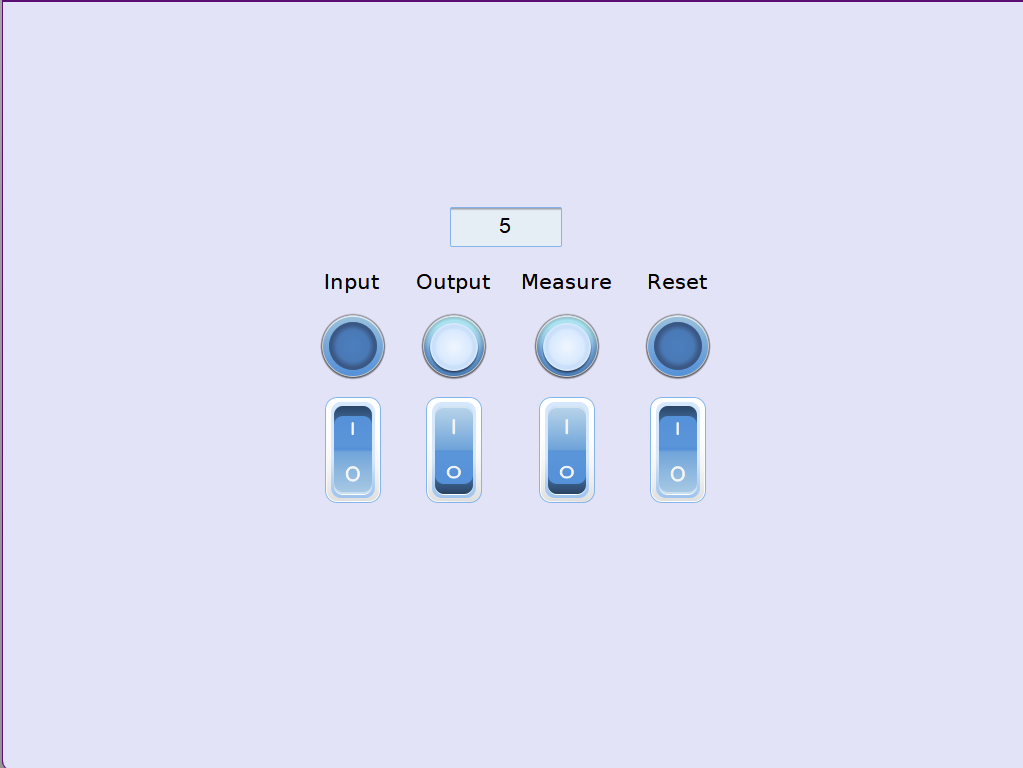
- The timer object has bits and memory address to help control its behavior. There are six of these control memory addresses:
→ Input bit (IN) = Bit that turns the timer on and off.
→ Measurement bit (TI) = Bit that turns on when the timer starts counting time.
→ Output bit (Q) = Bit turn on when the timer finishes or reaches its limit.
→ Elapsed time (ET) = Word object to display the time elapsed since time start. Must be enabled to use
→ Reset bit (R) = Resets the elapsed time back to zero.
- Next will be the mode selection of the timer object. There are five different options:
→ On Delay = When the Input Bit is turned ON, the timer begins counting toward the Preset Time.
Once the preset time is reached, the Input Bit is turned OFF, and the Output Bit (Q) turns ON, signaling that the timing cycle is complete.
The timer then automatically resets to zero, ready for the next cycle.
→ Off Delay = For the timer to start, the Input Bit must be turned OFF. When the Input Bit transitions from ON to OFF, both the Output Bit (Q) and the Measurement Bit (TI) will turn ON.
These bits will remain ON until the Preset Time is reached.
To reset the timer to zero and begin a new timing cycle, toggle the Input Bit from ON to OFF again.
→ Pulse = When the Input Bit is turned ON, the Output Bit (Q) and Measurement Bit (TI) also turn ON and remain active for the duration of the Preset Time.
Once the preset time has elapsed, both the output and measurement bits will turn OFF.
To restart the timer, the Input Bit must toggle from OFF to ON again. This transition resets the timer and begins a new count cycle.
→ Accumulated ON delay = When the Input Bit is turned ON, the timer immediately begins counting toward the Preset Time. At the same time, the Measurement Bit (TI) is also turned ON and remains active until the preset time is reached.
If the Input Bit is turned OFF before the preset time is reached, the timer pauses and retains the current elapsed time. When the Input Bit is turned ON again, the timer resumes counting from where it left off.
Once the preset value is reached, the Output Bit (Q) turns ON, and the Measurement Bit (TI) turns OFF. The timer will hold the preset value until the Reset Bit is activated, which clears the elapsed time and restarts the timing cycle.
→ Accumulated OFF delay = When the input bit is turned OFF, the measurement bit (TI) and output bit (Q) turn ON, and the timer begins counting. If the input bit is turned ON again, the timer pauses but retains the elapsed time. When the input bit is turned OFF once more, the timer resumes counting from the previously stored value.
Once the timer amount equals the preset time, both the measurement bit (TI) and the output bit (Q) turn OFF.
To clear the elapsed time and restart the timing process, activate the Reset bit.
- To view the elapsed time on a memory address, click the Enable button within the Elapsed Time section. Please ensure the memory address is available and that its data type matches the selected time base.
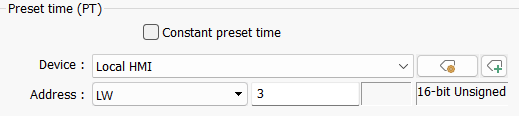
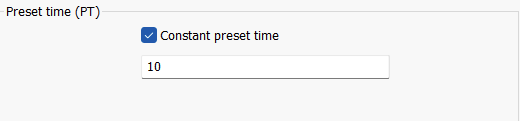
- For the preset time, you can either assign a static value to the timer by selecting the Constant Preset Time option in the section, or assign it to a memory address and input a time value during project runtime.
Dynamic Preset Time connected to LW-3
Static time assigned to 10 seconds
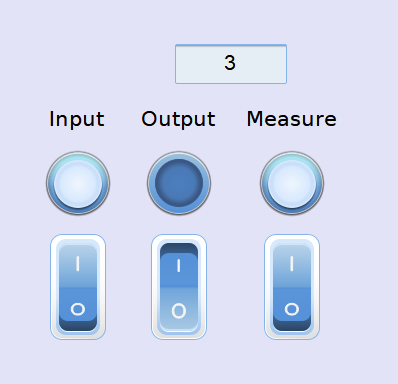
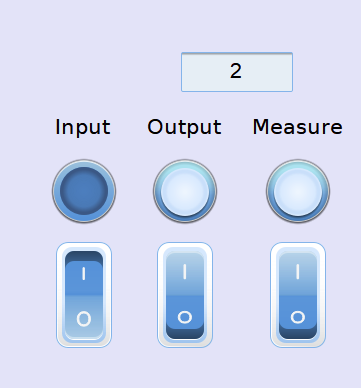
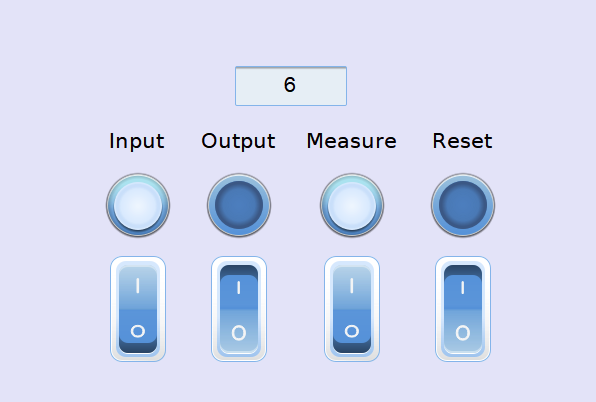
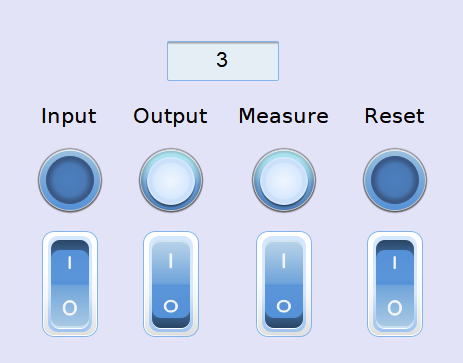
- After finalizing setup configuration and placing down the invisible box (if a per-page timer is selected), set up the objects on view and control the timer if needed. For the setup below, I will need one numeric object assigned to LW-0. Since the time base is in seconds, a 16-bit unsigned data format will be used for the numeric object. I will also use four toggle switches and bit lamps assigned to LB memory addresses 1–4.
Demo Project Timer
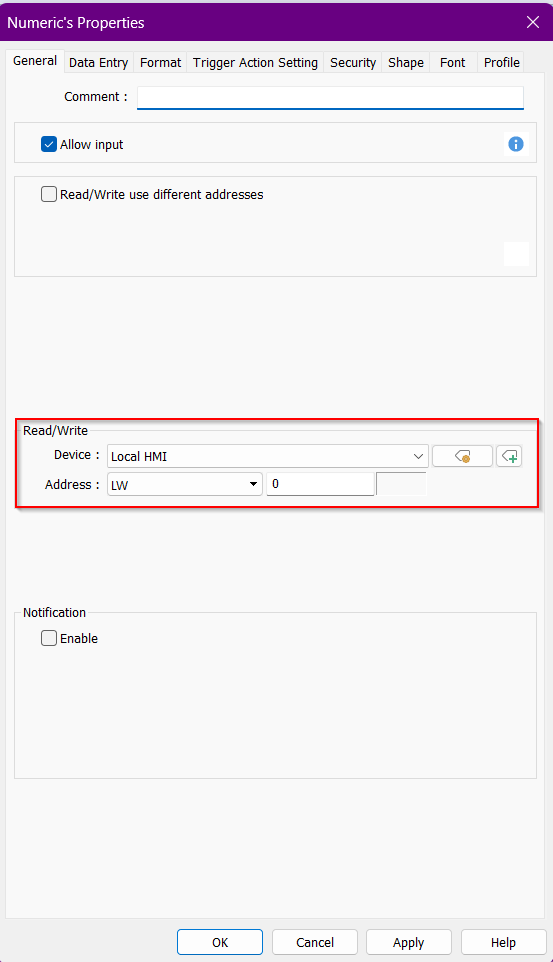
Numeric Object Setup
Toggle Switch and Bit Lamp Setup
- During runtime the project will have a timer just for this page.