Introduction:
Within this post, we describe the steps needed to setup a cMT-G02 or cMT-SVR-200’s LAN and Wi-Fi adapter.
Software Prerequisite:
Web browser
*(Chrome, FireFox, or Window’s Edge)
Related Tutorials:
How to find and change the IP address of an SVR/SVRX, FHD/FHDX, Gxx, or CTRL01
Instructions:
-
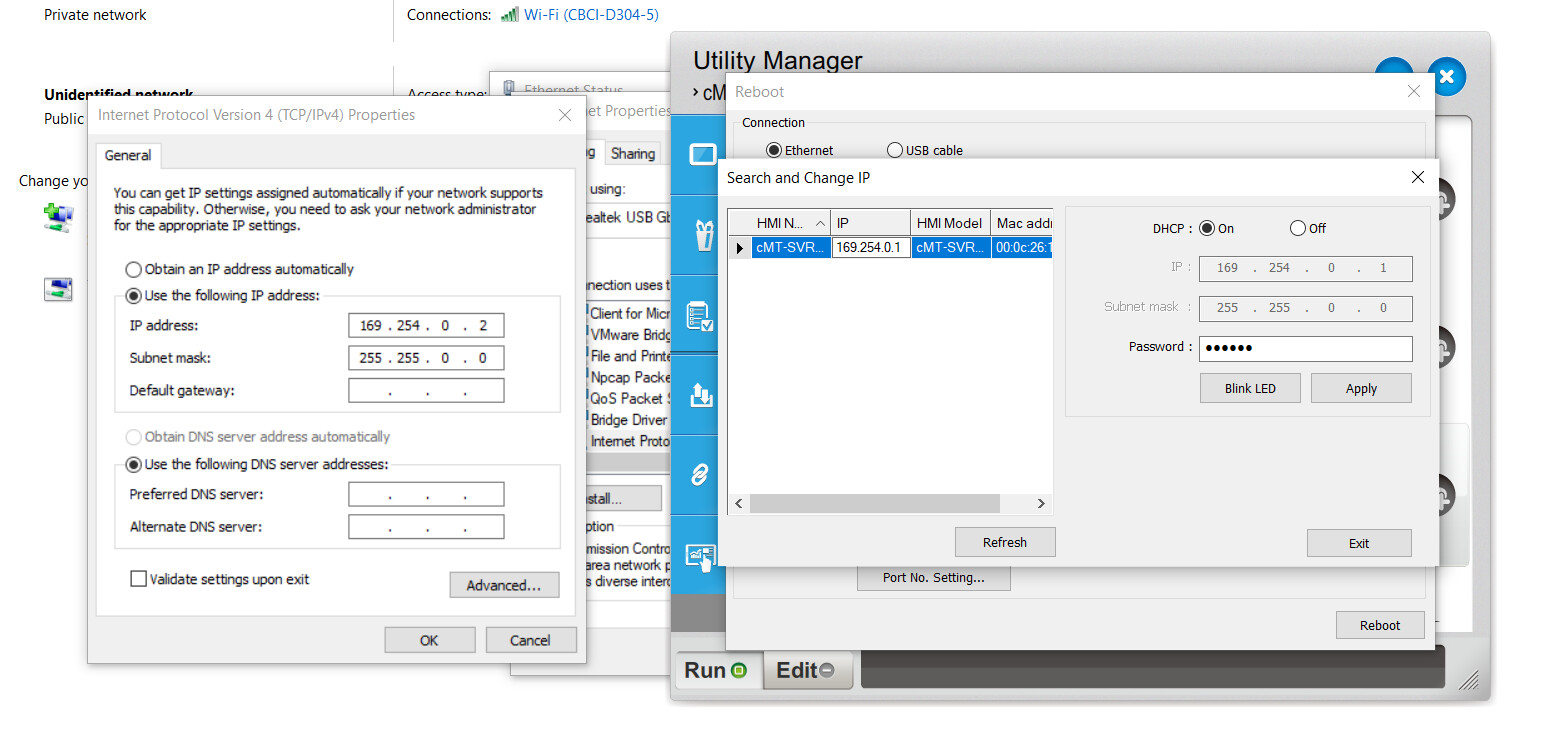
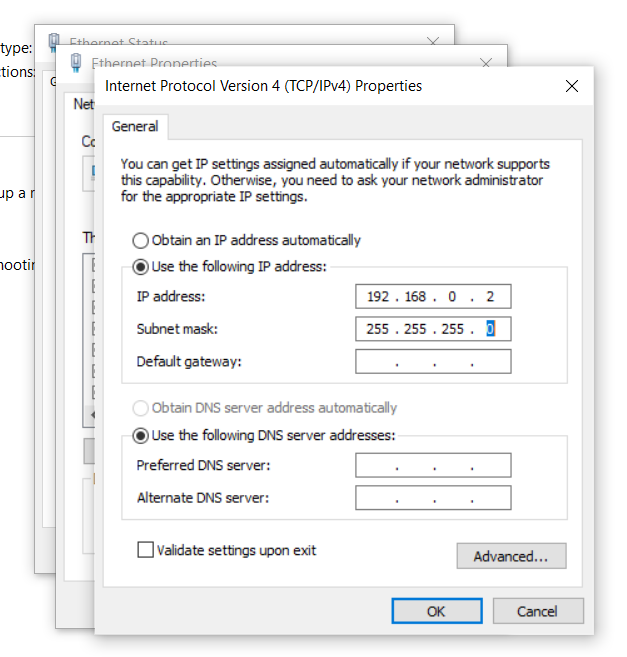
The default IP of the Ethernet port on these units is 169.254.0.1. To connect with this device via Ethernet, please ensure that your PC’s IP is within the range 169.254.0.2 ~ 169.254.0.254:
Note: Once connected, you can verify the unit’s IP by following the steps described within this post.
Note: If DHCP is “On” as in the image below, please set this option “Off” and click “Apply”. [Optional] You may set a static IP address using this dialog as well.
-
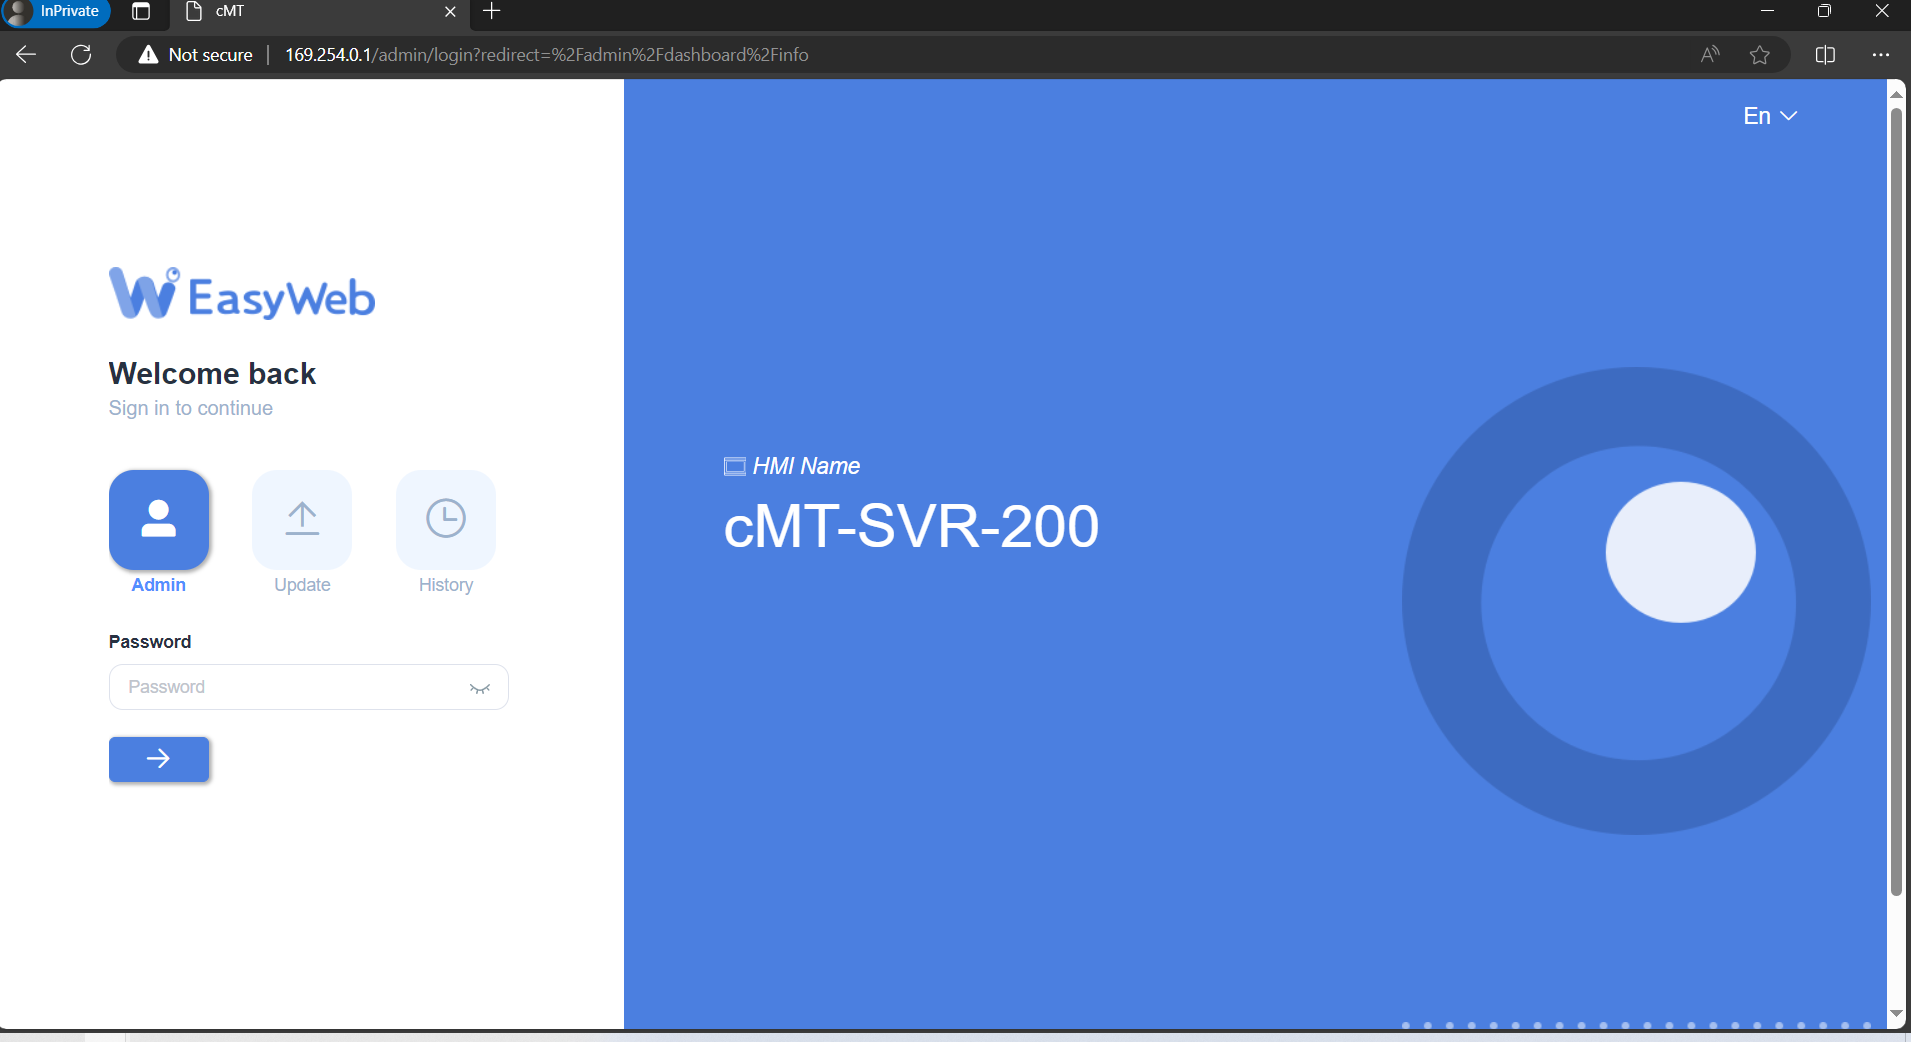
Once we’ve verified the SVR or G02’s IP address, open your PC’s web browser and enter the HMI’s IP within the URL entry bar:
Note: The browser may display a warning, but please select choose an option that will allow you to proceed to the HMI’s web server.
-
When prompted, enter the HMI’s system password to login:
Note: The default password is “111111”.
-
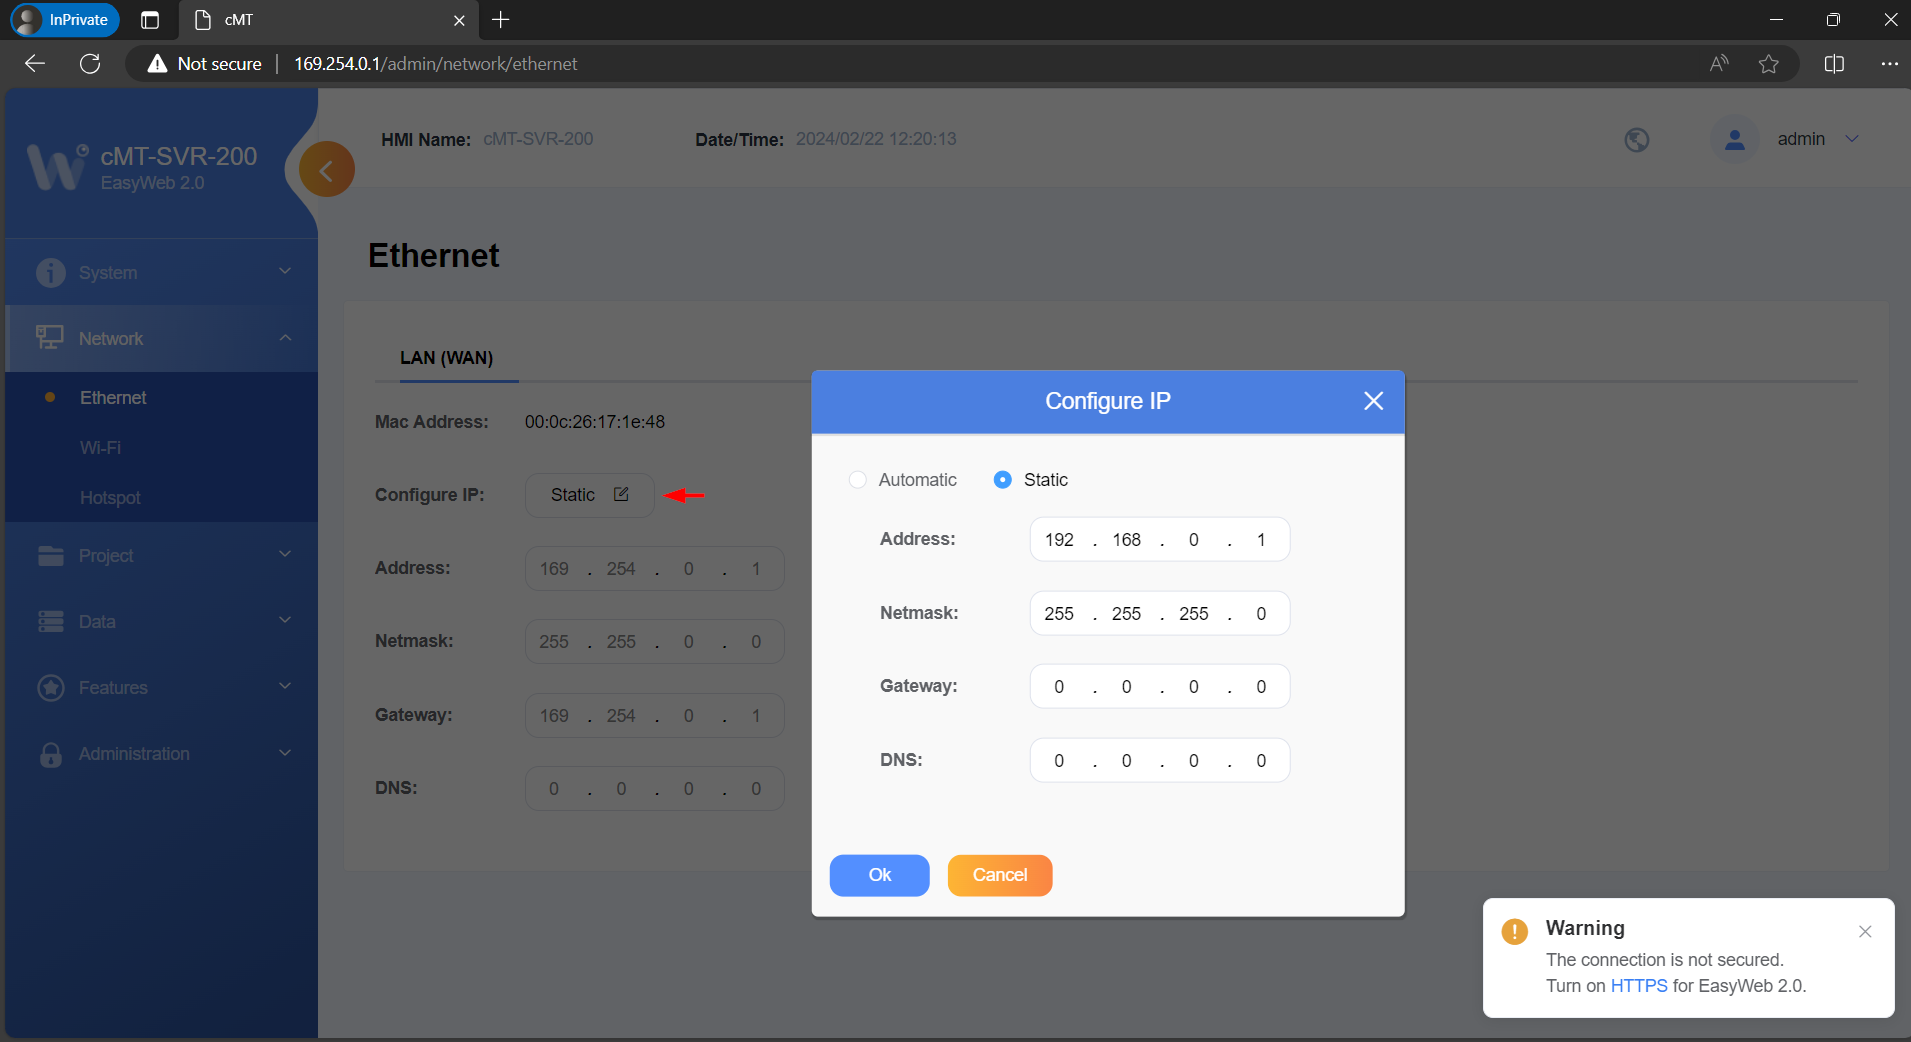
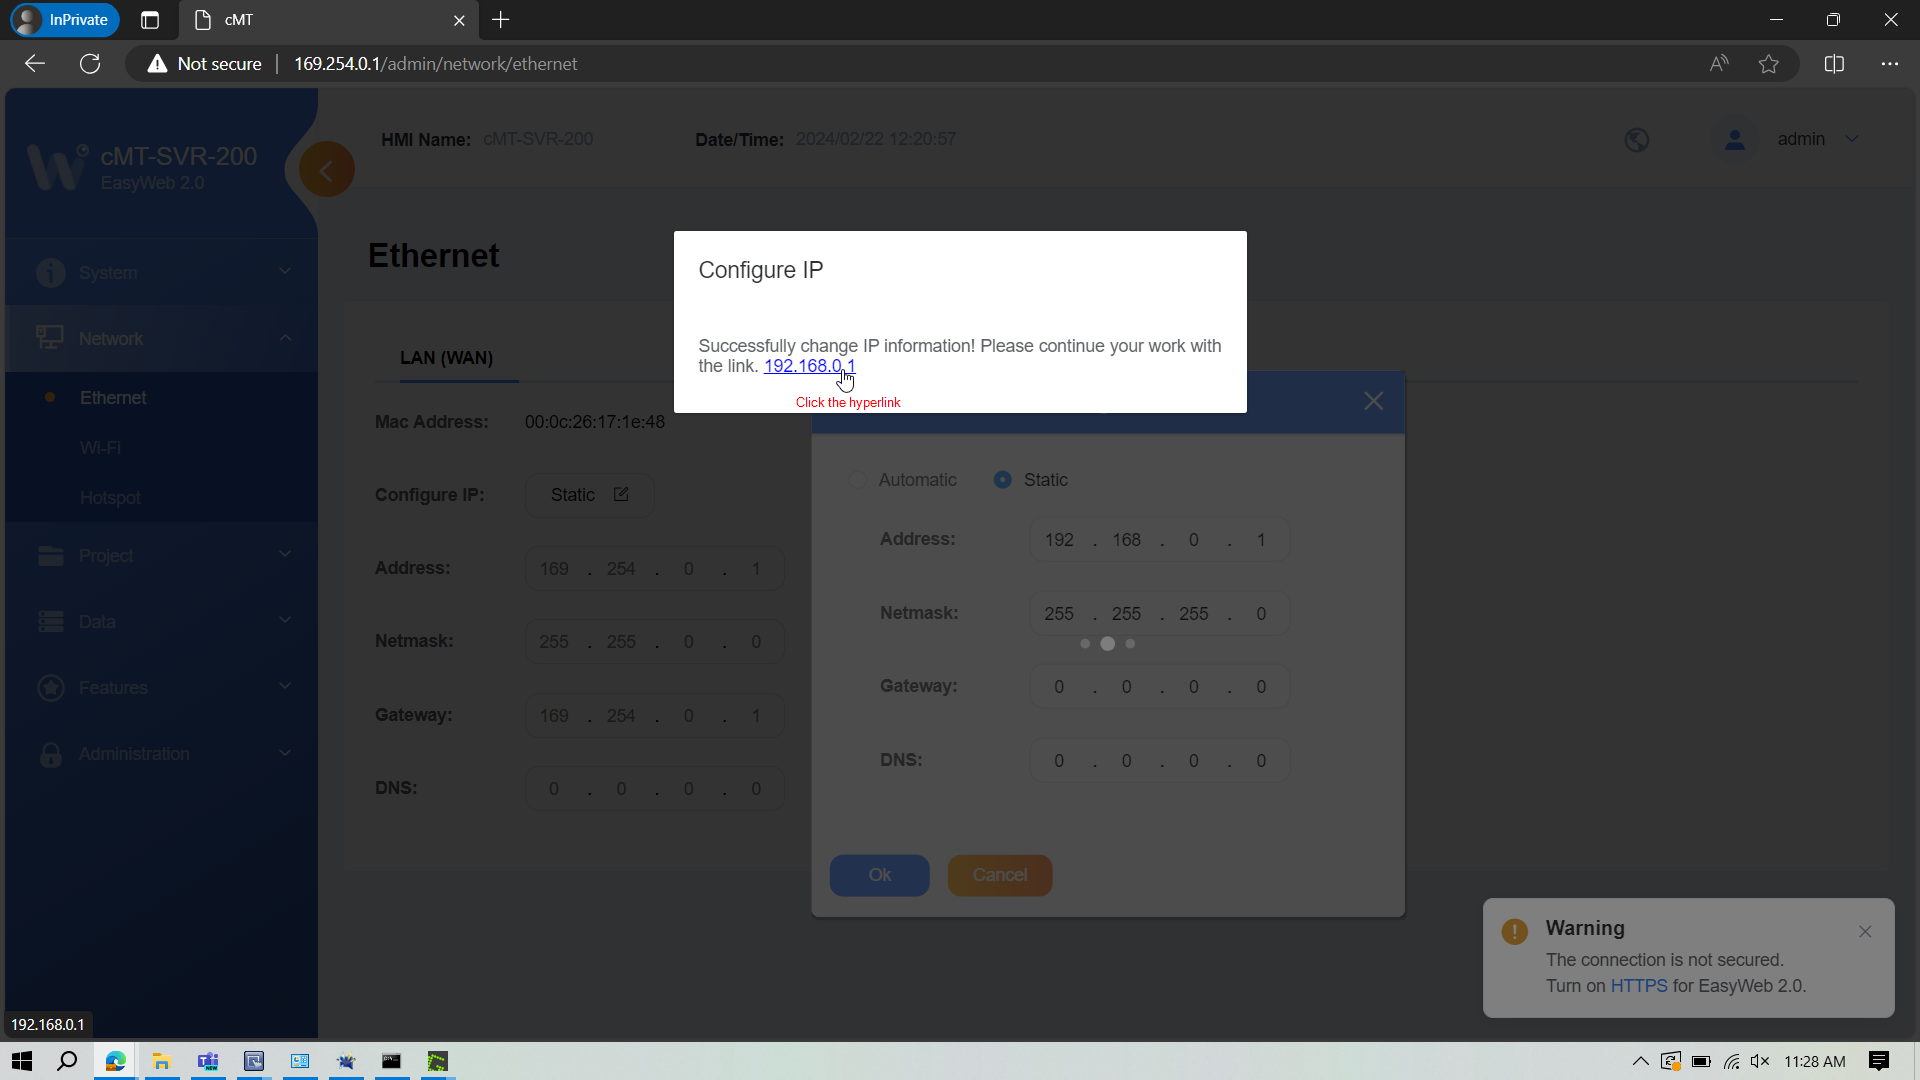
Within the “Network” tab, select “Ethernet” and configure a static IP suitable for the application:
Note: This step is required.
-
When finished, click “Ok”:
-
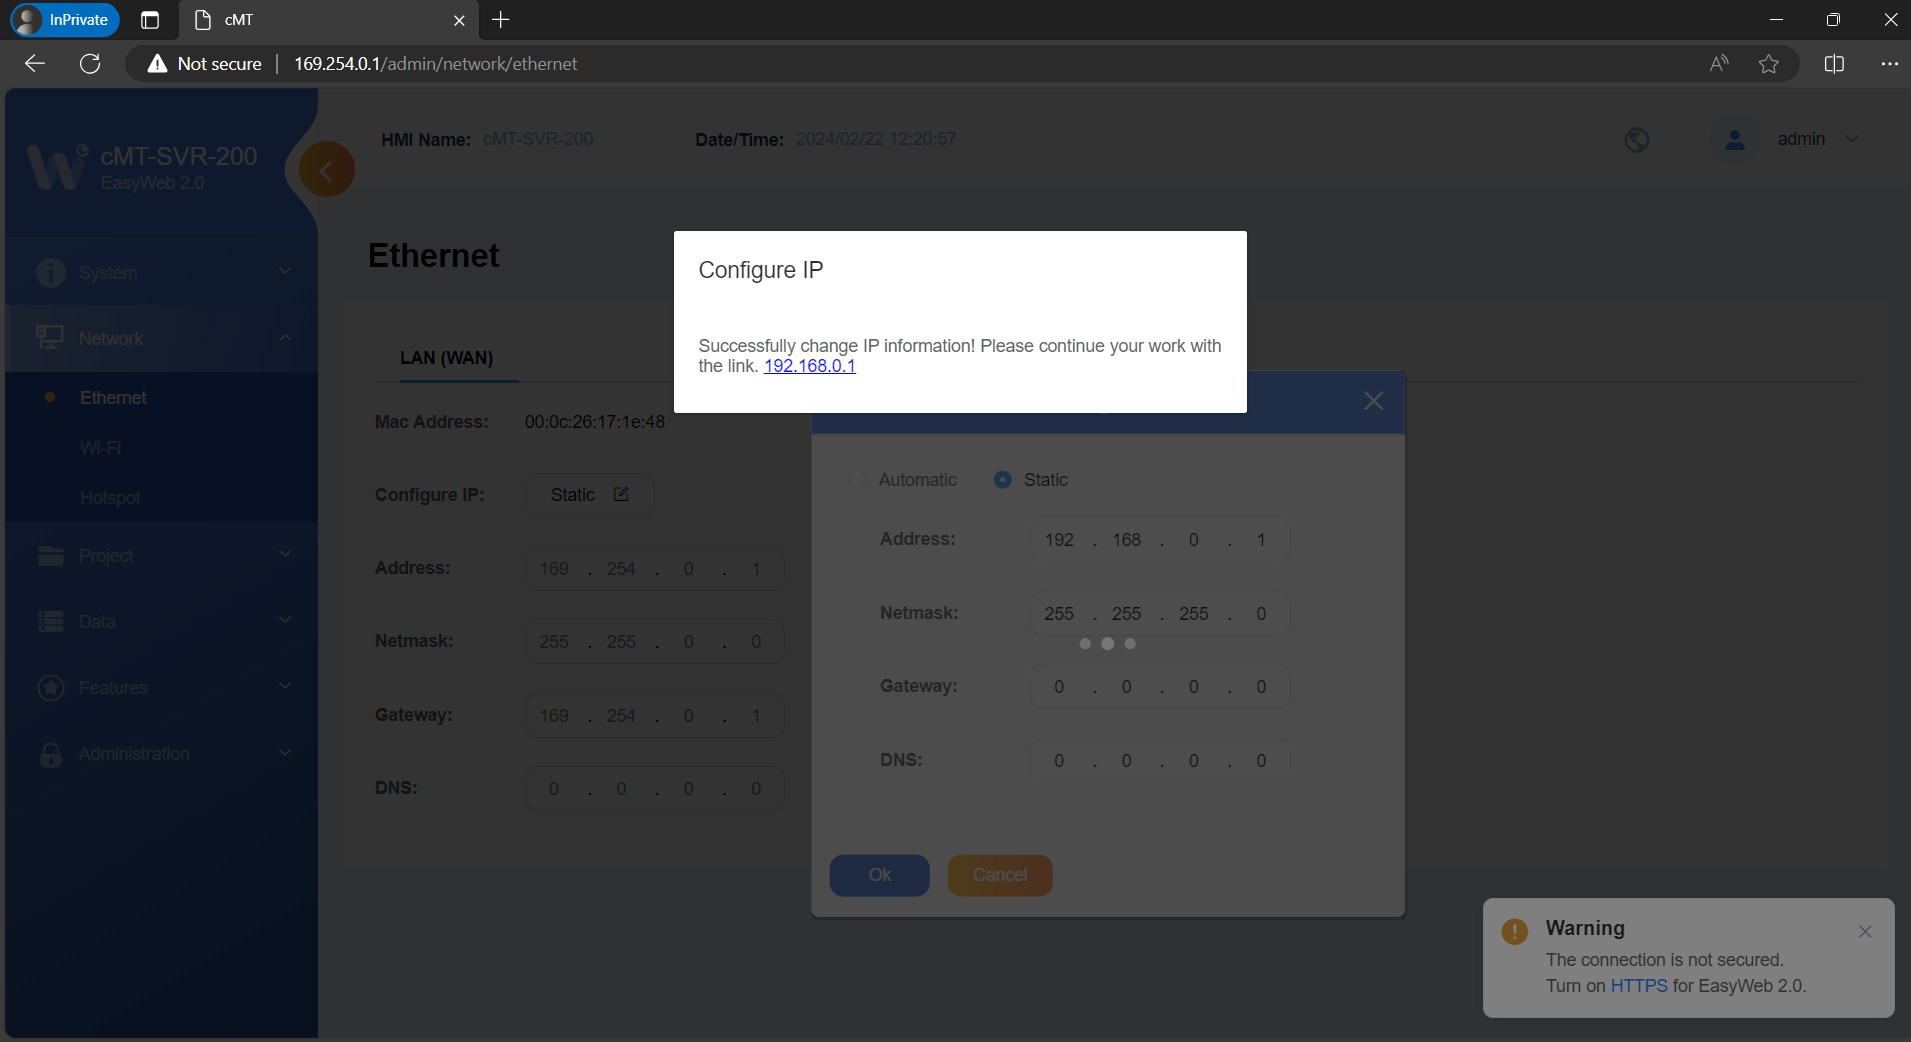
Then, ensure that your PC’s IP will allow it to communicate with the HMI now that the IP address of the LAN port has been set:
-
Re-connect with the SVR or G02 using the web prompt and if need be re-login:
-
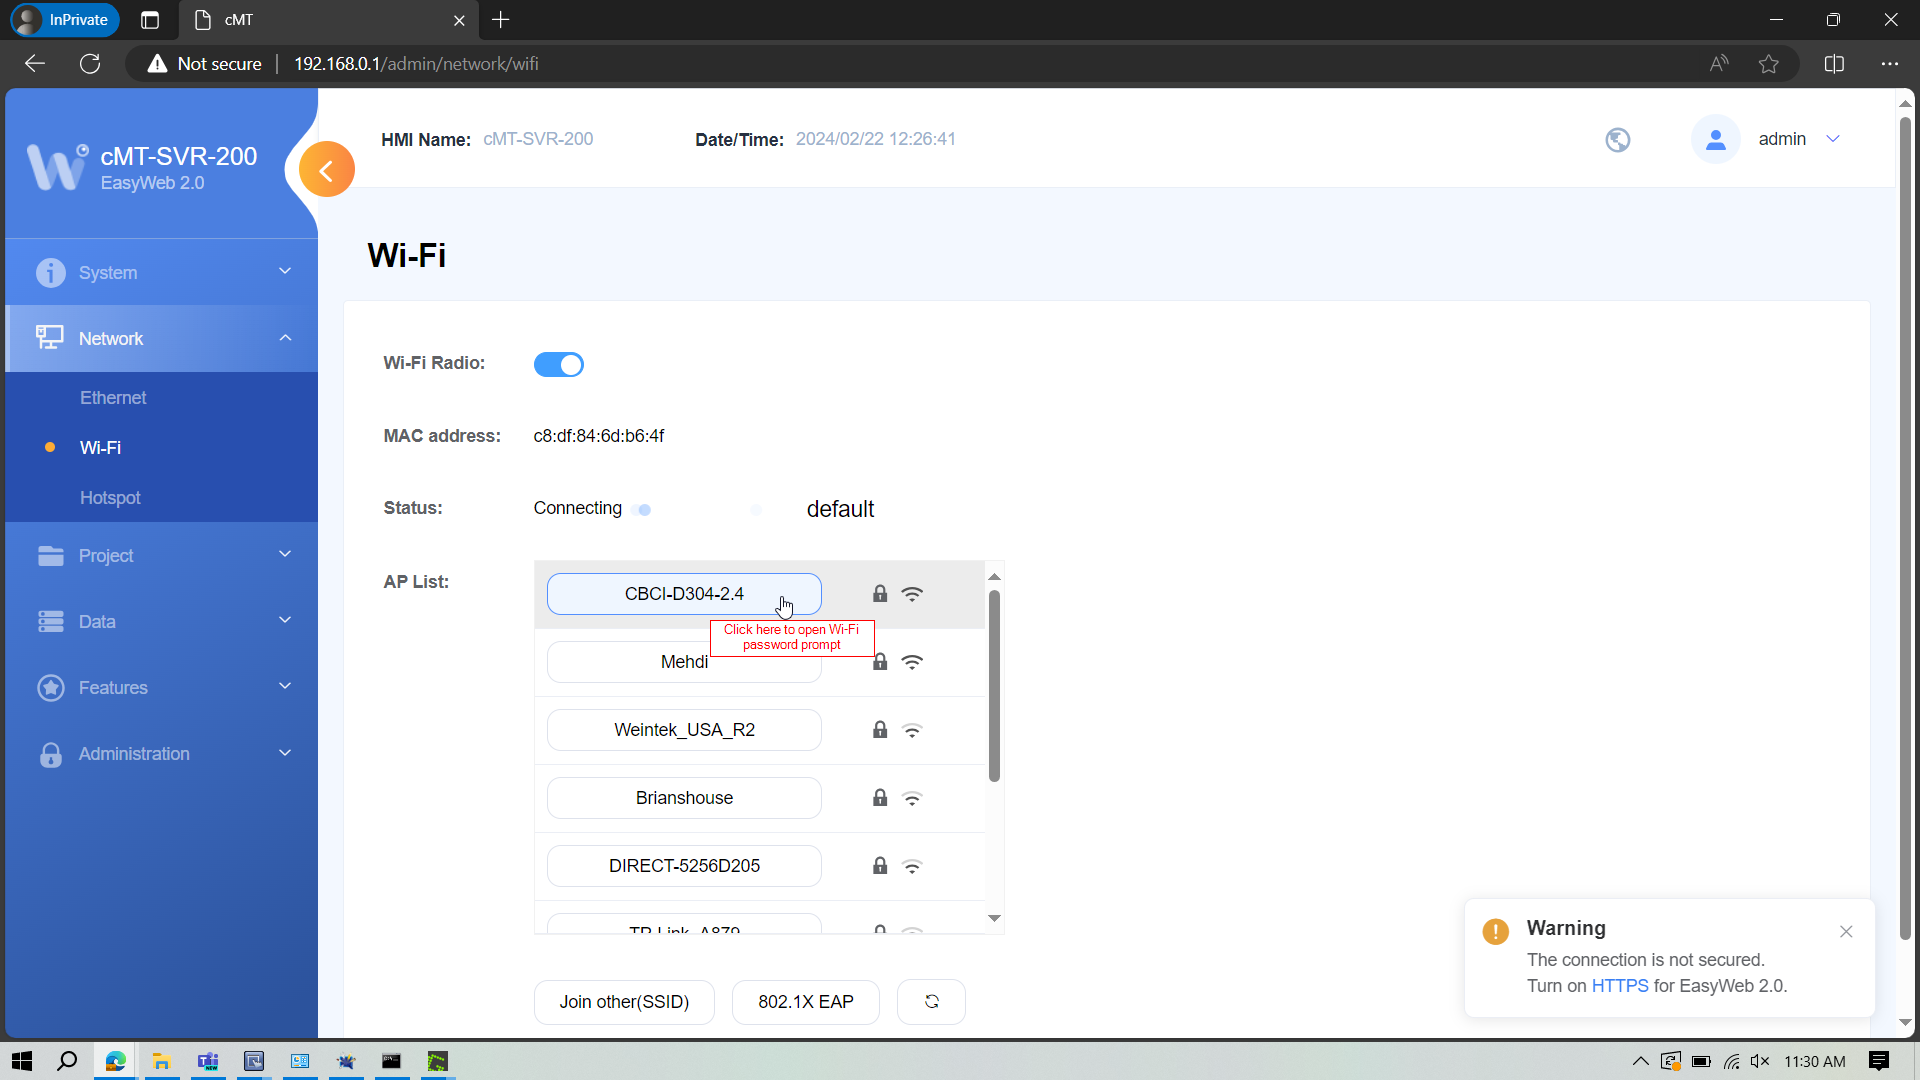
Select “Wi-Fi” under “Network” and choose the desired wireless access point:
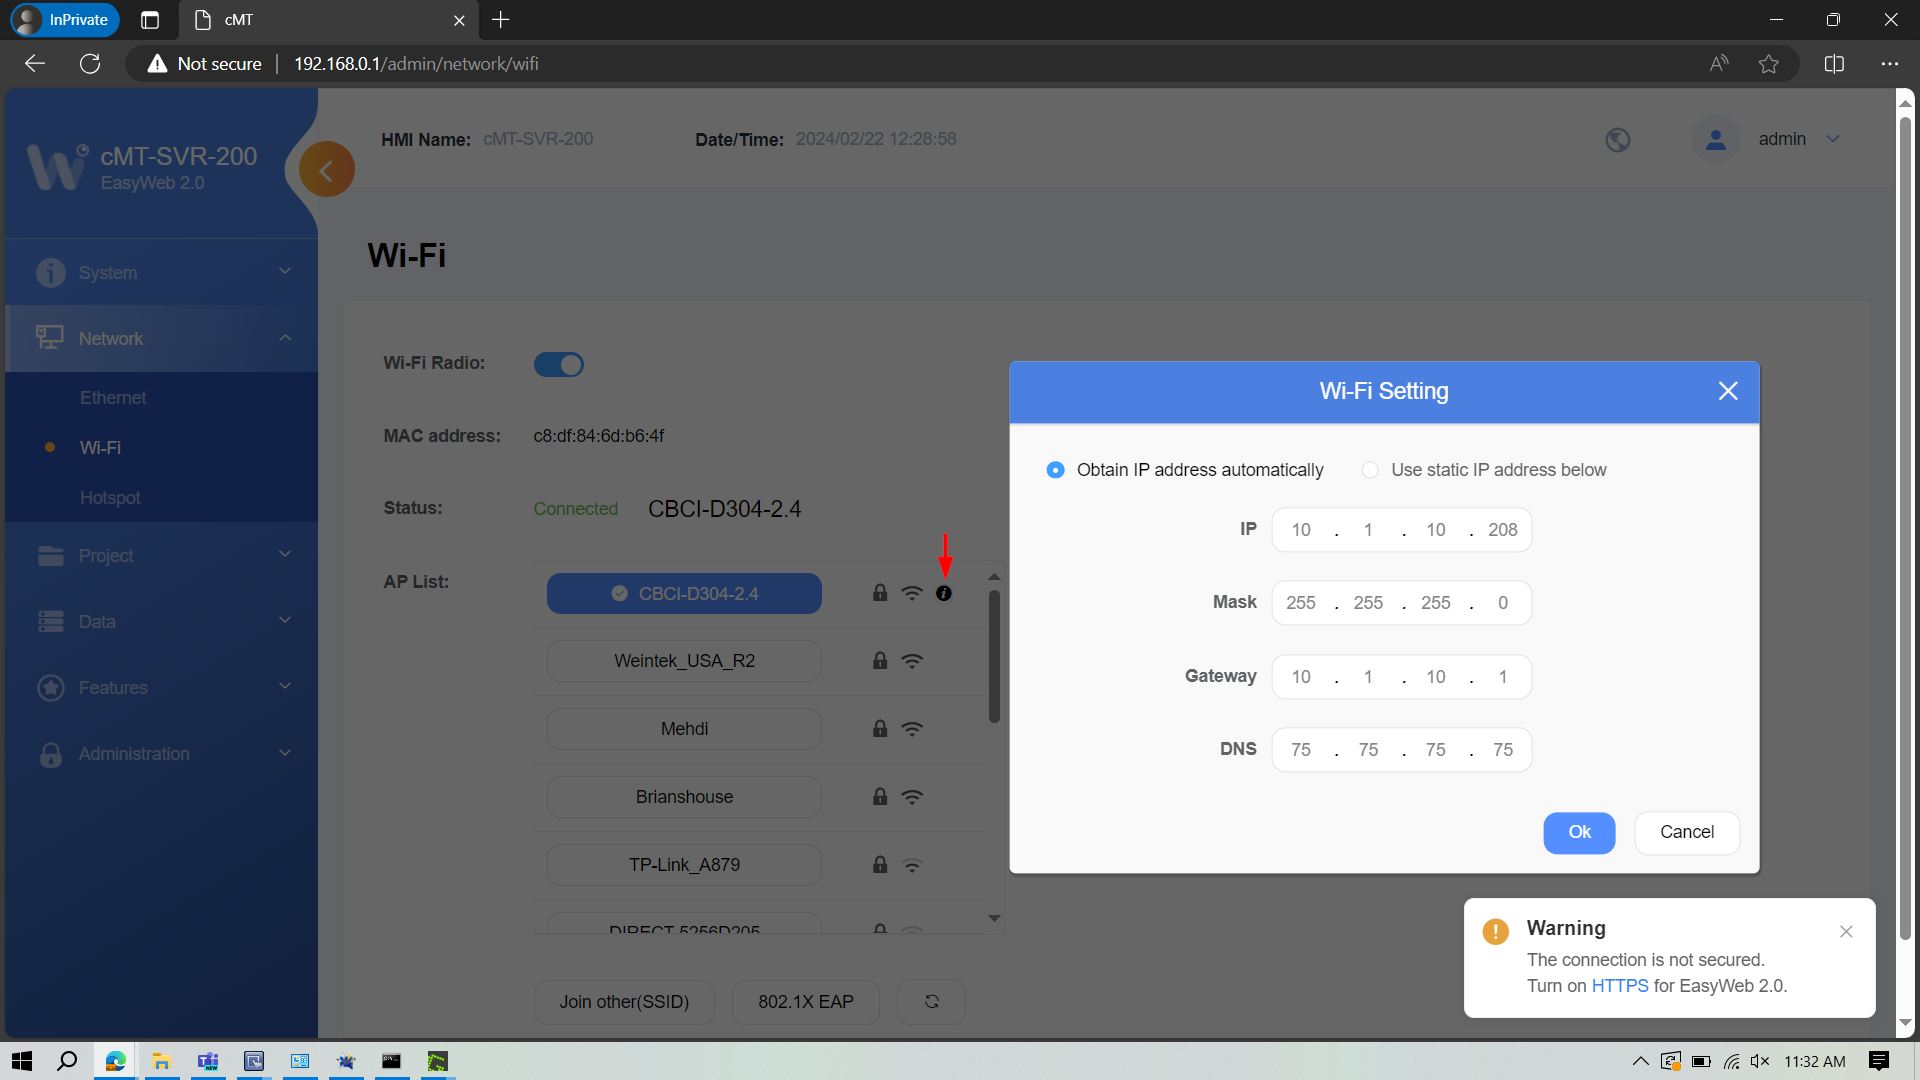
Note: Make sure that the HMI’s Wi-Fi IP address is on a different subnet than the LAN IP. As an example, if the LAN IP is 192.168.0.1, please ensure that first 3 segments of the Wi-Fi IP do not match the LAN IP.
-
Click the
 to open the Wi-Fi settings menu:

Keywords
G02, SVR, Wi-Fi, disconnect, issue, setup, LAN, connect, find, ping