Introduction:
This demo project was created to help our customers utilize the “Item Address” setting within the “Option List”. The “Item Address” setting allows the developer to configure dynamic labels within an “Option List”. Developers often use this to select recipes configured within their PLC.
Note: Item labels must be contained within an array. They cannot be referenced from separate structures.
Software Version:
EasyBuilder Pro 6.03.02.393+
Instructions:
Setup:
-
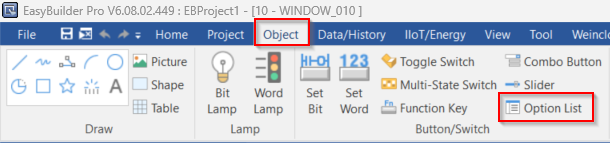
Within an EasyBuilder Pro project, navigate to the “Object” tab and select “Option List”:
-
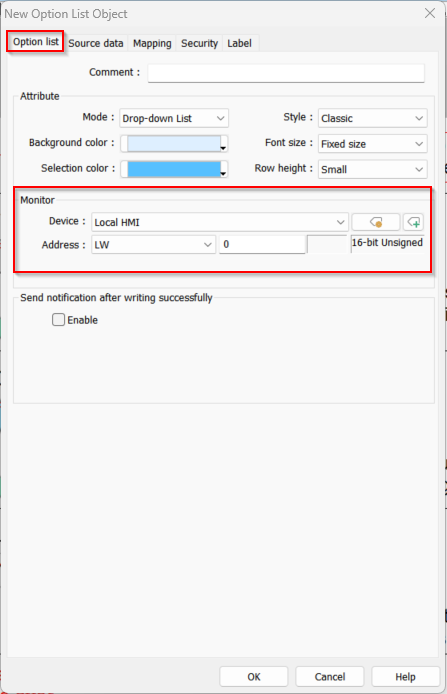
In the “Option list” tab, configure your “Monitor” address. This will be the address of the “Option List” itself:
Note: This address contains the numeric index of the selected item.
-
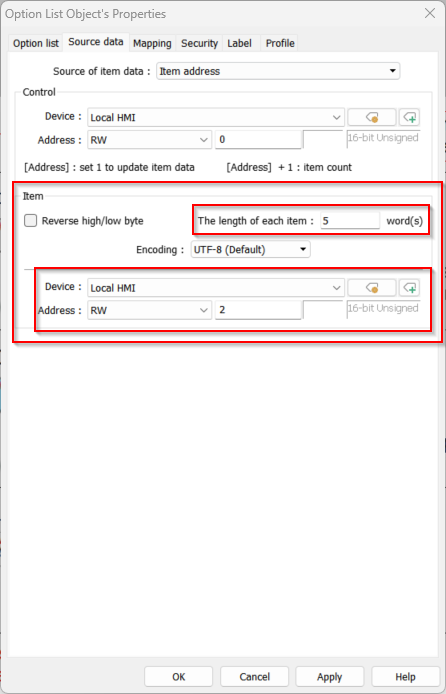
Within the “Source data” tab, Select “Item address” from the “Source of item data” drop-down menu and configure the “Control” address. This address will be used to update the contents of our “Option List”:
-
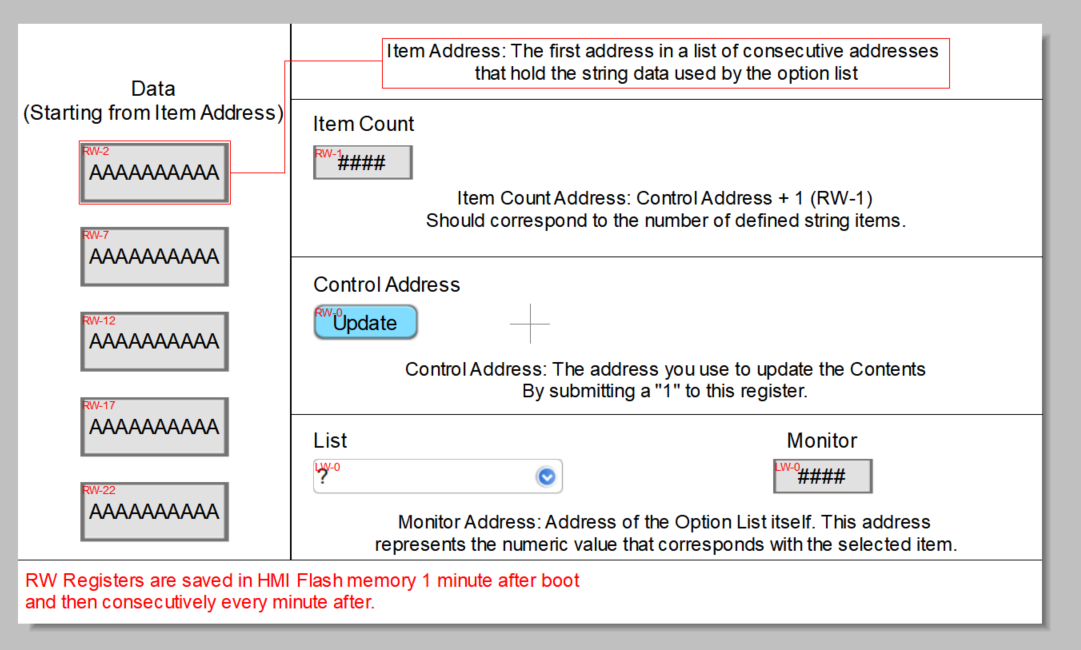
Next, within the “Item” section, configure “The length of each item” in your “Option List” and the “Item” address. The “Item” address is the first address in a list of consecutive addresses that hold the string data used by the “Option List”:

Demonstration:
-
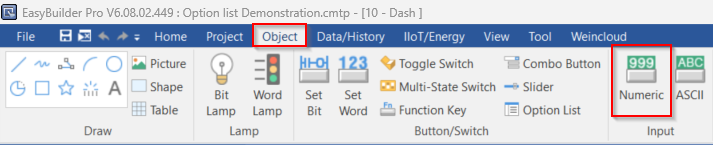
Navigate to the “Object” tab and select an “ASCII” object:
-
Within the “General” tab, configure the “Read/Write” address and word length, to match the “Item” address of the “Option List” object. Within this demo, I’ve created 5 “ASCII” objects. These objects will contain data that will be added to your “Option List”:
-
Within the “Object” tab, select a “Numeric” object:
-
Within the 'Numeric" object’s “General” tab, configure the “Read/Write” address to match the “Option List” “Control” address +1. This object will define the number of string items within your “Option List”:
-
Next, navigate to the “Object” tab and select a “Set Word” object:
-
Within the “Set Word” object’s “General” tab, configure the “Write” address to match the “Option List” object’s “Control” address. Within the “Attribute” section, select “Write constant value” from the “Set style” drop-down menu and enter “1” in the “Set value” field. This object will allow you to update the contents of the “Option List” object:
-
Within the “Object” tab, select a “Numeric” object:
-
Within the “General” tab, configure the “Read/Write” address to match the “Option List” object’s “Monitor” address. This object will display the numeric value that corresponds with the selected item within the “Option list”:


When finished, your project should look similar to this (without the "Text/Comment objects):
Simulation:
-
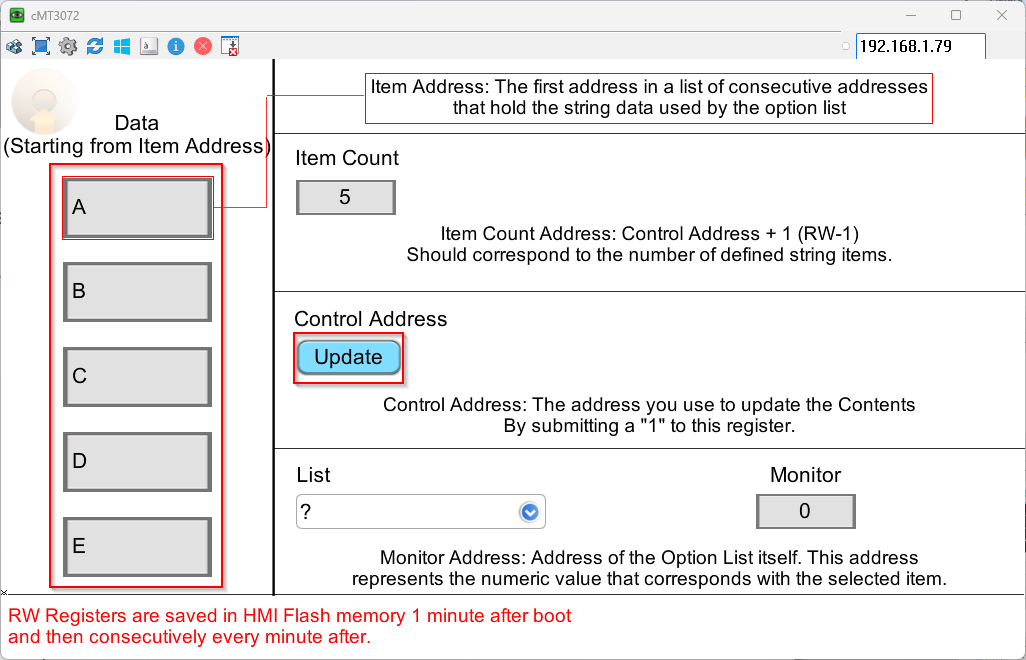
Once your project has been downloaded to an HMI, enter some data into the 'ASCII" objects we created earlier, set the item count, and click on the “Set Word” button:
-
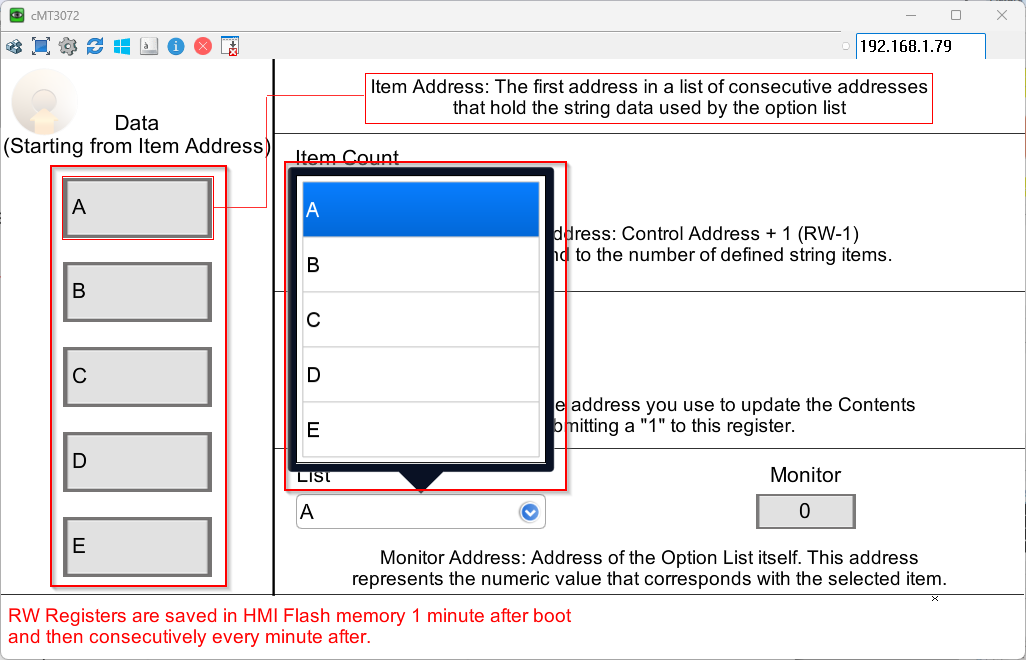
You will see the string data entered into the “ASCII” objects within the “Option List”:
-
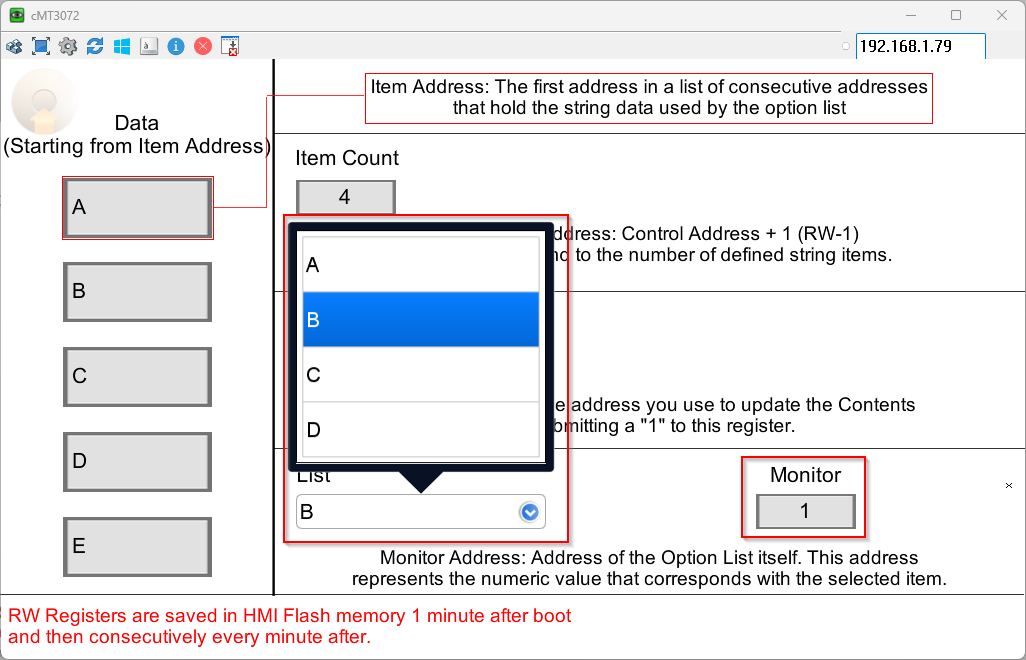
You can edit the number of options in the “Option List” by entering the desired number of options in the “Item Count” register:
-
The “Monitor” address will display the number of the numeric value that corresponds with the selected item in the “Option list”:

You can find a copy of this EasyBuilder Pro project file here.