Introduction:
The integration of multi-language support within EasyBuilder Pro greatly enhances the accessibility of your programs, catering to a wider audience. In this guide, we will cover the process of manipulating the label library to achieve this objective.
Software Version:
EasyBuilder Pro 6.03.02.463+
Related Tutorials:
Video - How to create a multi-language Project within EasyBuilder Pro
Instructions:
-
To begin, navigate to the “Project” tab to access the “Label Tag Library”:
-
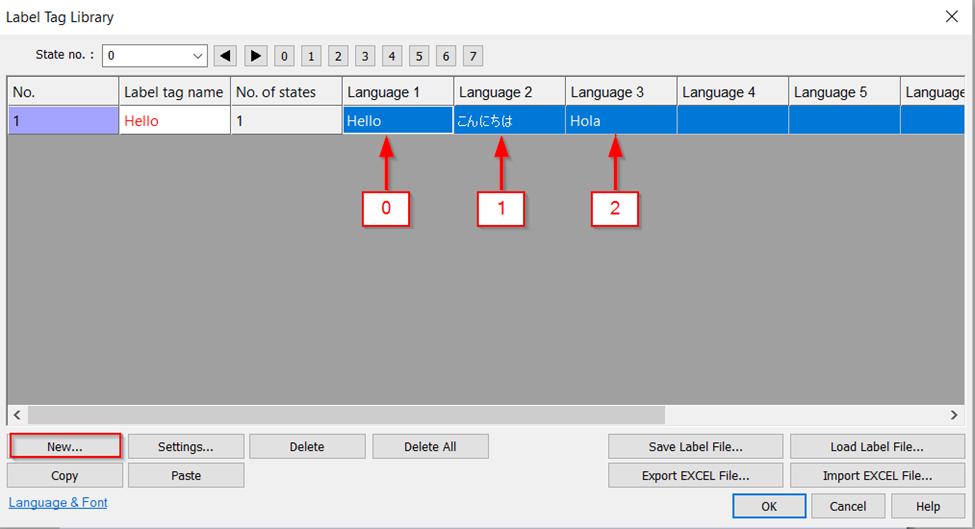
Within the “Label Tag Library,” select ‘New” to create a label, then assign a name to your label via the “Label tag name” field. In the respective language fields, input the desired translations for the term. In the example below, “Hello” has been translated into English (0), Japanese (1), and Spanish (2):
-
Next, create a “Text” object. This can be found within the “Object” tab in the “Draw” section. It will be represented by the “A” icon:
Note: This feature can also be used within an object label.

-
Within the “Text/Comment” tab, select the (A) “Use Label Library” option. Then, select the label you would like to use in the (B) “Label Tag” drop-down menu. The (C) “Language” box, may be used to select a specific language for the purpose of defining text attributes. These attributes may be customized within the (D) “Attributes” section:
-
Next, create a button to alternate through the languages set within the Label Library. We will use the “Set Word” object, which can be found in the “Object” tab:
-
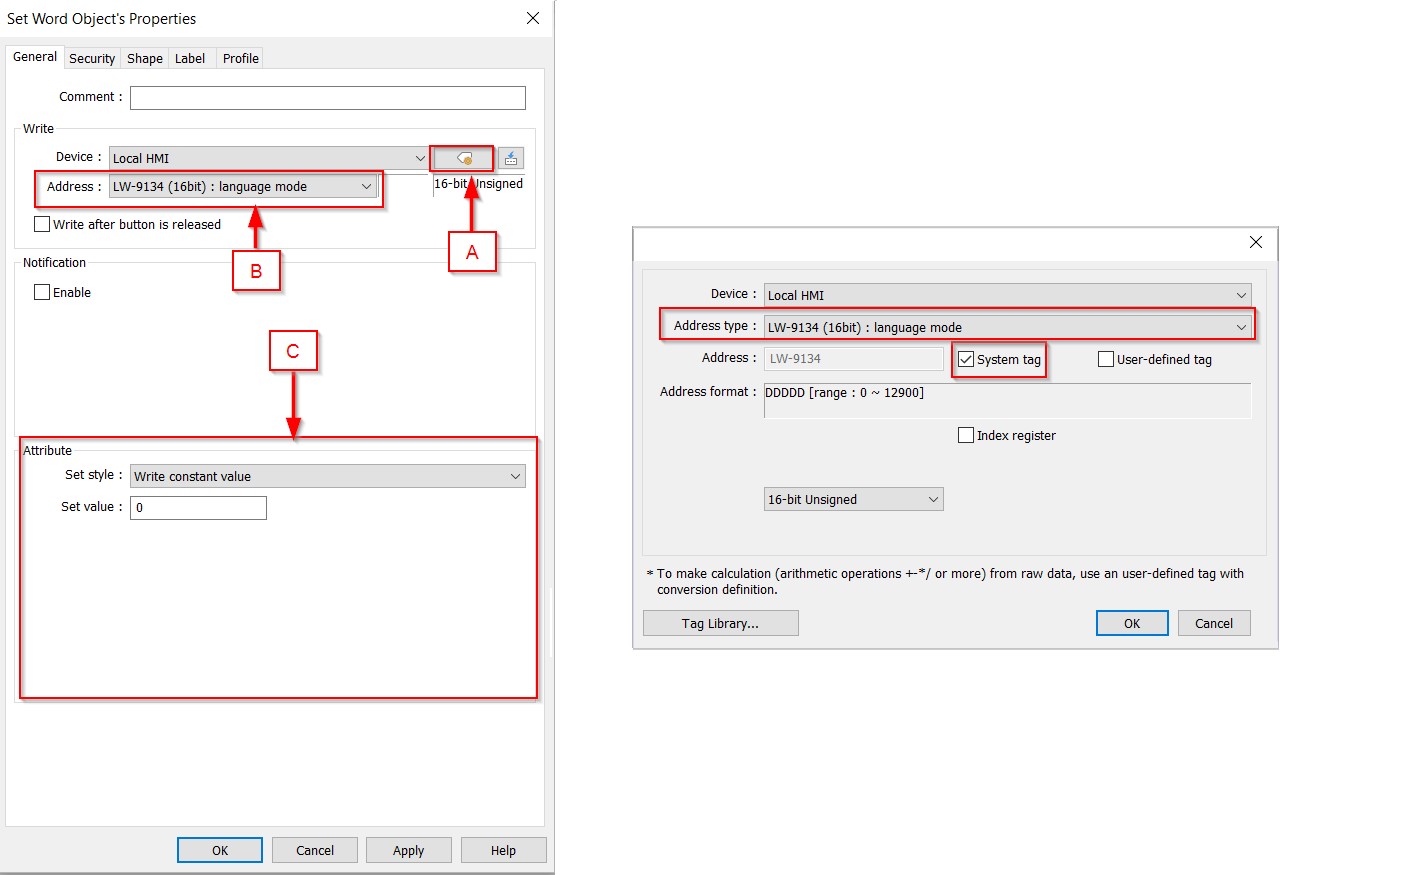
Within the “Set Word” object, go to the address (A) “Settings” and select the “System Tag” option. The (B) “Address type” should be set to “LW-9134 (16 bit): language mode”. Within the (C) “Attribute” section, set the “Set Style” to “Write constant value” and assign the “Set Value” to zero. A value of ‘0’ corresponds with “Language 1.” Thus, pressing this “Set Word” object will display text in English (Language 1):
Note: Although the translations are labeled as “Language 1,” “Language 2,” and “Language 3,” they use a zero-based index. This implies that “Language 1” corresponds with an index value of zero.
-
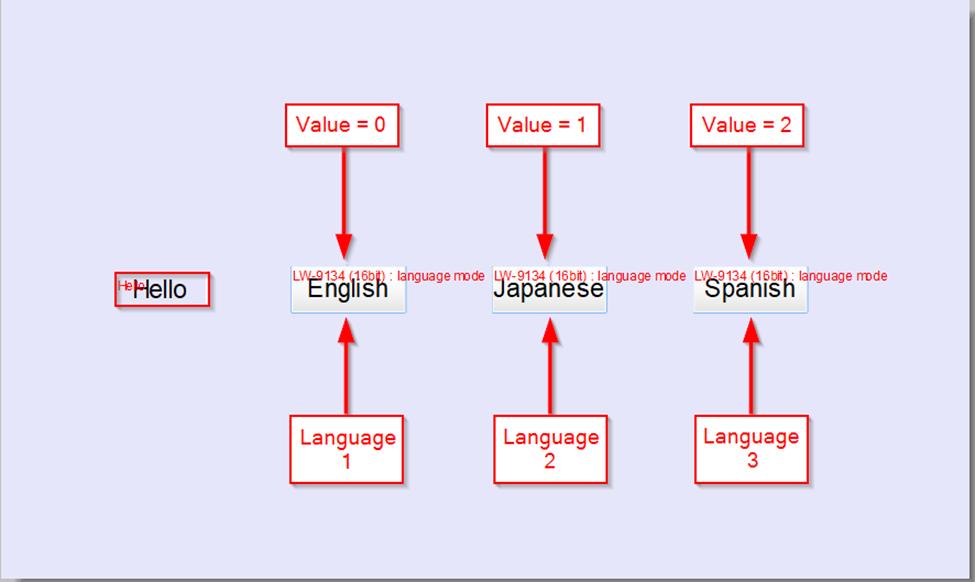
Next, duplicate the “Set Word” object twice and change the “Set Value” to 1 and 2, respectively. The second object will change the text object to “Language 2,” and the third will change the text object to “Language 3”:


Notes:
-
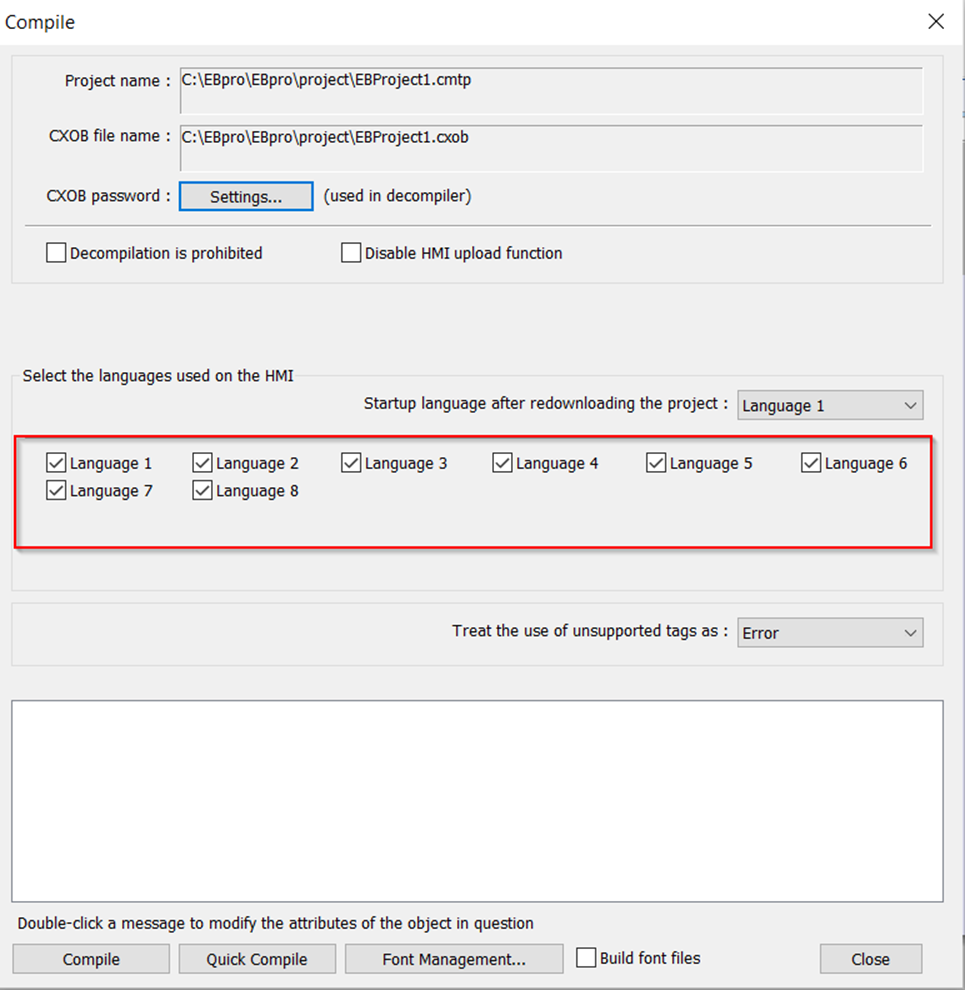
If your language doesn’t display when the “Language mode” value is changed, the language may not have been compiled. To fix this problem, navigate to the “Compile” menu within the “Project” tab. Then, make sure all desired languages are selected and click “Compile”:
-
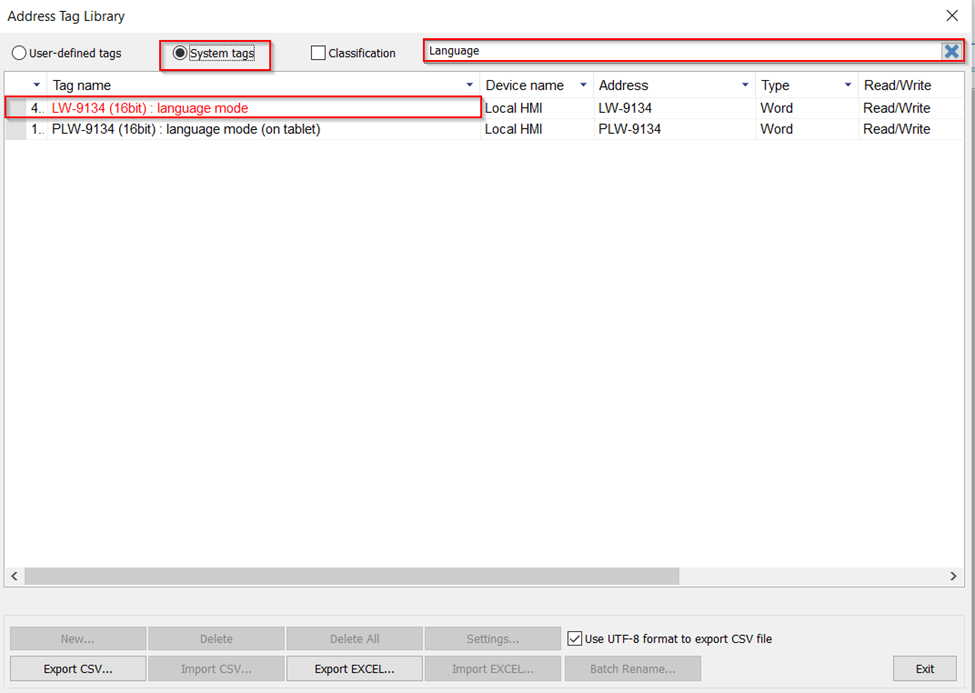
You can also view system tags in the “Address Tag Library,” choose “System Tags,” and enter “Language” in the search bar. The addresses “LW-9134” and “PLW-9134” are employed for switching language modes. However, PLW-9134 should be used when accessing the HMI through cMT Viewer:


Keywords
language, multi-language, accessibility, label, library, set word, translate, translation, bi-lingual, 9134, lw-9134, plw-9134