Introduction:
In this guide, we will demonstrate how to design a custom keyboard for use within ASCII and Numeric input objects within EasyBuilder Pro.
Software Version:
EasyBuilder Pro 6.03.02.463+
Note: Certain options within objects or windows may be placed in other locations in different versions. The example below was designed with 6.09.01.524.
Instructions:
-
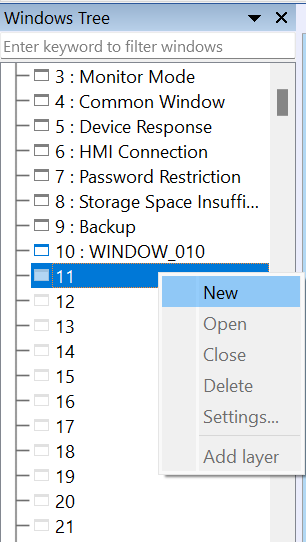
Within your “Windows Tree” right-click an unused window to create a new window. If the “Windows Tree” is not visible on your project, navigate to the “View” tab and select the “Windows Tree” option.
-
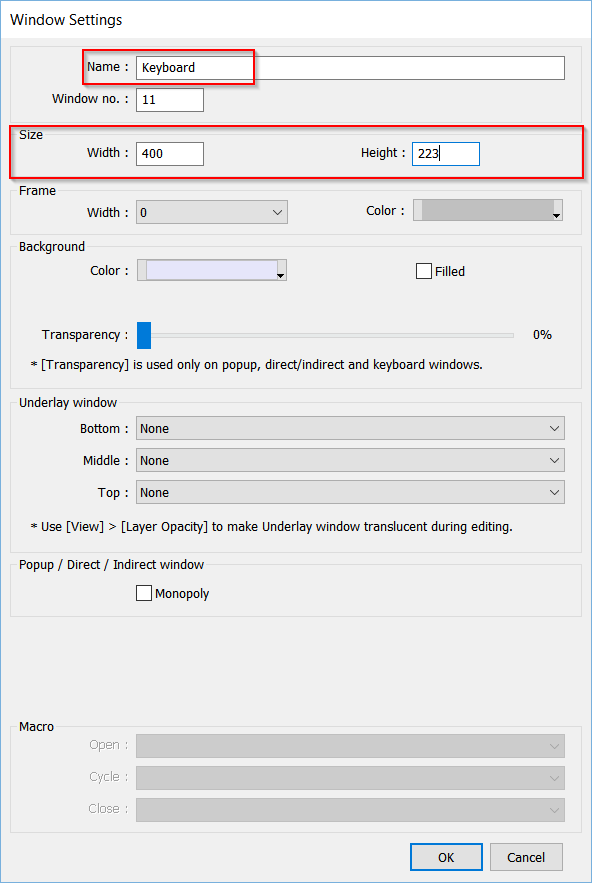
Within the window setting I have modified the size of the window to be 400 x 223. This smaller window size allows for the keyboard to be better placed within the main project window. Additionally, I have modified the name of the window for labeling purposes.
-
We will utilize the “Function Key” object from the “Button/Switch” section of the “Object” tab to create input values for the custom keyboard:
-
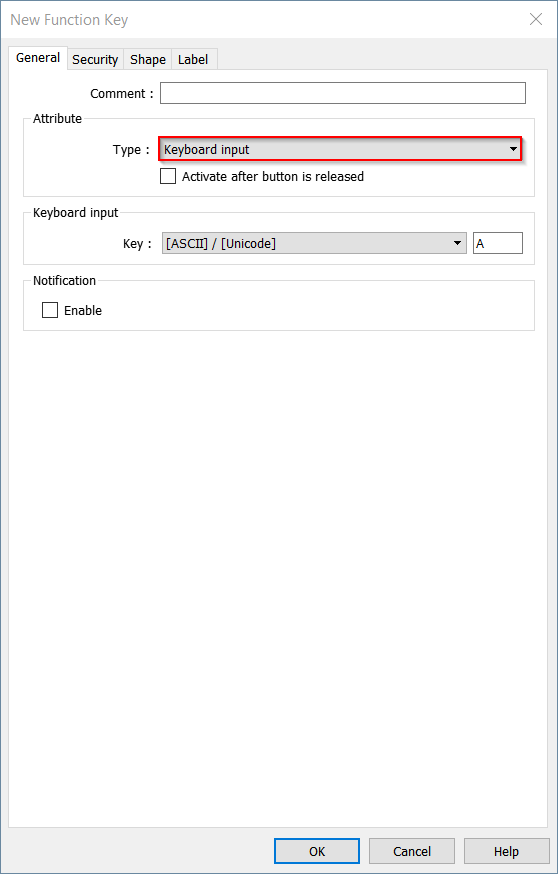
Modify the “Type” attribute within the function key properties to “Keyboard input”.
-
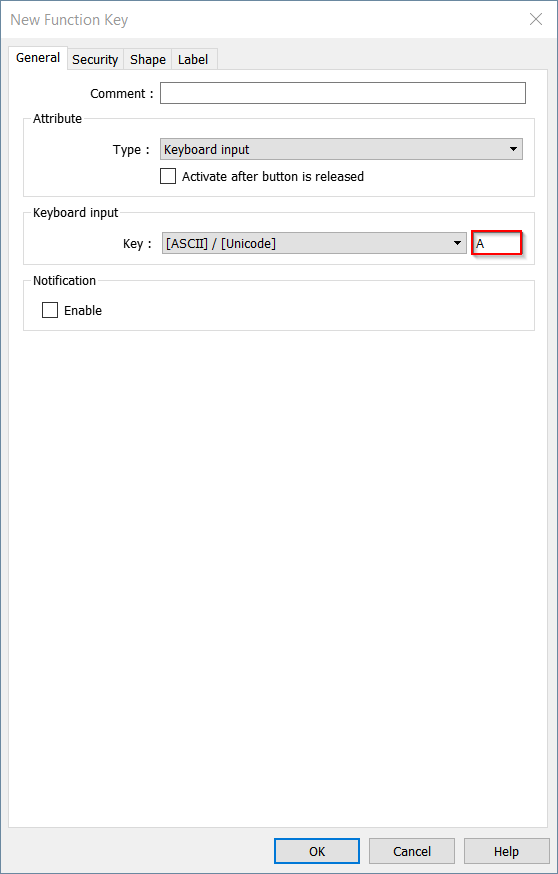
In the “Keyboard input” section, program each function key to correspond with desired characters or actions:
*Note: Within the example below, the function key will allow the user to type the character “A”.
-
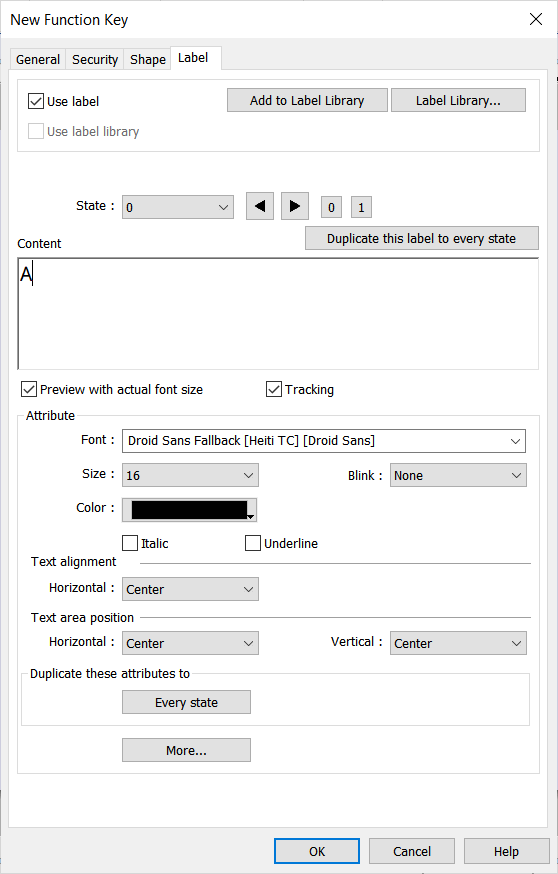
An object labels can be set within the “Label” tab:
-
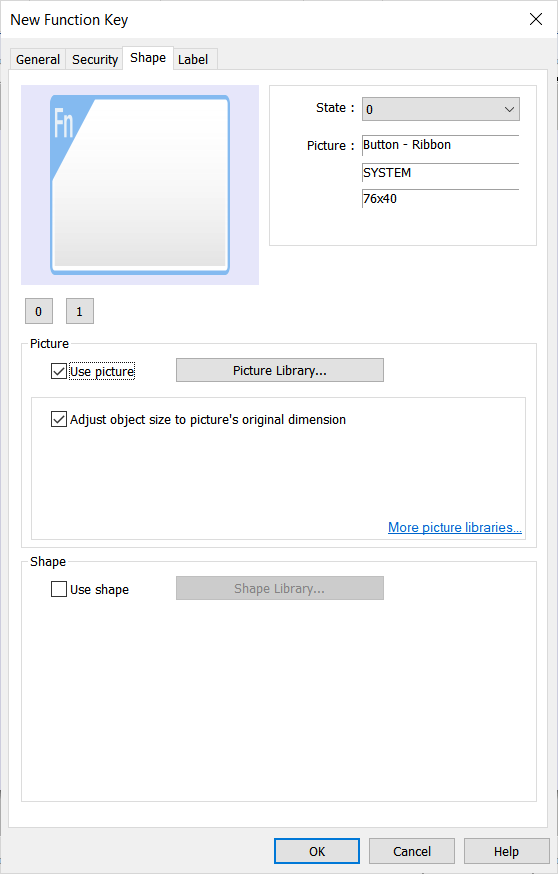
The object’s shape can be adjusted within the “Shape” tab:
-
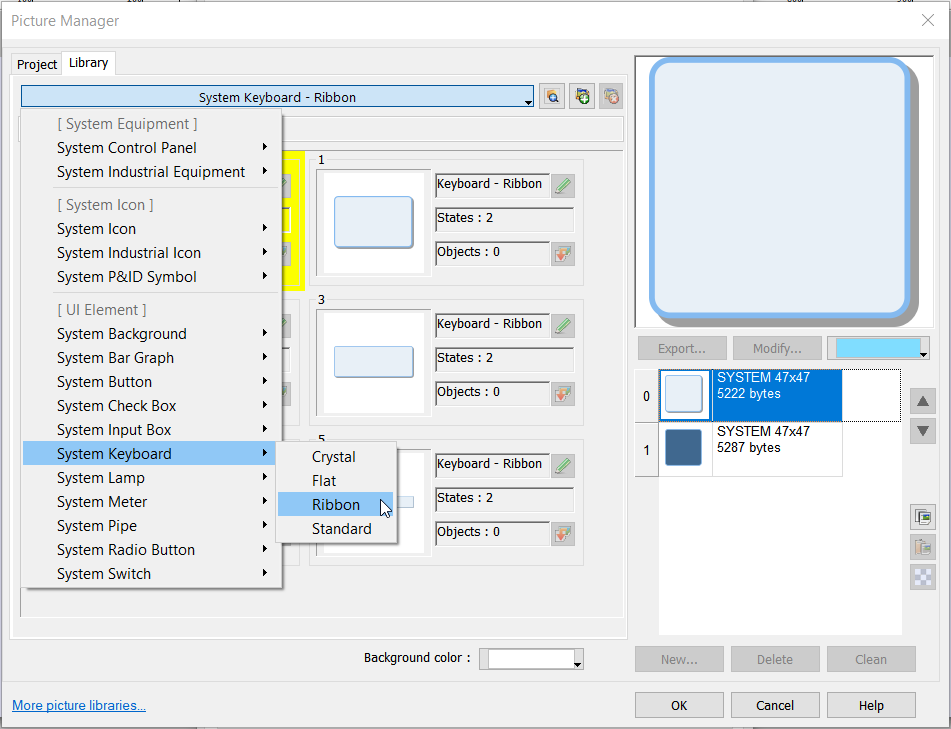
[Optional] By selecting the “Picture Library…” button within the image above, you can select an shape from the “System Keyboard” image library:
-
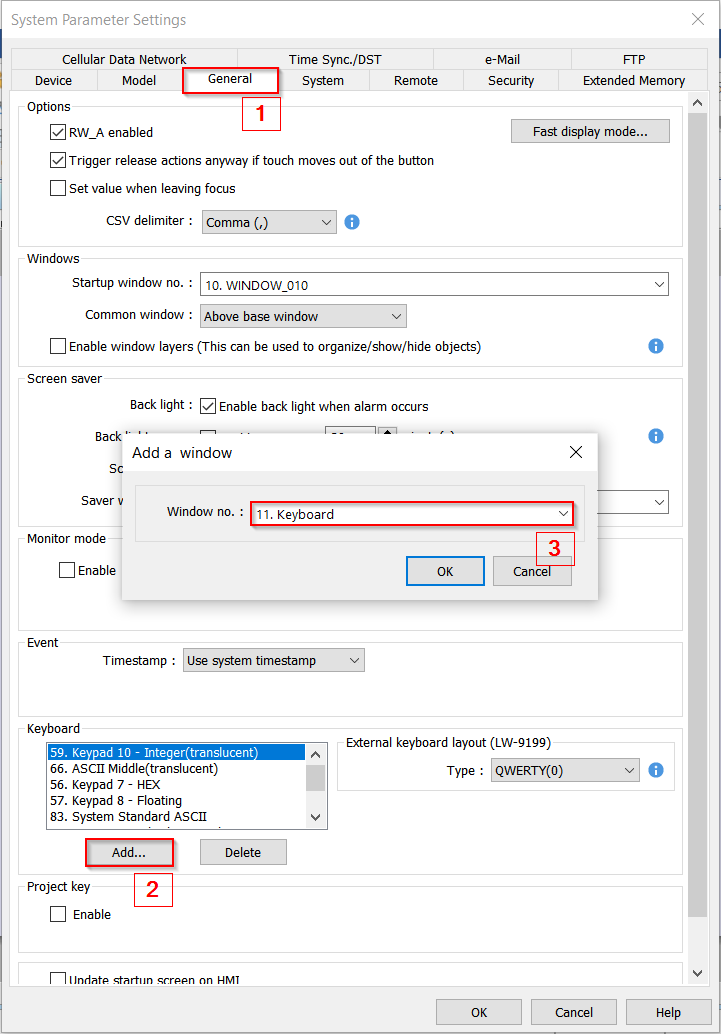
In order to use your custom keyboard, you will need to add this to the “Keyboard” list within the “System Parameters”. To do this, navigate to “System Parameters” within the “Home” tab and select the “General” tab. Then, within the “Keyboard” section, select “Add…” and choose the window that contains your custom keyboard:
-
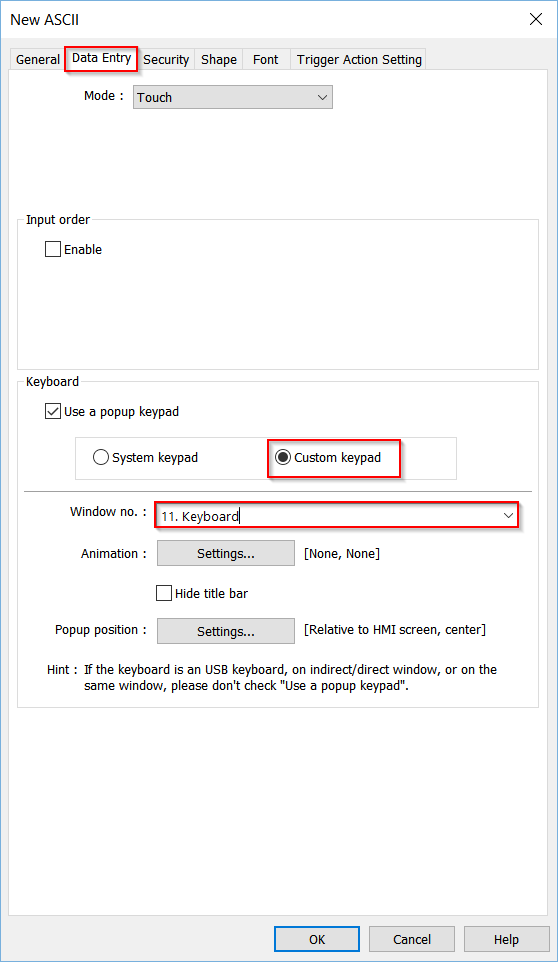
Now you will be able to access your custom keyboard within ASCII and numeric objects by selecting “Custom keypad” within the “Data Entry” tab of the object’s properties:


Keywords
custom keyboard PLC, ASCII numeric input, modify keyboard, system parameters keyboard, window setting, change, window tree, specialized keyboard