Introduction:
By default, a cMT X series HMI requires users to enter or select a username before validating their password. However, some project developers may wish to simplify this process by allowing operators to login using only a password. Within this post we demonstrate how to design a security option that will allow us to protect objects via password entry.
Software Version:
EasyBuilder Pro 6.06.01.332+
Demo:
v1.0 ![]()
*requires 6.09.01.322+
Related Tutorials:
Why can’t I login to my user account when using cMT Viewer?
How to automatically logout any user when idle
How to password protect an object
How to password protect a window
Video - How to password protect an object within EasyBuilder Pro
Create users
-
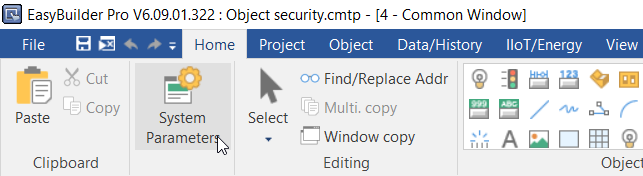
Within the “Home” tab select “System Parameters”:
-
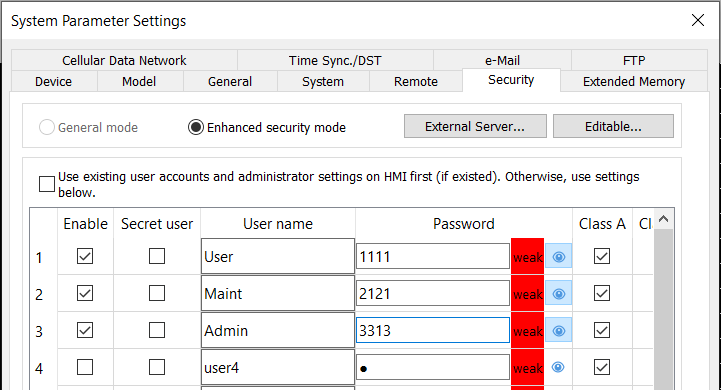
Within the “System Parameters” select the “Security” tab and add username and passwords:
-
The “Class” will later determine what objects a user can access, the class settings may be specified next to the user account:

User login
-
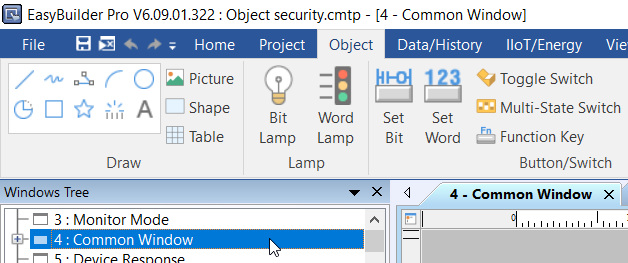
Click “Ok” when finished and double-click the “Common Window” within the window tree:
-
Within the “Object” tab, select the “Action Trigger (Per-page)” object:
-
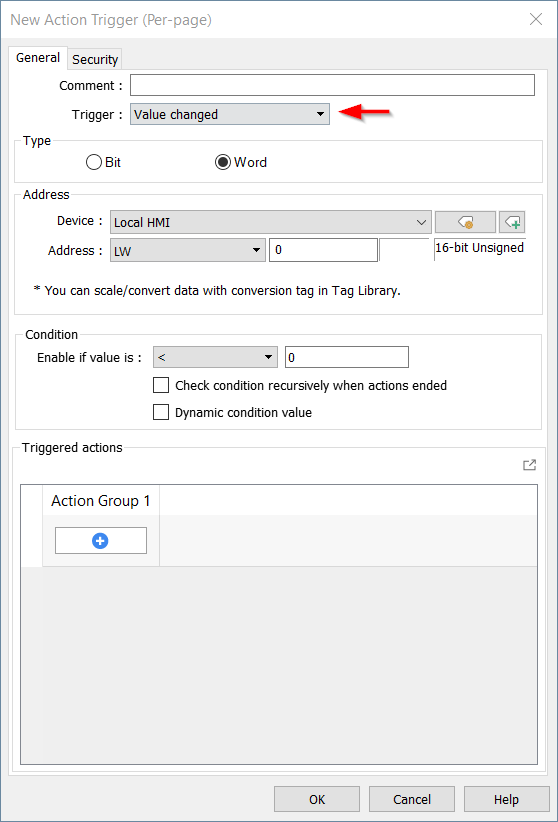
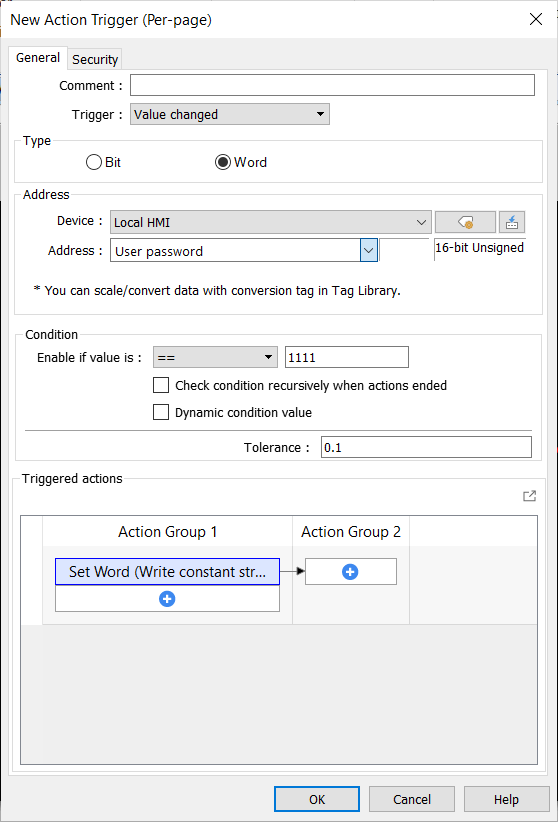
We will use “Action Trigger (Per-page)” objects to validate user “passwords”. Within the “New Action Trigger (Per-page)” object select “Value changed” from the “Mode” drop-down list:
-
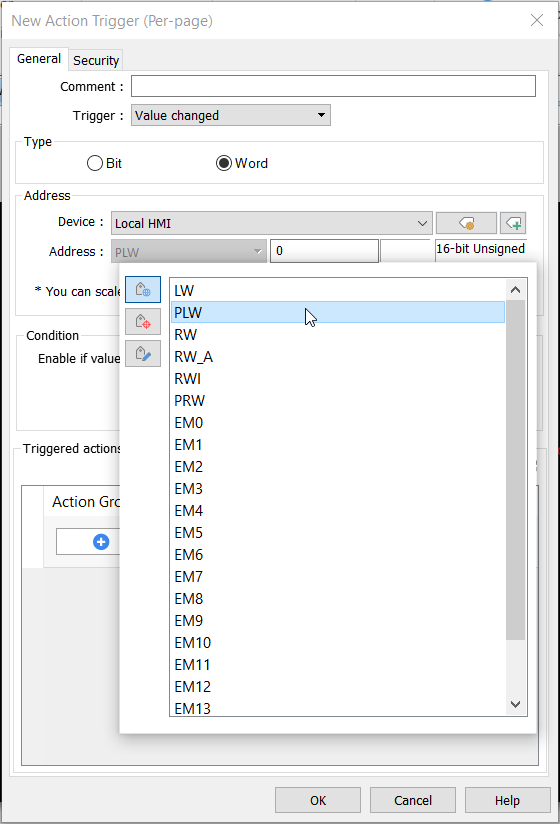
Within the “Address” drop-down list select PLW:
-
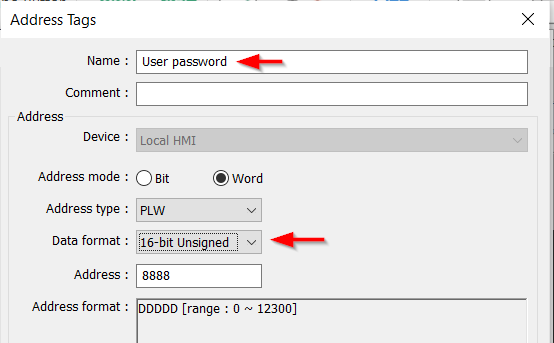
Specify an unused register and select the “add tag” button on the right-hand side:
Note: Later, we will use this address to enter user passwords.
-
Enter the desired tag name and click “Ok” to create this tag:
-
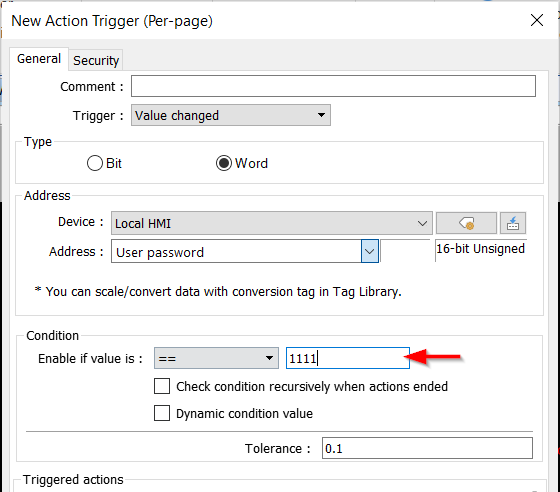
Use the “Condition” to define the password of the first user added in step 2:
-
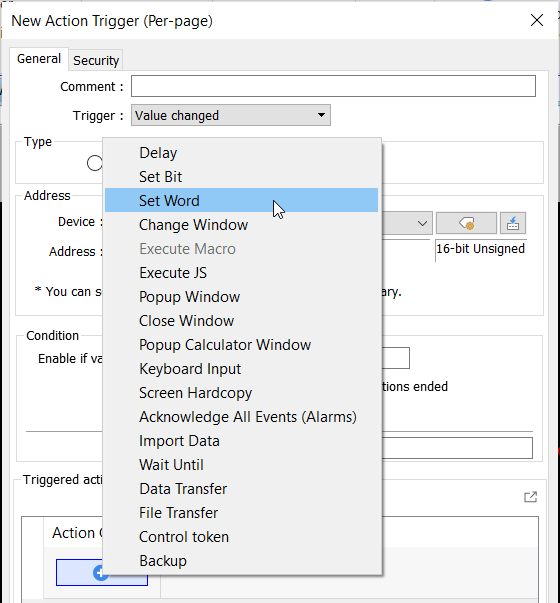
To login, we will use a “Set Word” action to enter both the username and password:
-
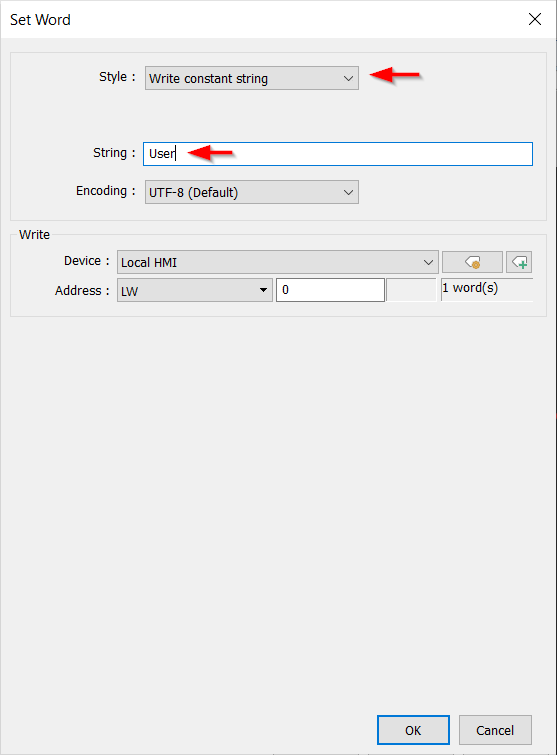
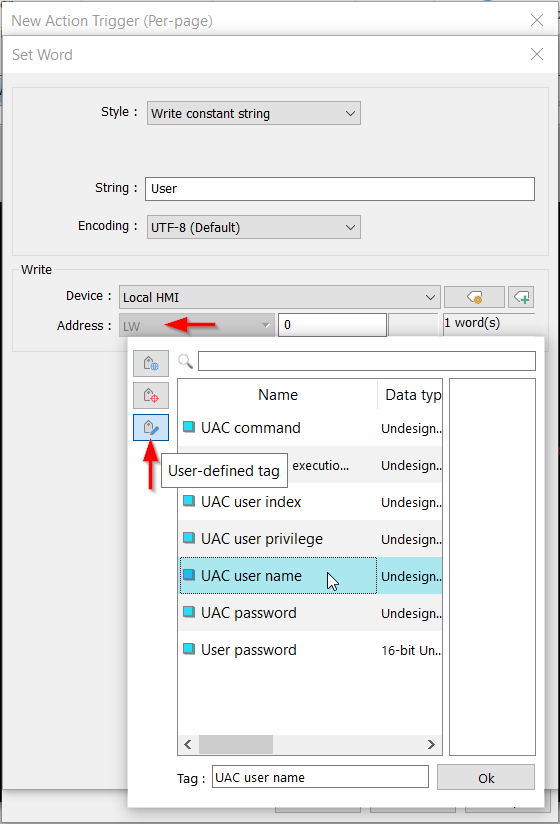
Select “Write constant string” within the “Style” drop-down list and enter the username that corresponds with the password defined within the “Condition”:
-
Within the “Address” drop-down list, select the “User-defined tag” tab and click “UAC user name”:
-
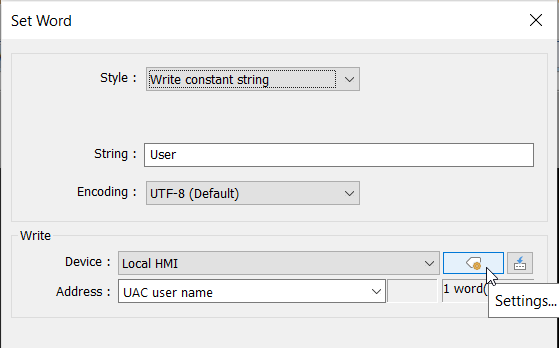
Select the “Settings” button to specify the character count:
-
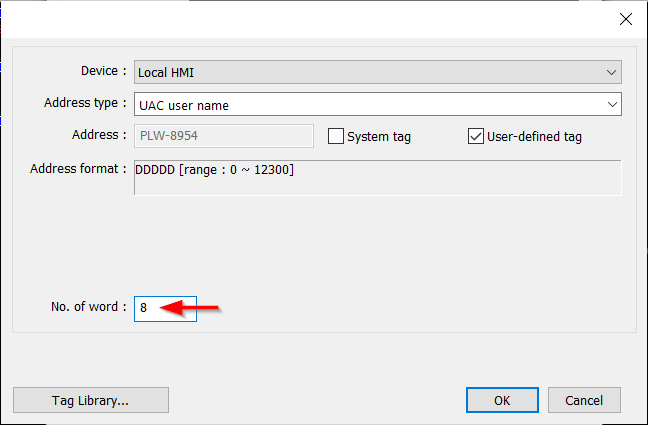
The “No. of word” for “UAC user name” and “UAC password” must be set to ‘8’ which allows a maximum of 16 characters to be set:
Note: If the “No. of word” is not set to 8, the login may be unsuccessful or behave unexpectedly.
-
Click “Ok” when finished:
-
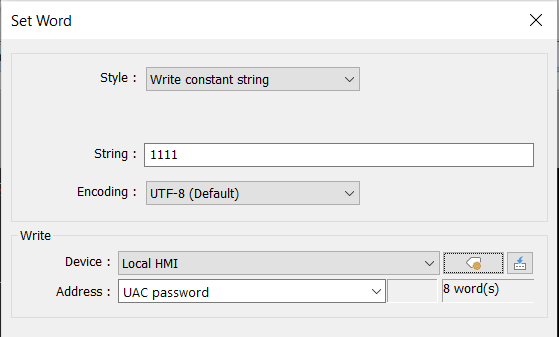
Repeat steps 11 - 16 to set the “UAC password” with the password defined in step 2:
Note: The “Set Word” in this example should appear as below.
-
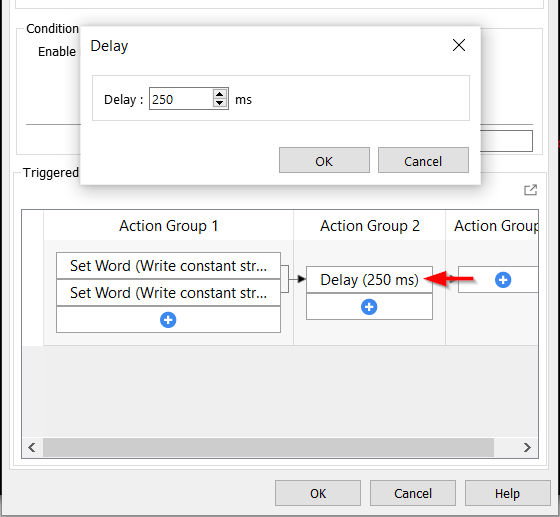
Within “Action Group 2” set a delay of 250ms:
-
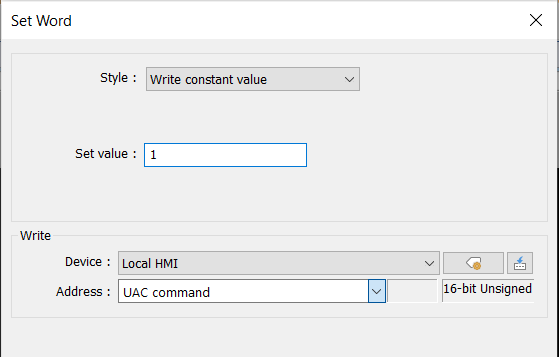
Within “Action Group 3” create a “Set Word” object to set the “login” command:
Note: A command value of ‘1’ will request login, whereas a command value of ‘3’ will request logout.
-
Click “Ok” when finished and place this object on the “common window” :
-
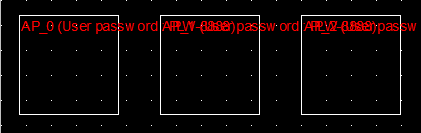
Copy this object and modify each parameter for each additional user:
Note: I’ve defined 3 users in step 2 and have created 3 "Action Trigger (Per-page) objects to login each user.


User logout
-
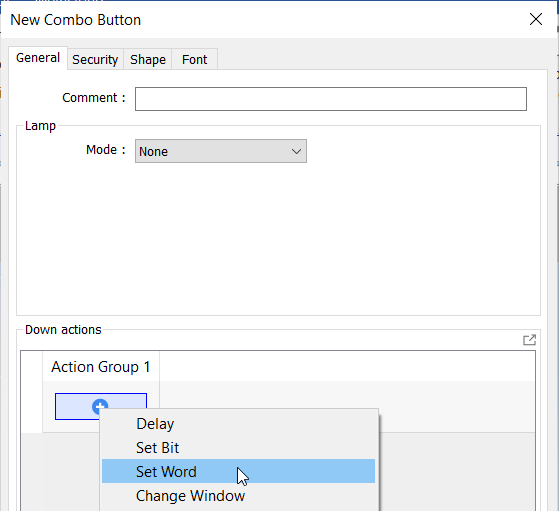
Within the “Object” tab, create a “Combo button”:
-
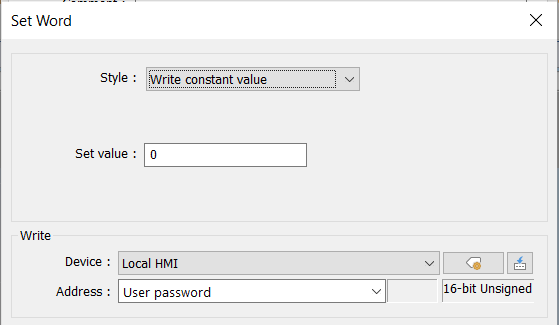
Within “Action Group 1” create a “Set Word” action:
-
Set a value of ‘0’ within the “User password” tag defined in step 5 of the “User login” section:
-
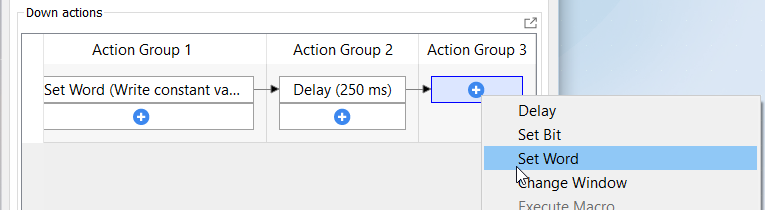
Within “Action Group 2” set a delay of 250ms:
-
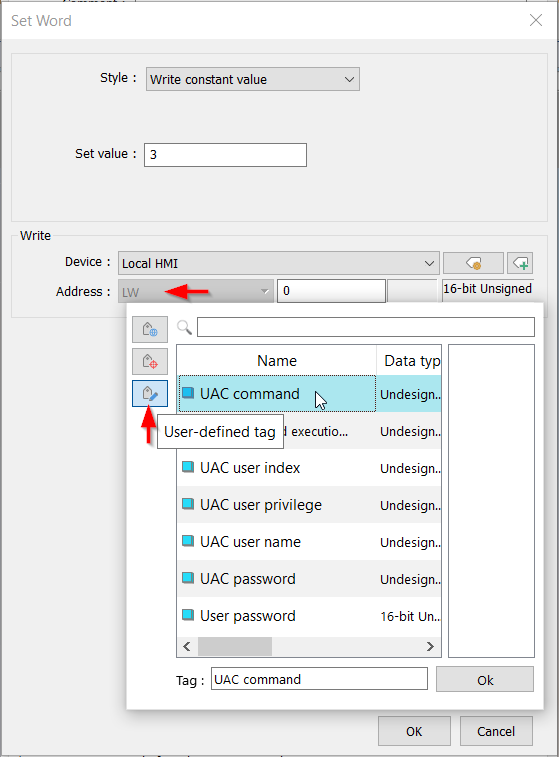
Within “Action Group 3” create a “Set Word” action:
-
Set a value of ‘3’ within the “UAC command” tag to logout the current user:
-
Click “Ok” and place this object:


Protect objects
-
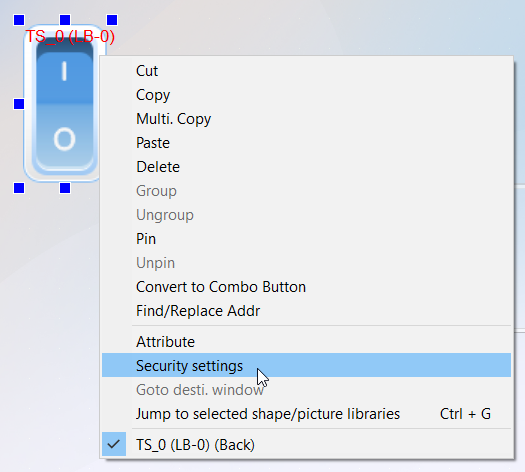
To secure an object, right-click an object and select “Security settings”:
-
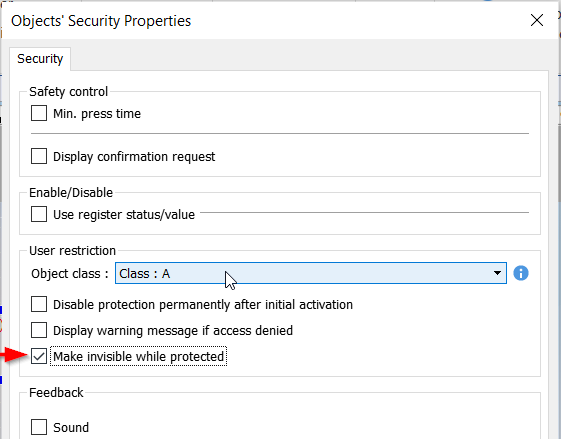
Select the “Object class” drop-down list and choose the desired security clearance and define the object’s secured behavior:
-
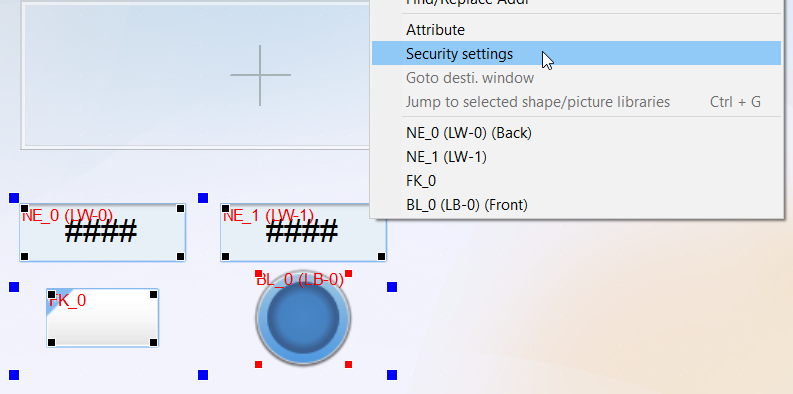
The “Security settings” option may be available when right clicking a group of select objects as well:
Password entry
-
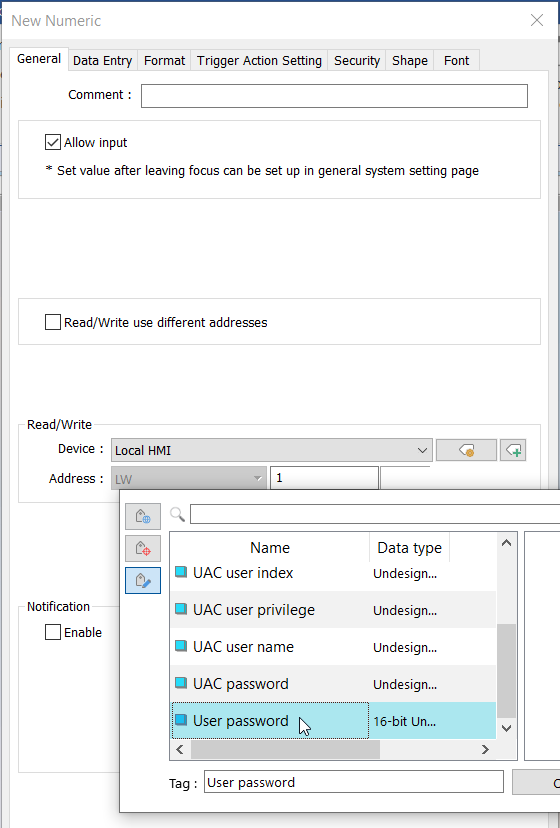
To create a password entry object, select the “Object” tab and click “Numeric”:
-
Ensure that the “Read/Write” address is set to the “User password” tag defined in step 5 of the “User login” section:
-
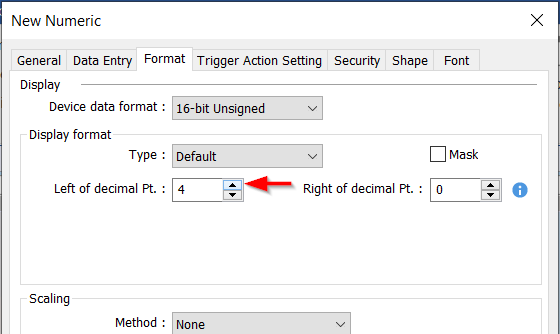
If the password is longer than 4 digits, increase the number of allowed digits within the “Format” tab:
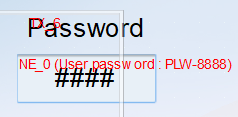
-
Click “Ok” to place this object: