Introduction:
Counterpart to the “Word Lamp”, a Multi-state switch allows numeric data to be written to a word address via user interaction. This object may be used to “Jog” through parameter settings or to increase or decrease the value within a word address over a predefined range.
Software Version:
EasyBuilder Pro 6.03.02.463+
Instructions:
-
The “Multi-State Switch” can be found in the “Object” tab within the “Button/Switch” section:

-
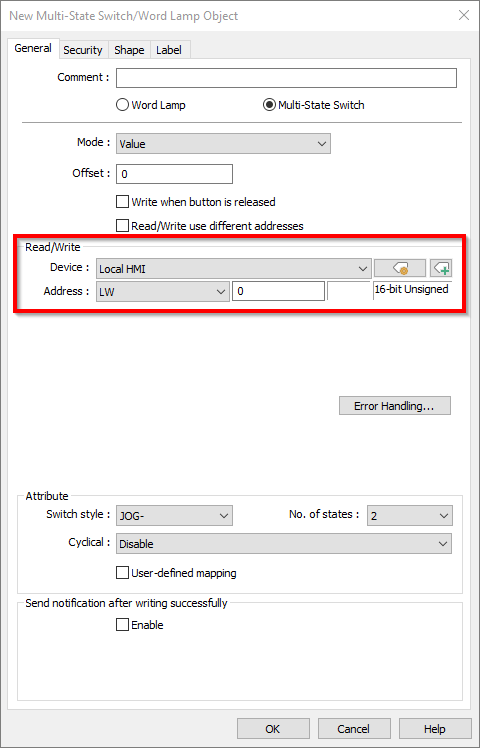
The “Mode” drop-down list will allow you to configure the “Multi-state Switch” to change states based on “Value” or “LSB”. The “Value” option assigns each state to an integer, such that state 0 will write a value of 0 and state 1 will write a value of 1 and so on. “LSB” stands for “least significant bit”. This option essentially turns on each bit within the word in sequence whilst turning off preceding bits. With LSB selected, the value written depends on the bit index, such that state 3 will write a value of 4 and state 4 will write a value of 8 and so on:
-
In the “Read/Write” section, you can define the address that this object will read from and write to:
-
The “Error Handling…” box will allow you to define how this object will react if the value of the “Read/Write” address does not match a defined state:
-
Within the “Attribute” section (A) “Switch style” may be set to either “JOG-“ or “JOG+”. When “JOG+” is selected, each time the button is pressed it will increment the state by one. The (B) “No. of state” allows you to define the number of states represented by this object. When (C) “Cyclical” is enabled the value of the write address will return to 0 when the user clicks this object while the last state is displayed. Lastly (D) “User-defined mapping” allows you to map each state to a specific value:
-
Within the “Shape” tab of the object, select a picture or shape for each state. To navigate to each state, select the desired state from the drop-down menu or click on the corresponding numbered box:
-
Within the “Label” tab, the same concepts are used as you can add a label to each state. The label is written within the “Content” box and modified within the “Attribute” section. You can navigate to each label with the arrows or corresponding numbered box: