Introduction:
In this post, we demonstrate how to name the “header” or “Description” of each data point within a “Data Sampling” object. The header is used within “Trend Display” objects and to label data columns when a backup file is exported to an external drive as a .csv.
Software Version:
EasyBuilder Pro 6.03.02.463+
Demo:
v1.0 ![]()
*requires 6.09.01.322+
Related Tutorials:
How to customize a “Trend Display” object
How to hide a Trend display’s settings button
How to export or import a recipe as a .csv from a USB
Video - EasyBuilder Pro Data Sampling - Weintek USA, Chapter 8
Video - How to sample data and display a trend within your EasyBuilder Pro project
Video - How to backup historical data as a csv within EasyBuilder Pro
Instructions:
Modify data point headers
When backing up historical data to a .csv file, headers within the .csv file will be shown as the data point’s data format by default. To add a custom name for the device, which will be displayed in the .csv file’s headers, follow the instructions below:
| .csv file headers with unnamed data points: | .csv file headers with named data points: | |
 |
 |
-
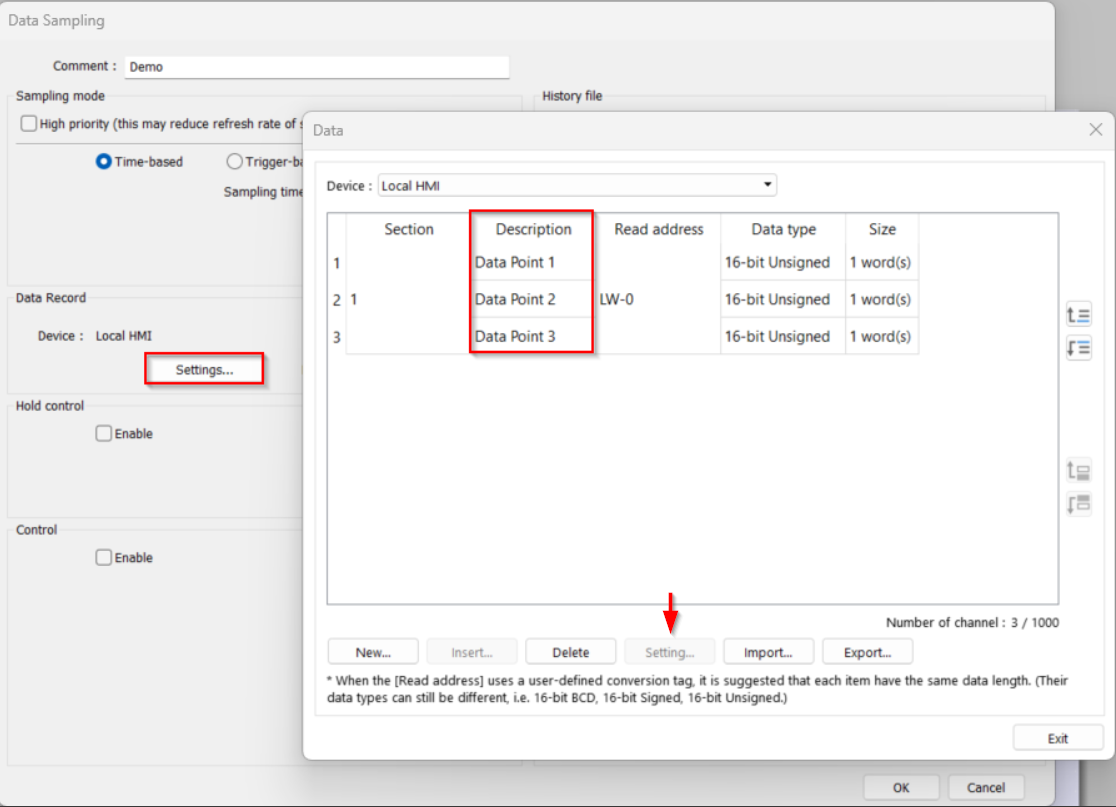
Within a “Data Sampling” object, select “Settings…”, here, the “Description” for data points can be configured. Select the data point that you would like to give a description and click the “Settings…” button below:
-
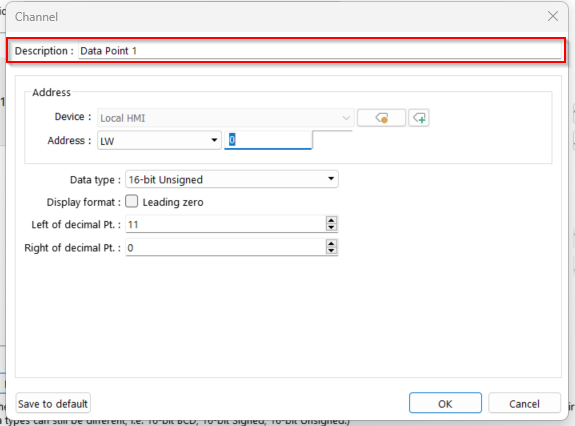
The data point’s description and in-turn the .csv “header”, can be modified within the “Description” field:
Generate a .csv Backup
-
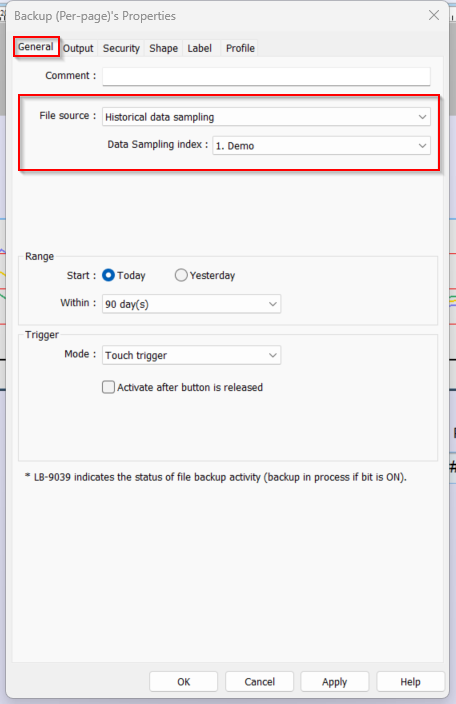
Within the “Data/History” tab, select “Backup (Per-page)”:
-
Within the “General” tab, select "Historical data sampling’ from the “File source” drop-down list and the name or “Comment” of your data sampling object from the “Data Sampling index” drop-down list:
-
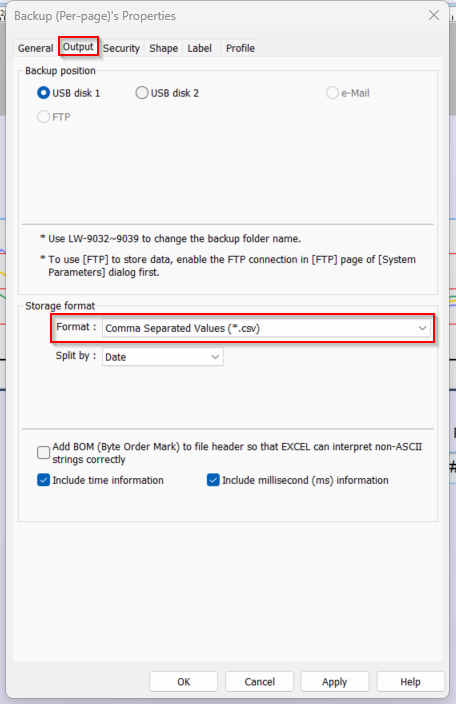
Within the “Output” tab, select “Comma Separated Values (*.csv)” from the “Format” drop-down list:
-
When finished, place the backup object within your project. When this button is pressed, historical data will be exported as a .csv to the USB drive inserted in your HMI.
Note: The USB drive must be formatted to FAT32.